Overview

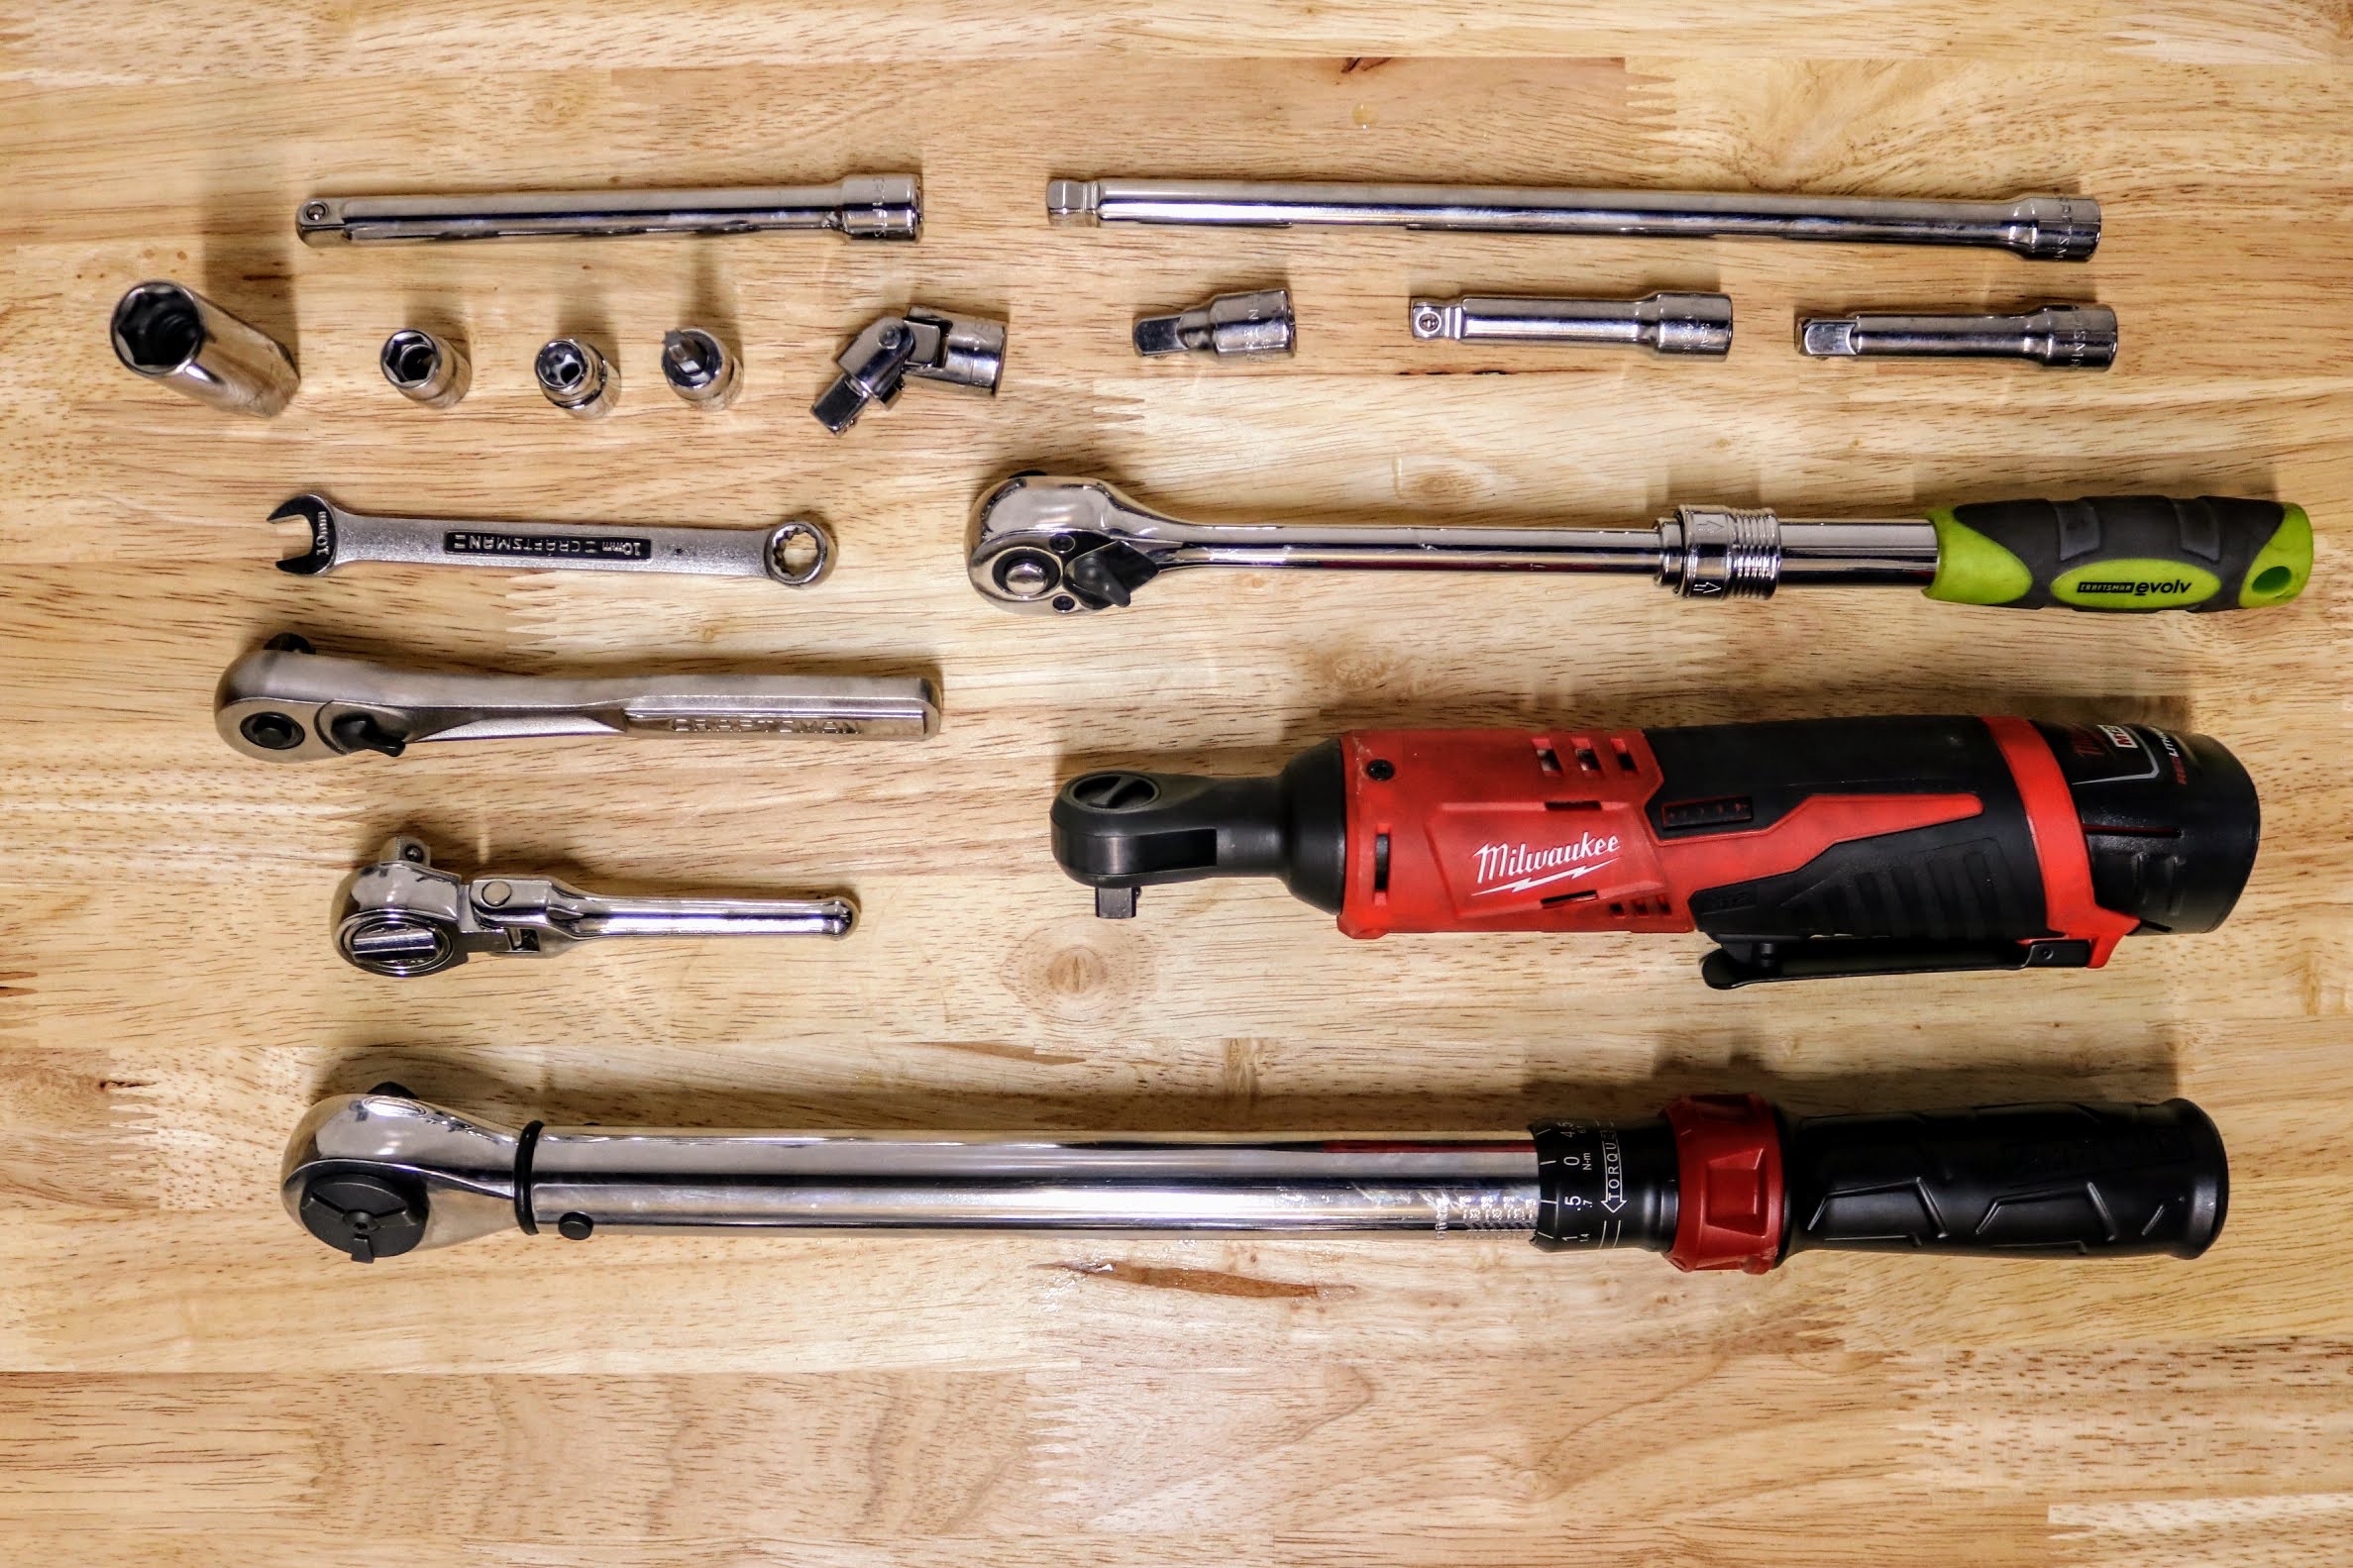
This guide goes through the steps we used to replace all six spark plugs on a Porsche 911 (991.1). Porsche states to replace spark plugs every 4 years, or every 40,000 miles (60,000 kms). Change the spark plugs on Porsche's flat six engine is not any different than any other engine. The difficulty is gaining access to all of the spark plugs. It took plenty of patience and finesse to work in such a tight area. With some creativity, plenty of extensions, universal joint, and various types of 3/8" ratchets, such as this 3/8" drive extendable ratchet, we were able to get the job done without completely ruining our knuckles. When you were at the hardware store and saw that weird looking ratchet or extension, this is the type of job when those tools earn their keep ten fold!

One final note, since this maintenance is usually done at the same time as the engine oil change, be sure to change the spark plugs FIRST, before the engine is hot.


Parts Used

Part Quantity Part No. Links to ones we used
Bosch Spark Plugs (set of 6) 1 Bosch FGR5NQE Amazon


Tools Used

Tool Link
Quick Jack BL-5000XL portable lift Amazon
Jack Stands Amazon
3/8" Drive Ratchet Amazon
3/8" Drive Torque Wrench Amazon
3/8" Drive Extension Amazon
3/8" Drive Universal Joint Amazon
E10 (External Torx) Socket Amazon
T30 (Torx) Socket Amazon
16 mm 6-Point Spark Plug Socket Amazon
10 mm 6-Point Socket, 3/8" Drive Amazon
10 mm Combination Wrench Amazon
Craftsman 3/8" Drive Extenable Ratchet 1 Amazon
Milwaukee 3/8" Powered Ratchet 1,2 Amazon
1/2" Drive Ratchet 3 Amazon
1/2" Drive Torque Wrench 3 Amazon
19 mm 6-Point Socket, 3/8" Drive 3 Amazon
Porsche Wheel Guide 3 Amazon
DeWALT 1/2" Impact Wrench 1,3 Amazon


Tools used for a Porsche 911 (991.1) oil change

1 Not necessary to complete this job, but sure makes it a lot easier!

2 Use only for removing bolts/nuts and

3 Used for wheel removal (not pictured)

Procedure Used


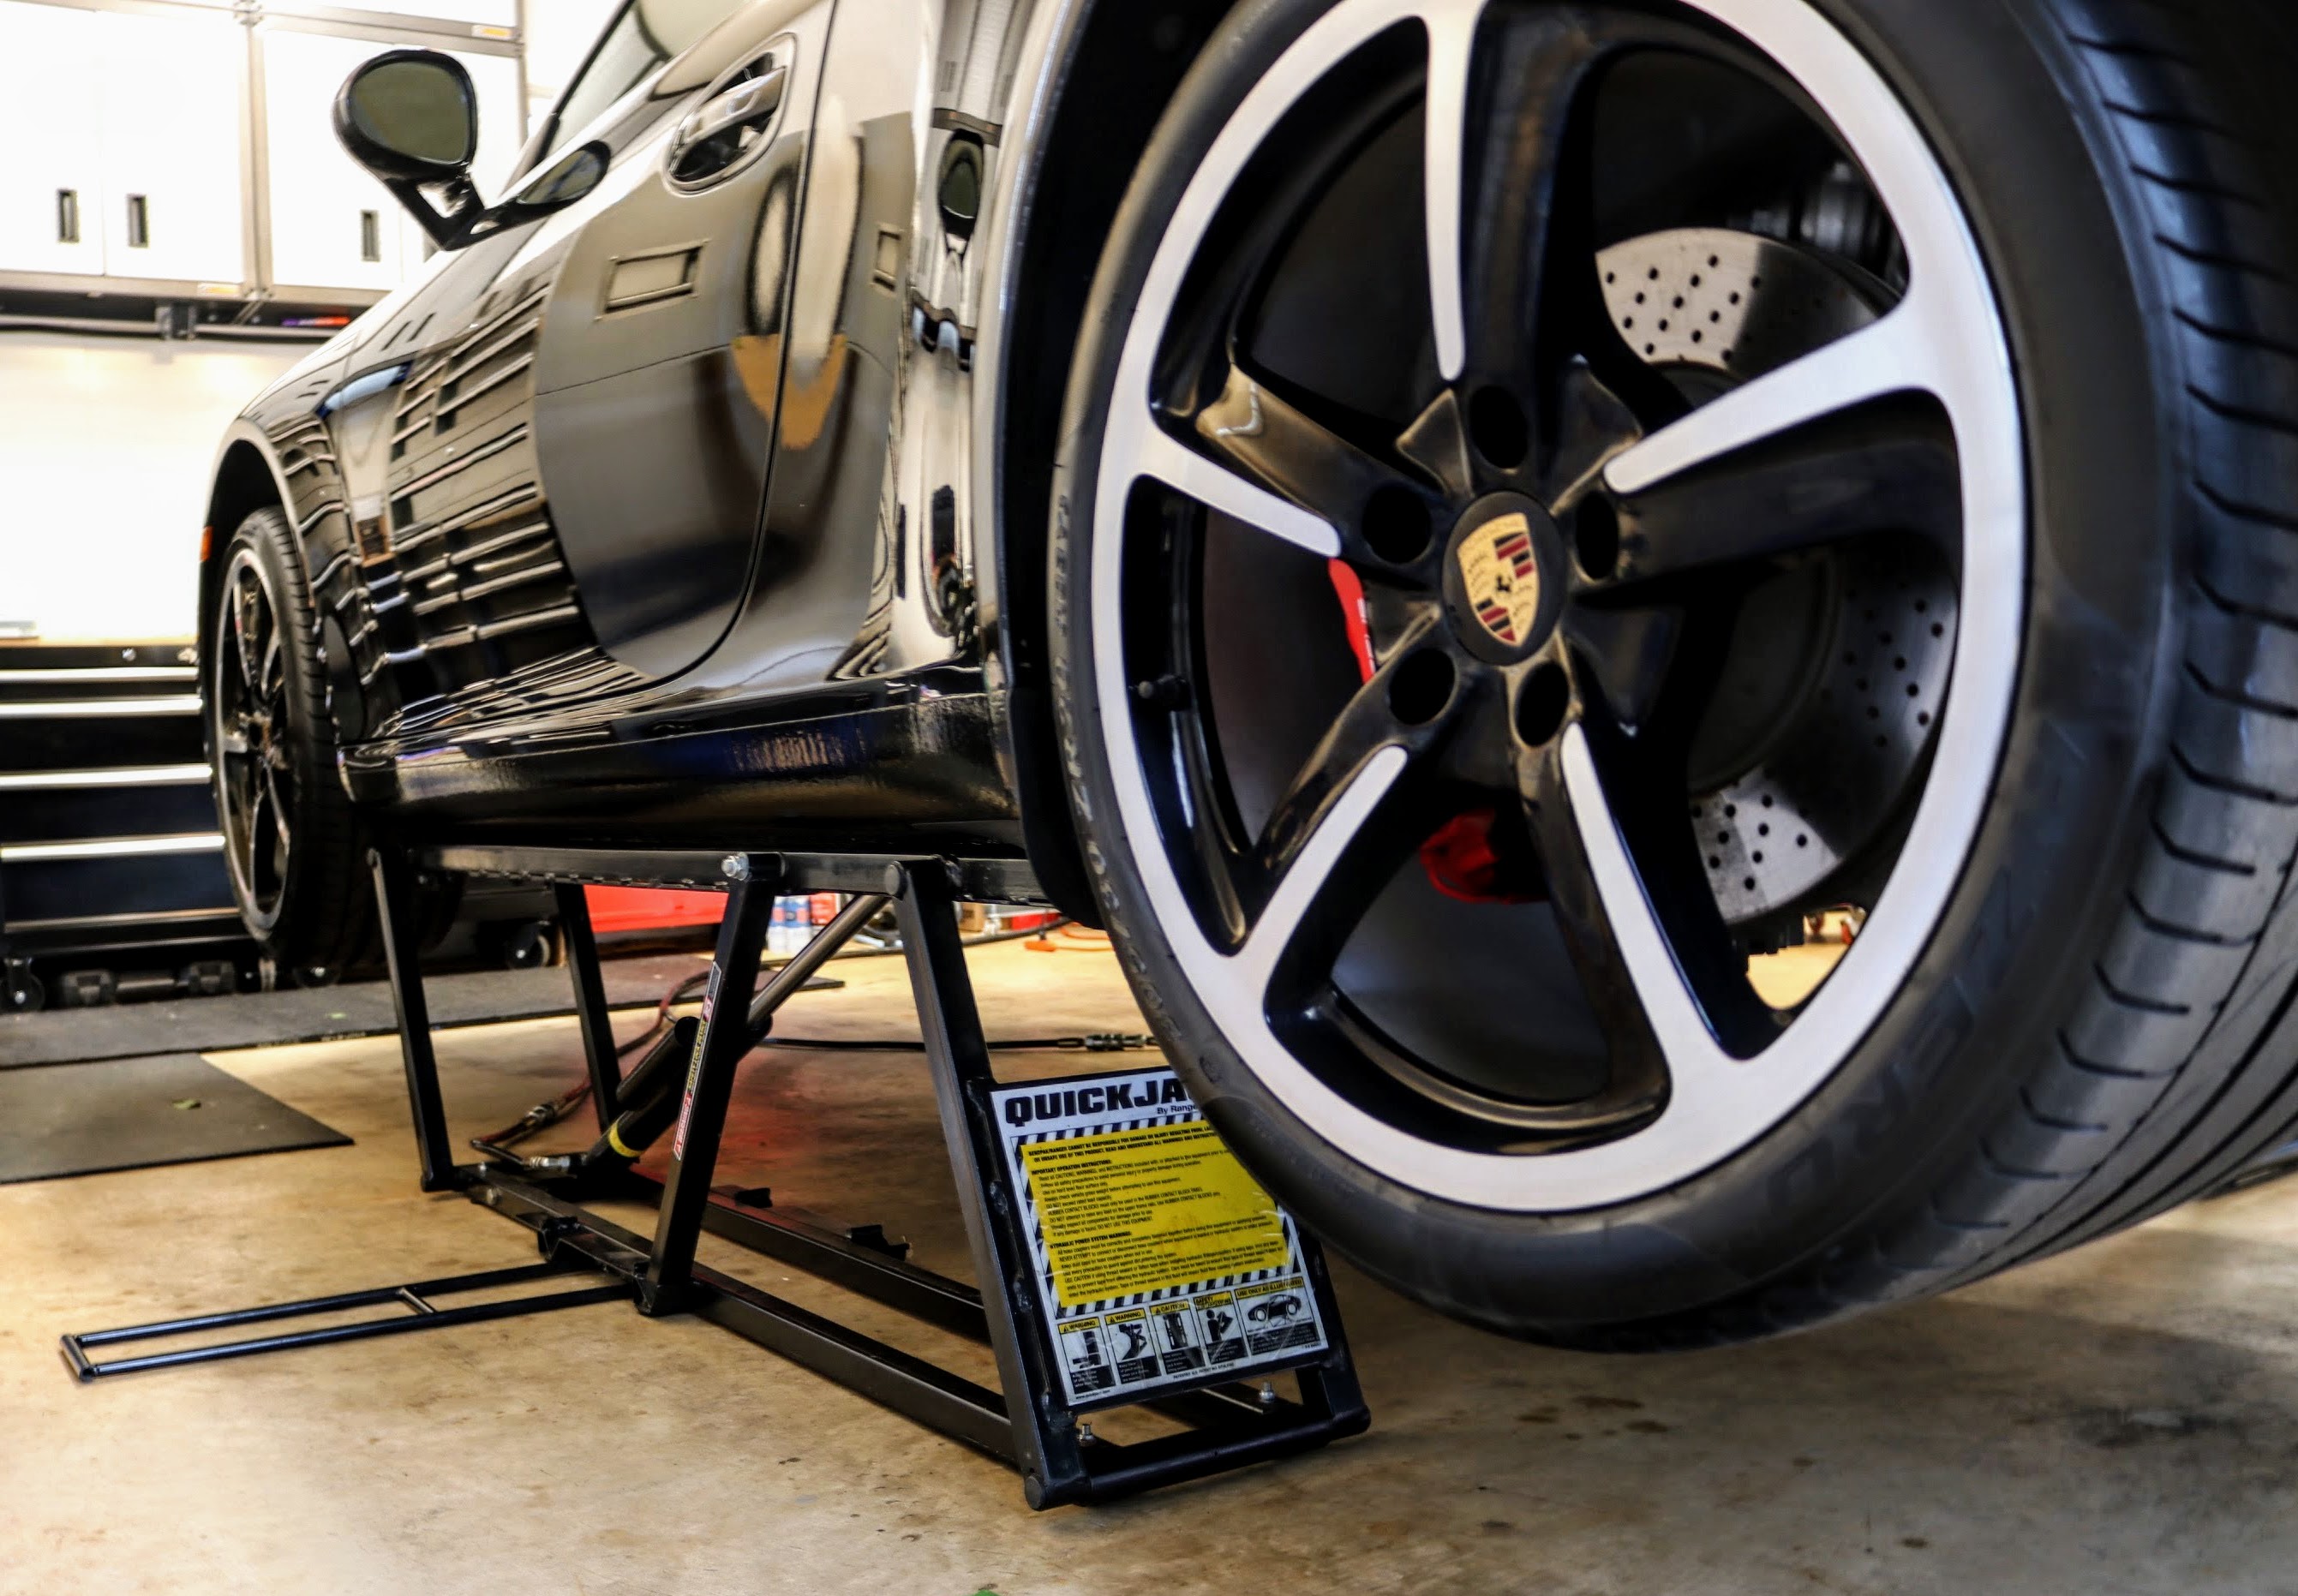
1. We lifted the car off the ground - enough for us to easily work inside the rear wheel wells. We used a QuickJack along with a few jack stands to be on the safe side while under the car. Porsche 911 (991) on the QuickJack BL-5000XL portable lift
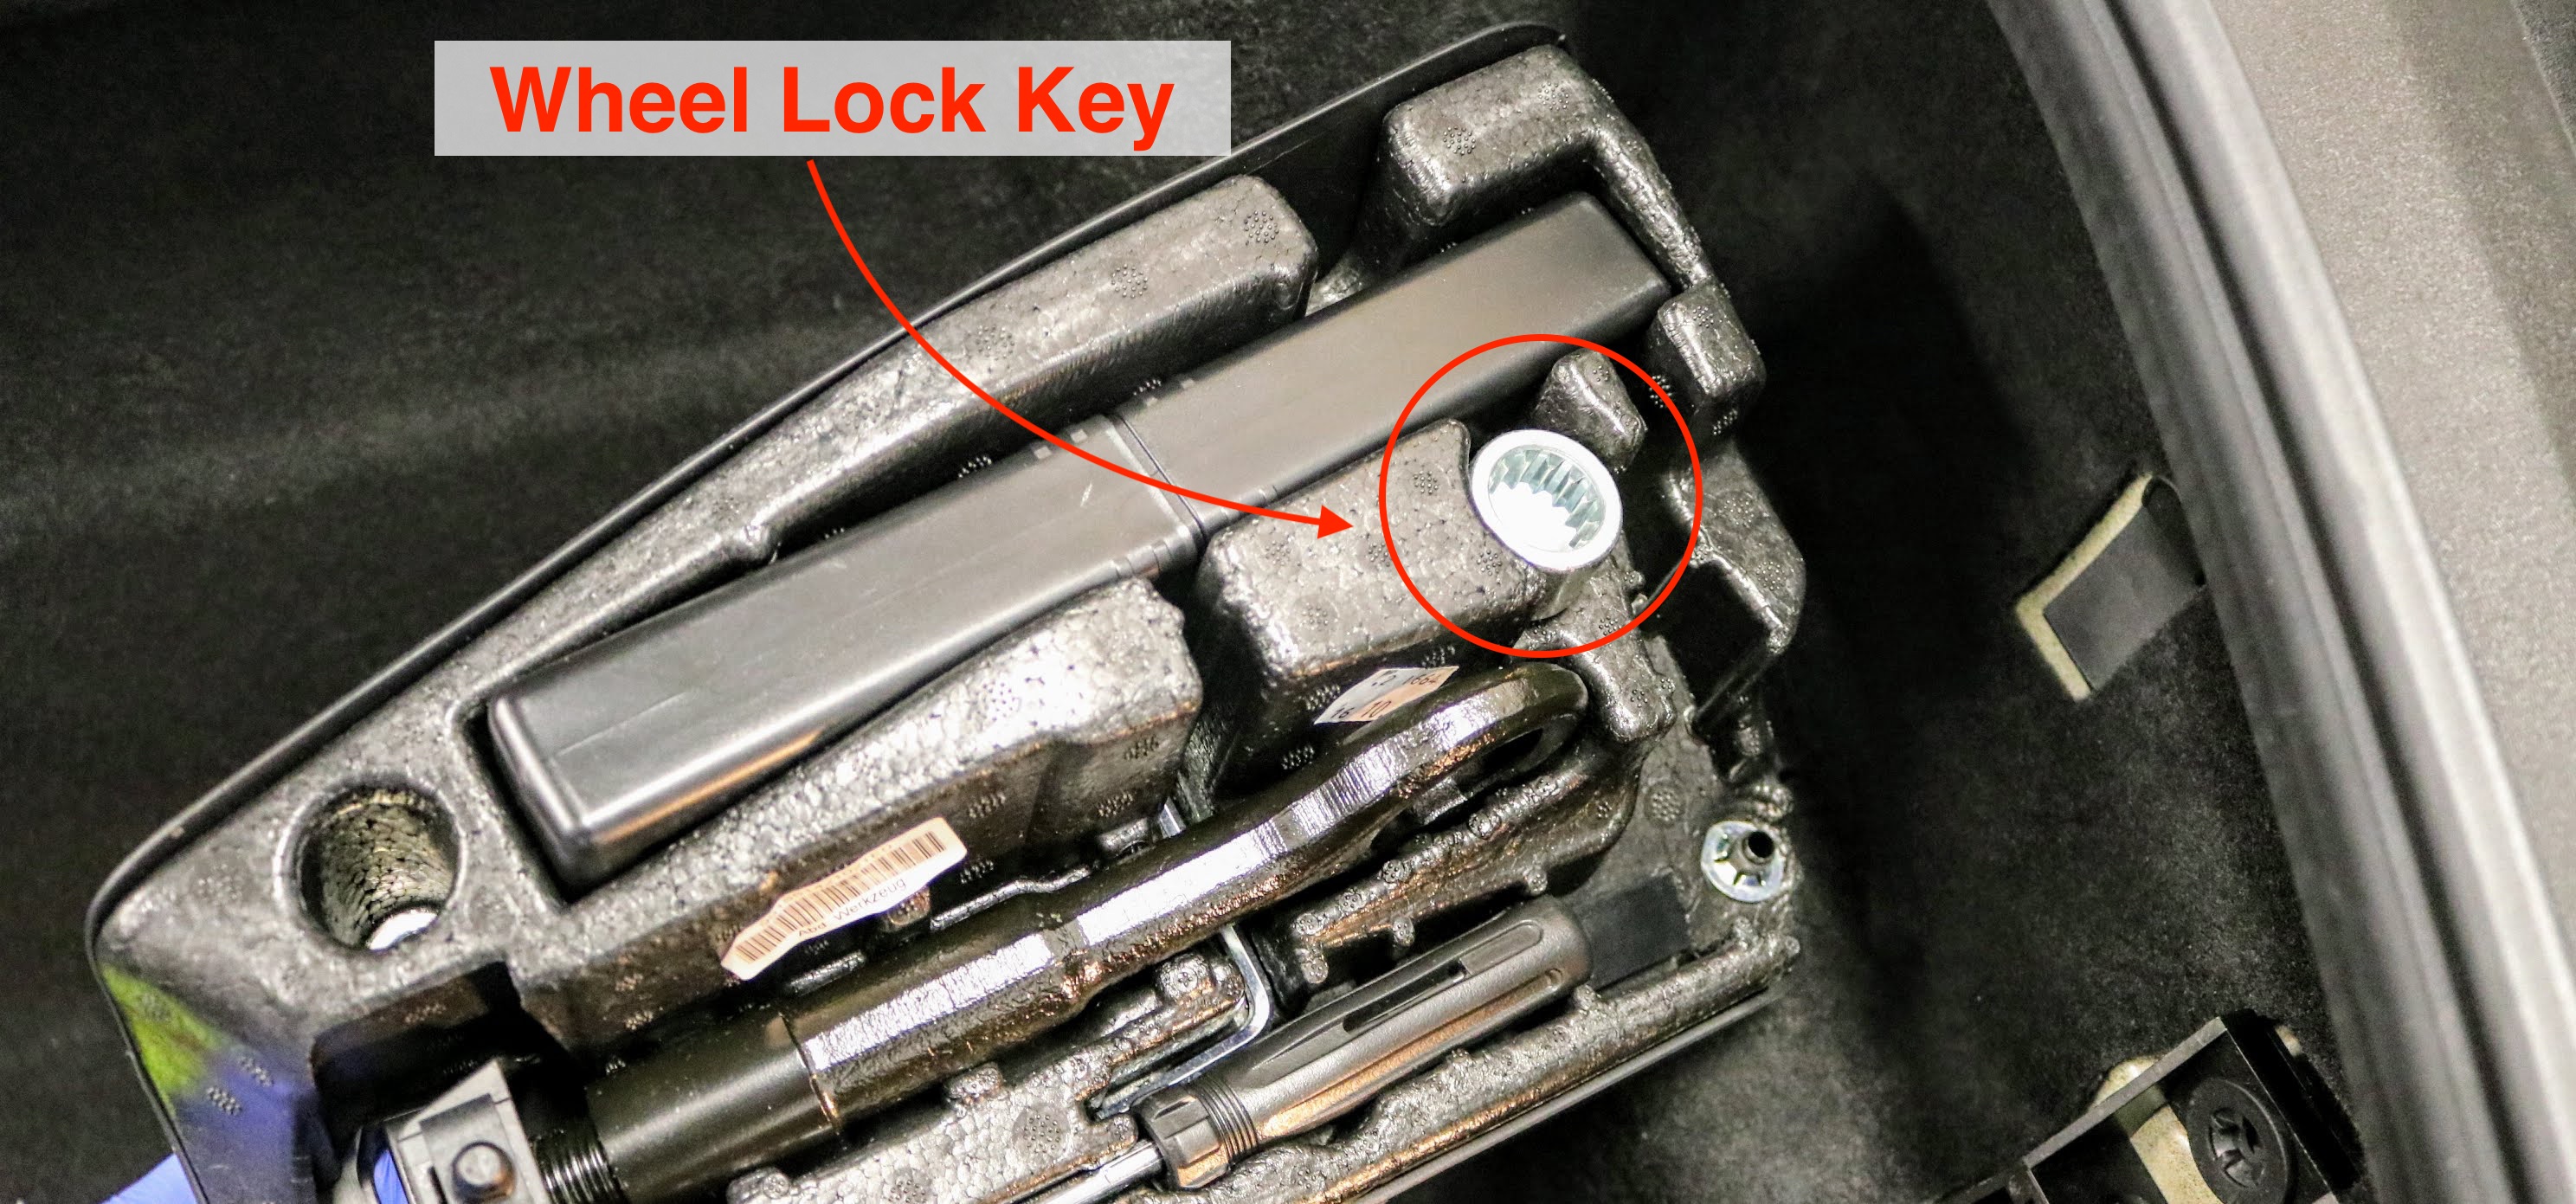
2. Next, we pulled out the wheel lock tool out of the front trunk. Porsche 911 (991)
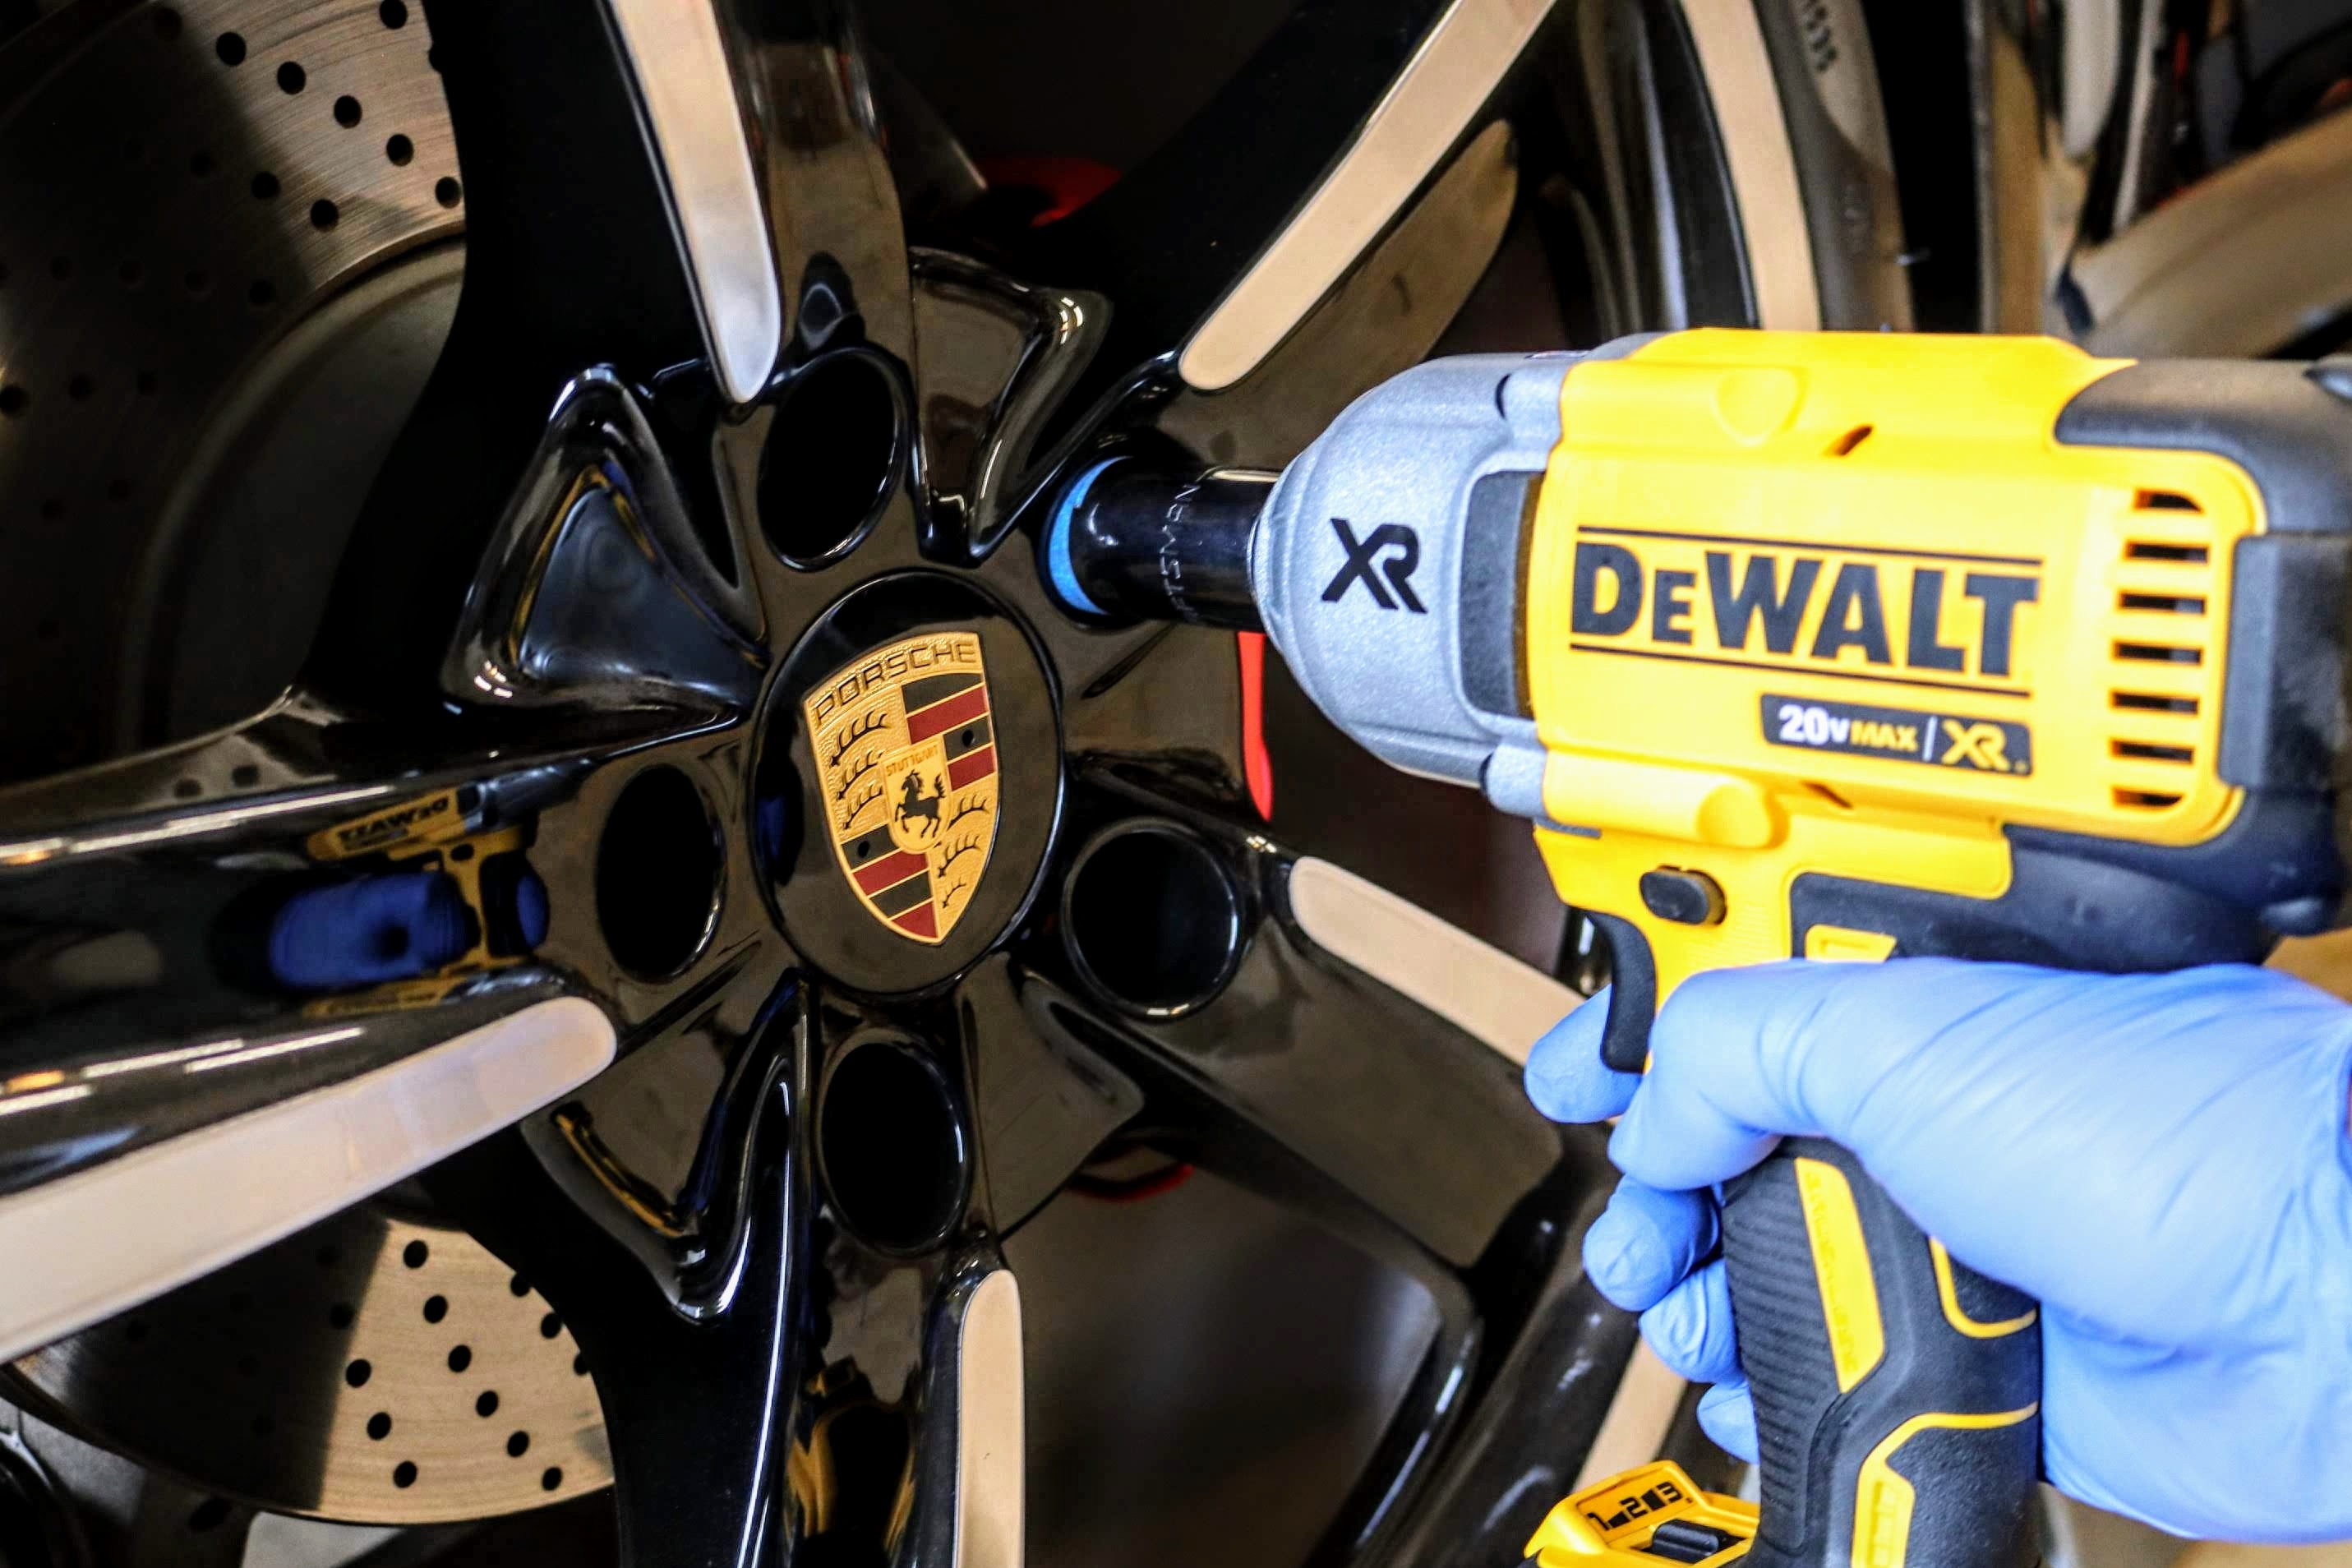
3. Using the 19 mm socket (the wheel lock tool on the corresponding bolt) and DeWALT 1/2" impact wrench we removed the wheel lug bolts on the rear wheel. TIP: we put a few wraps of blue painters tape around the outside of the 19 mm socket to prevent scratching the wheel. Porsche 911 (991)
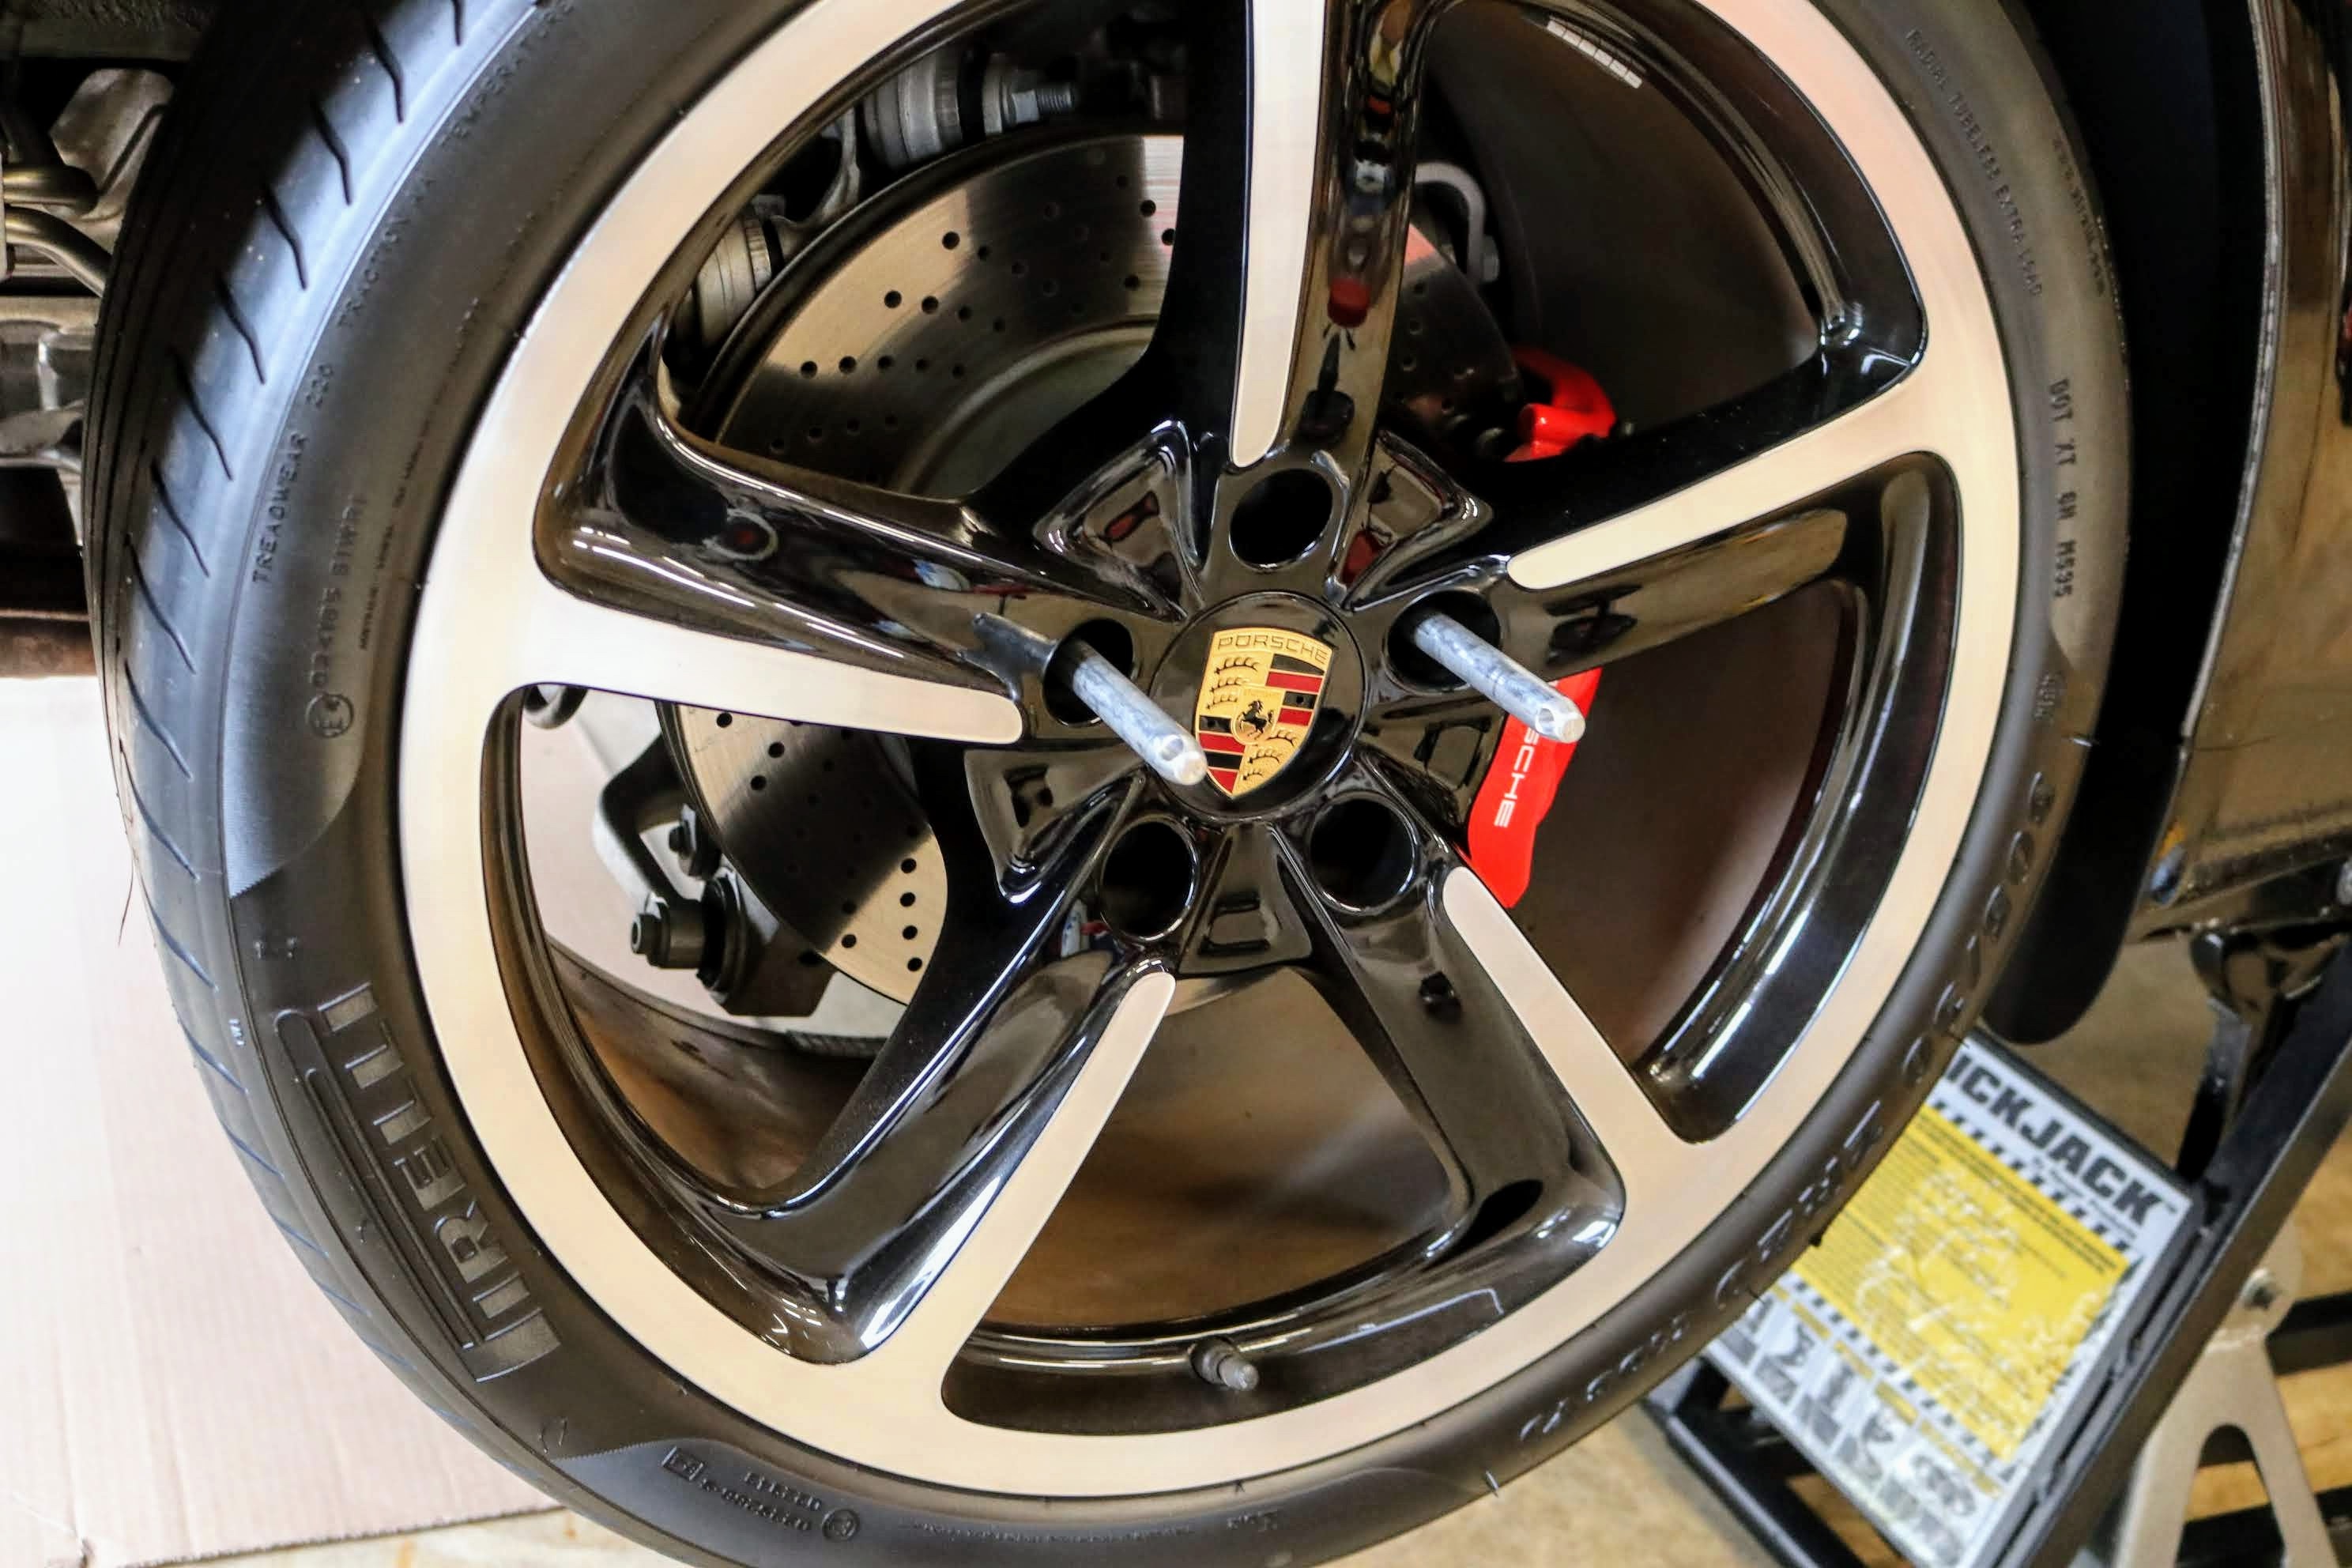
4. With the wheel bolts removed, we removed the rear wheel while using the Porsche wheel guides to prevent ruining the wheels, brake calipers, and/or brake rotors. Porsche 911 (991)
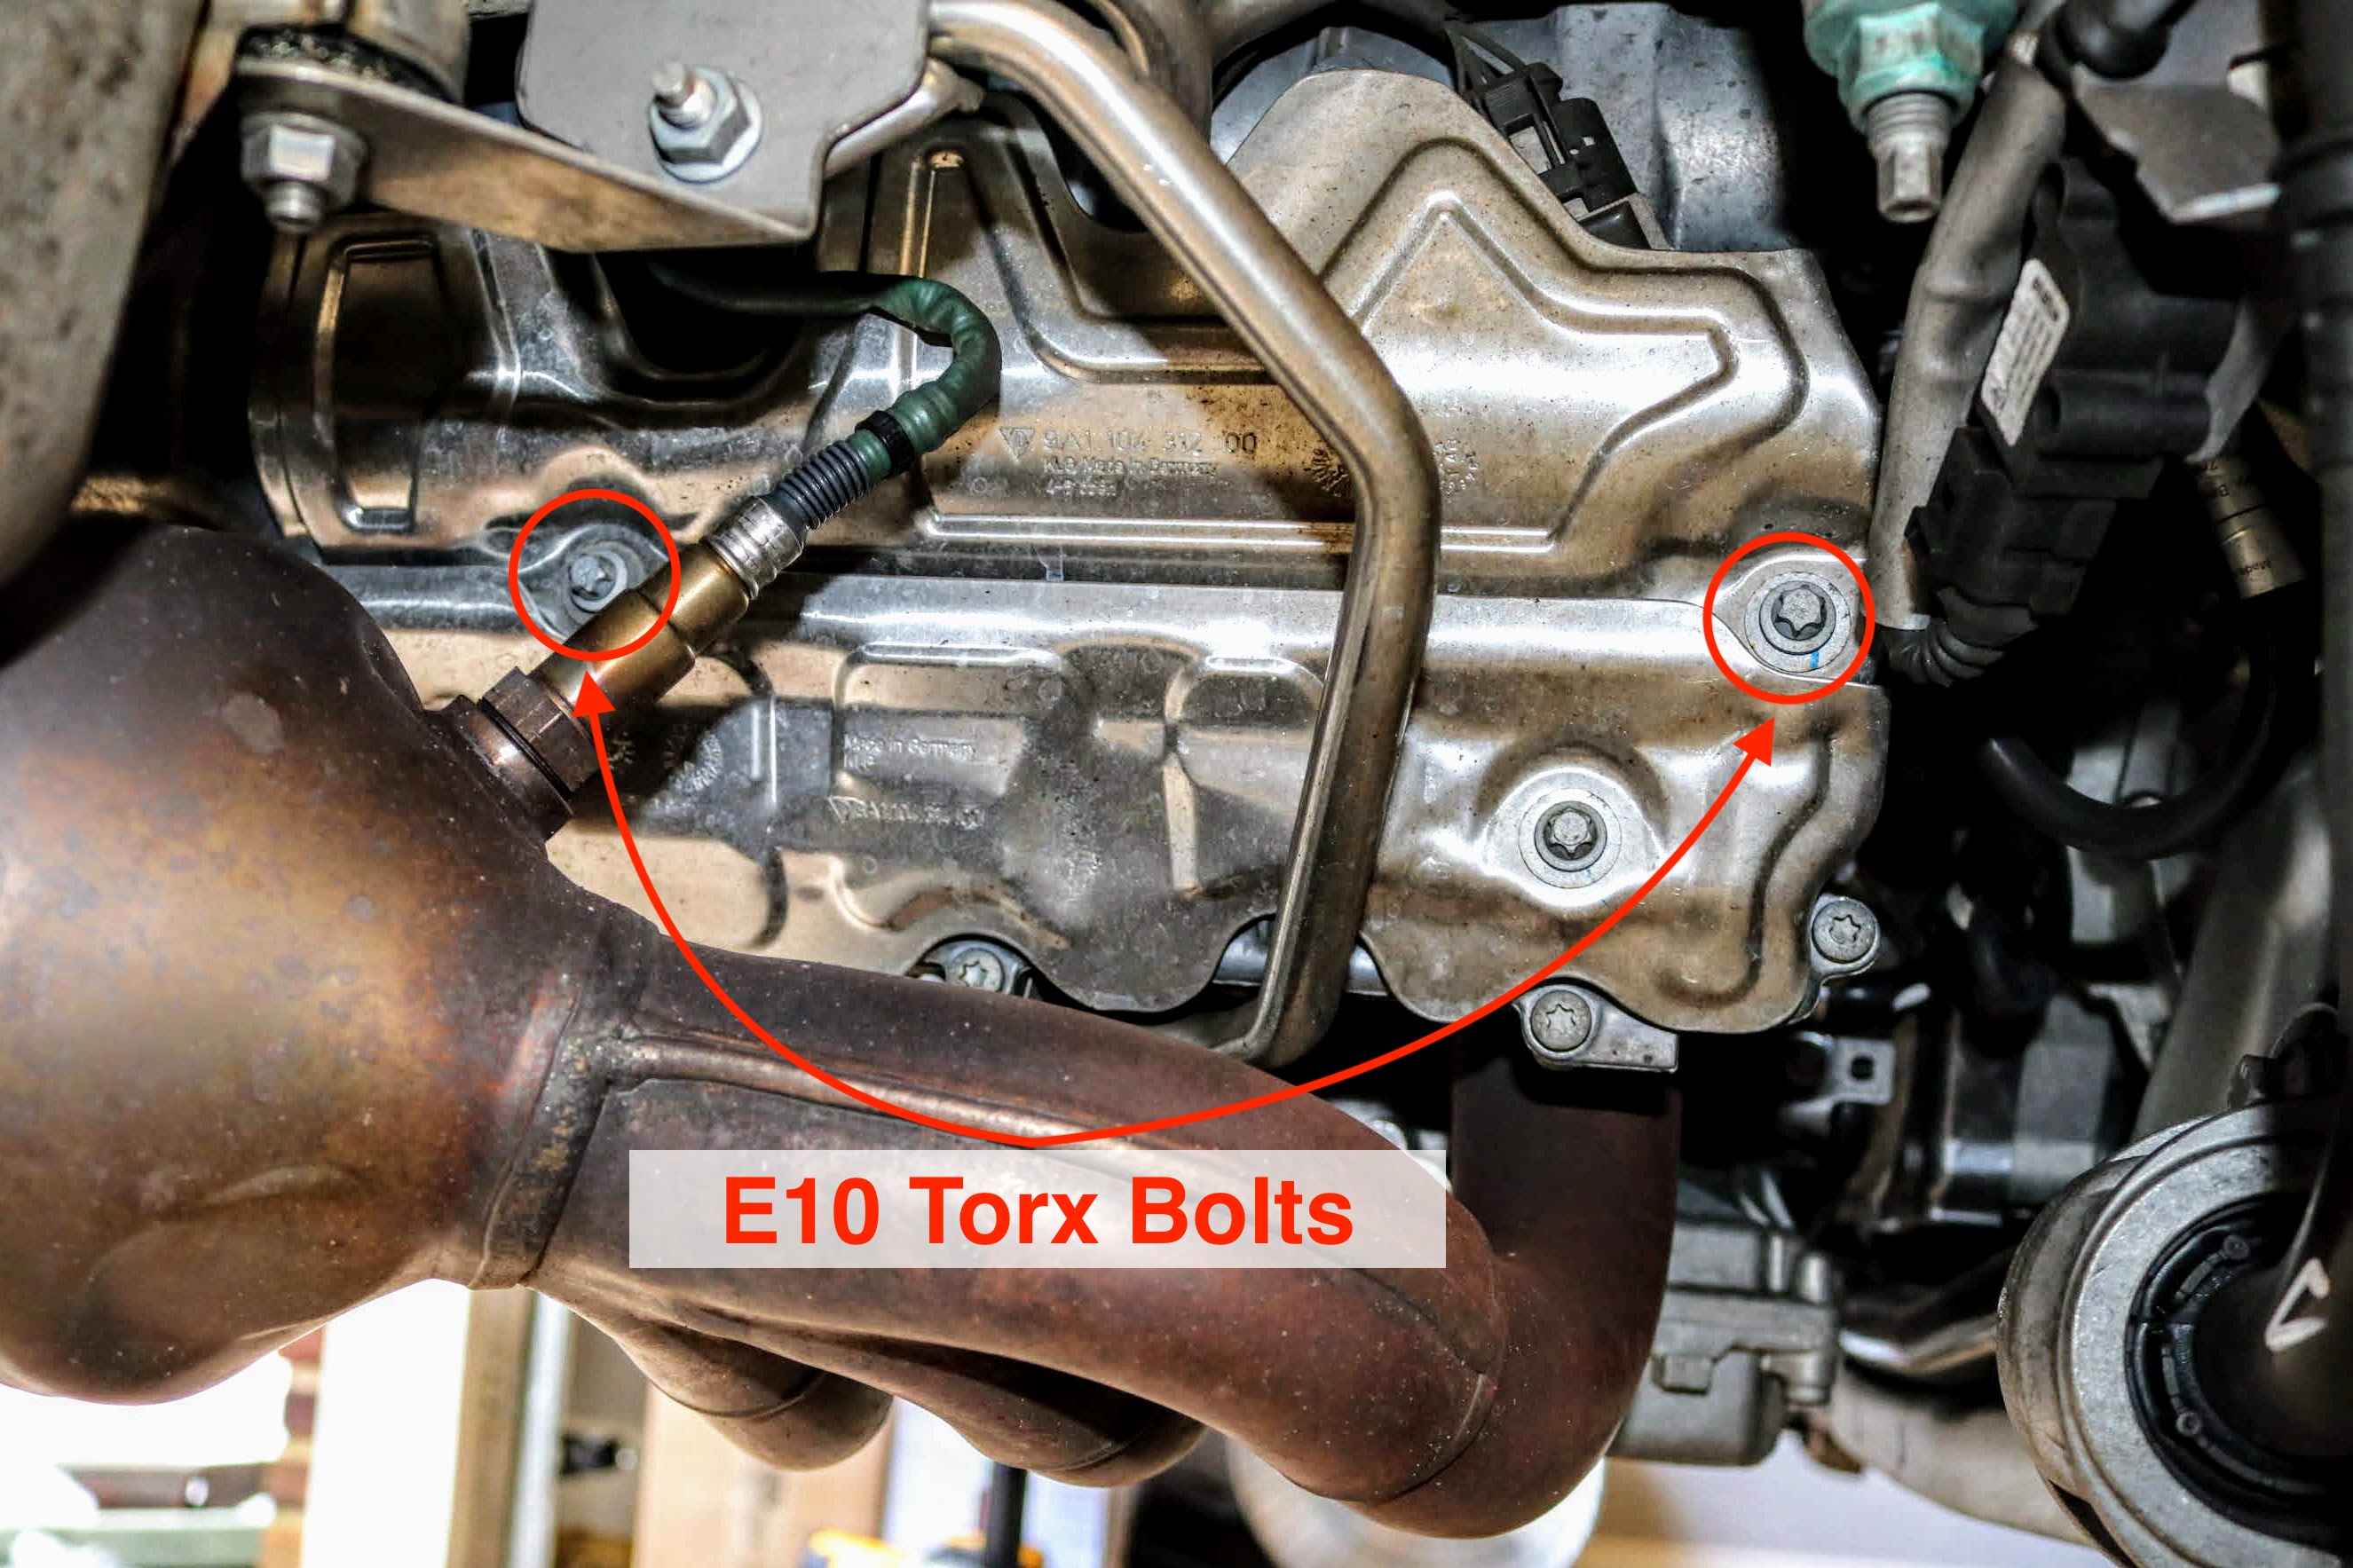
5. Moving inside the rear wheel well towards the side of the engine, we removed the two E10 torx bolts to free the heat shield. Porsche 911 (991)
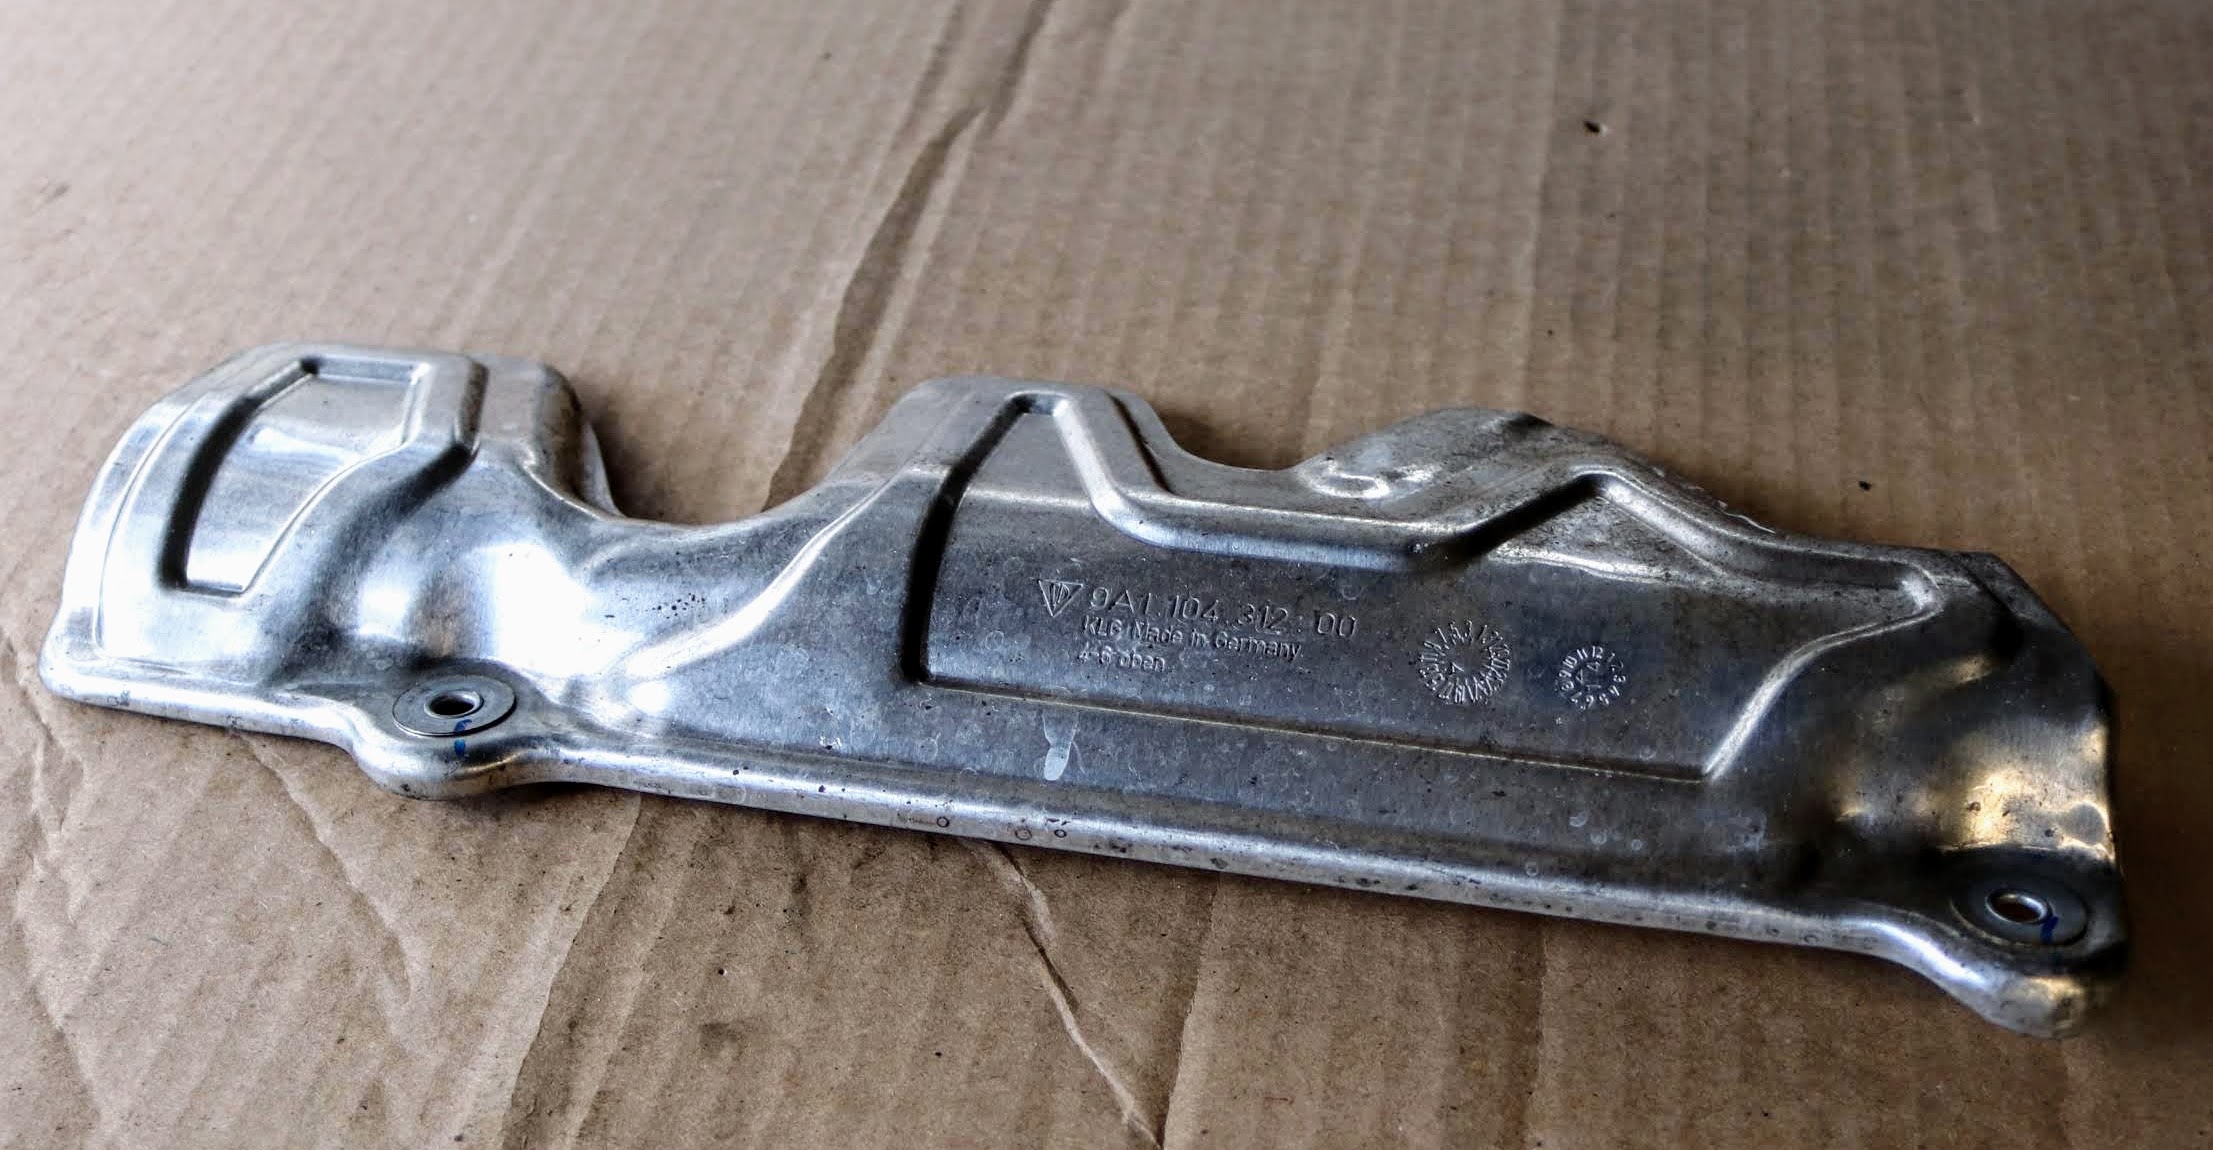
6. Next, we completely removed the heat shield. It took a decent amount of finesse to get it out of the tight space. Porsche 911 (991)
7. We repeated Step 2. through Step 6. for each side of the car.
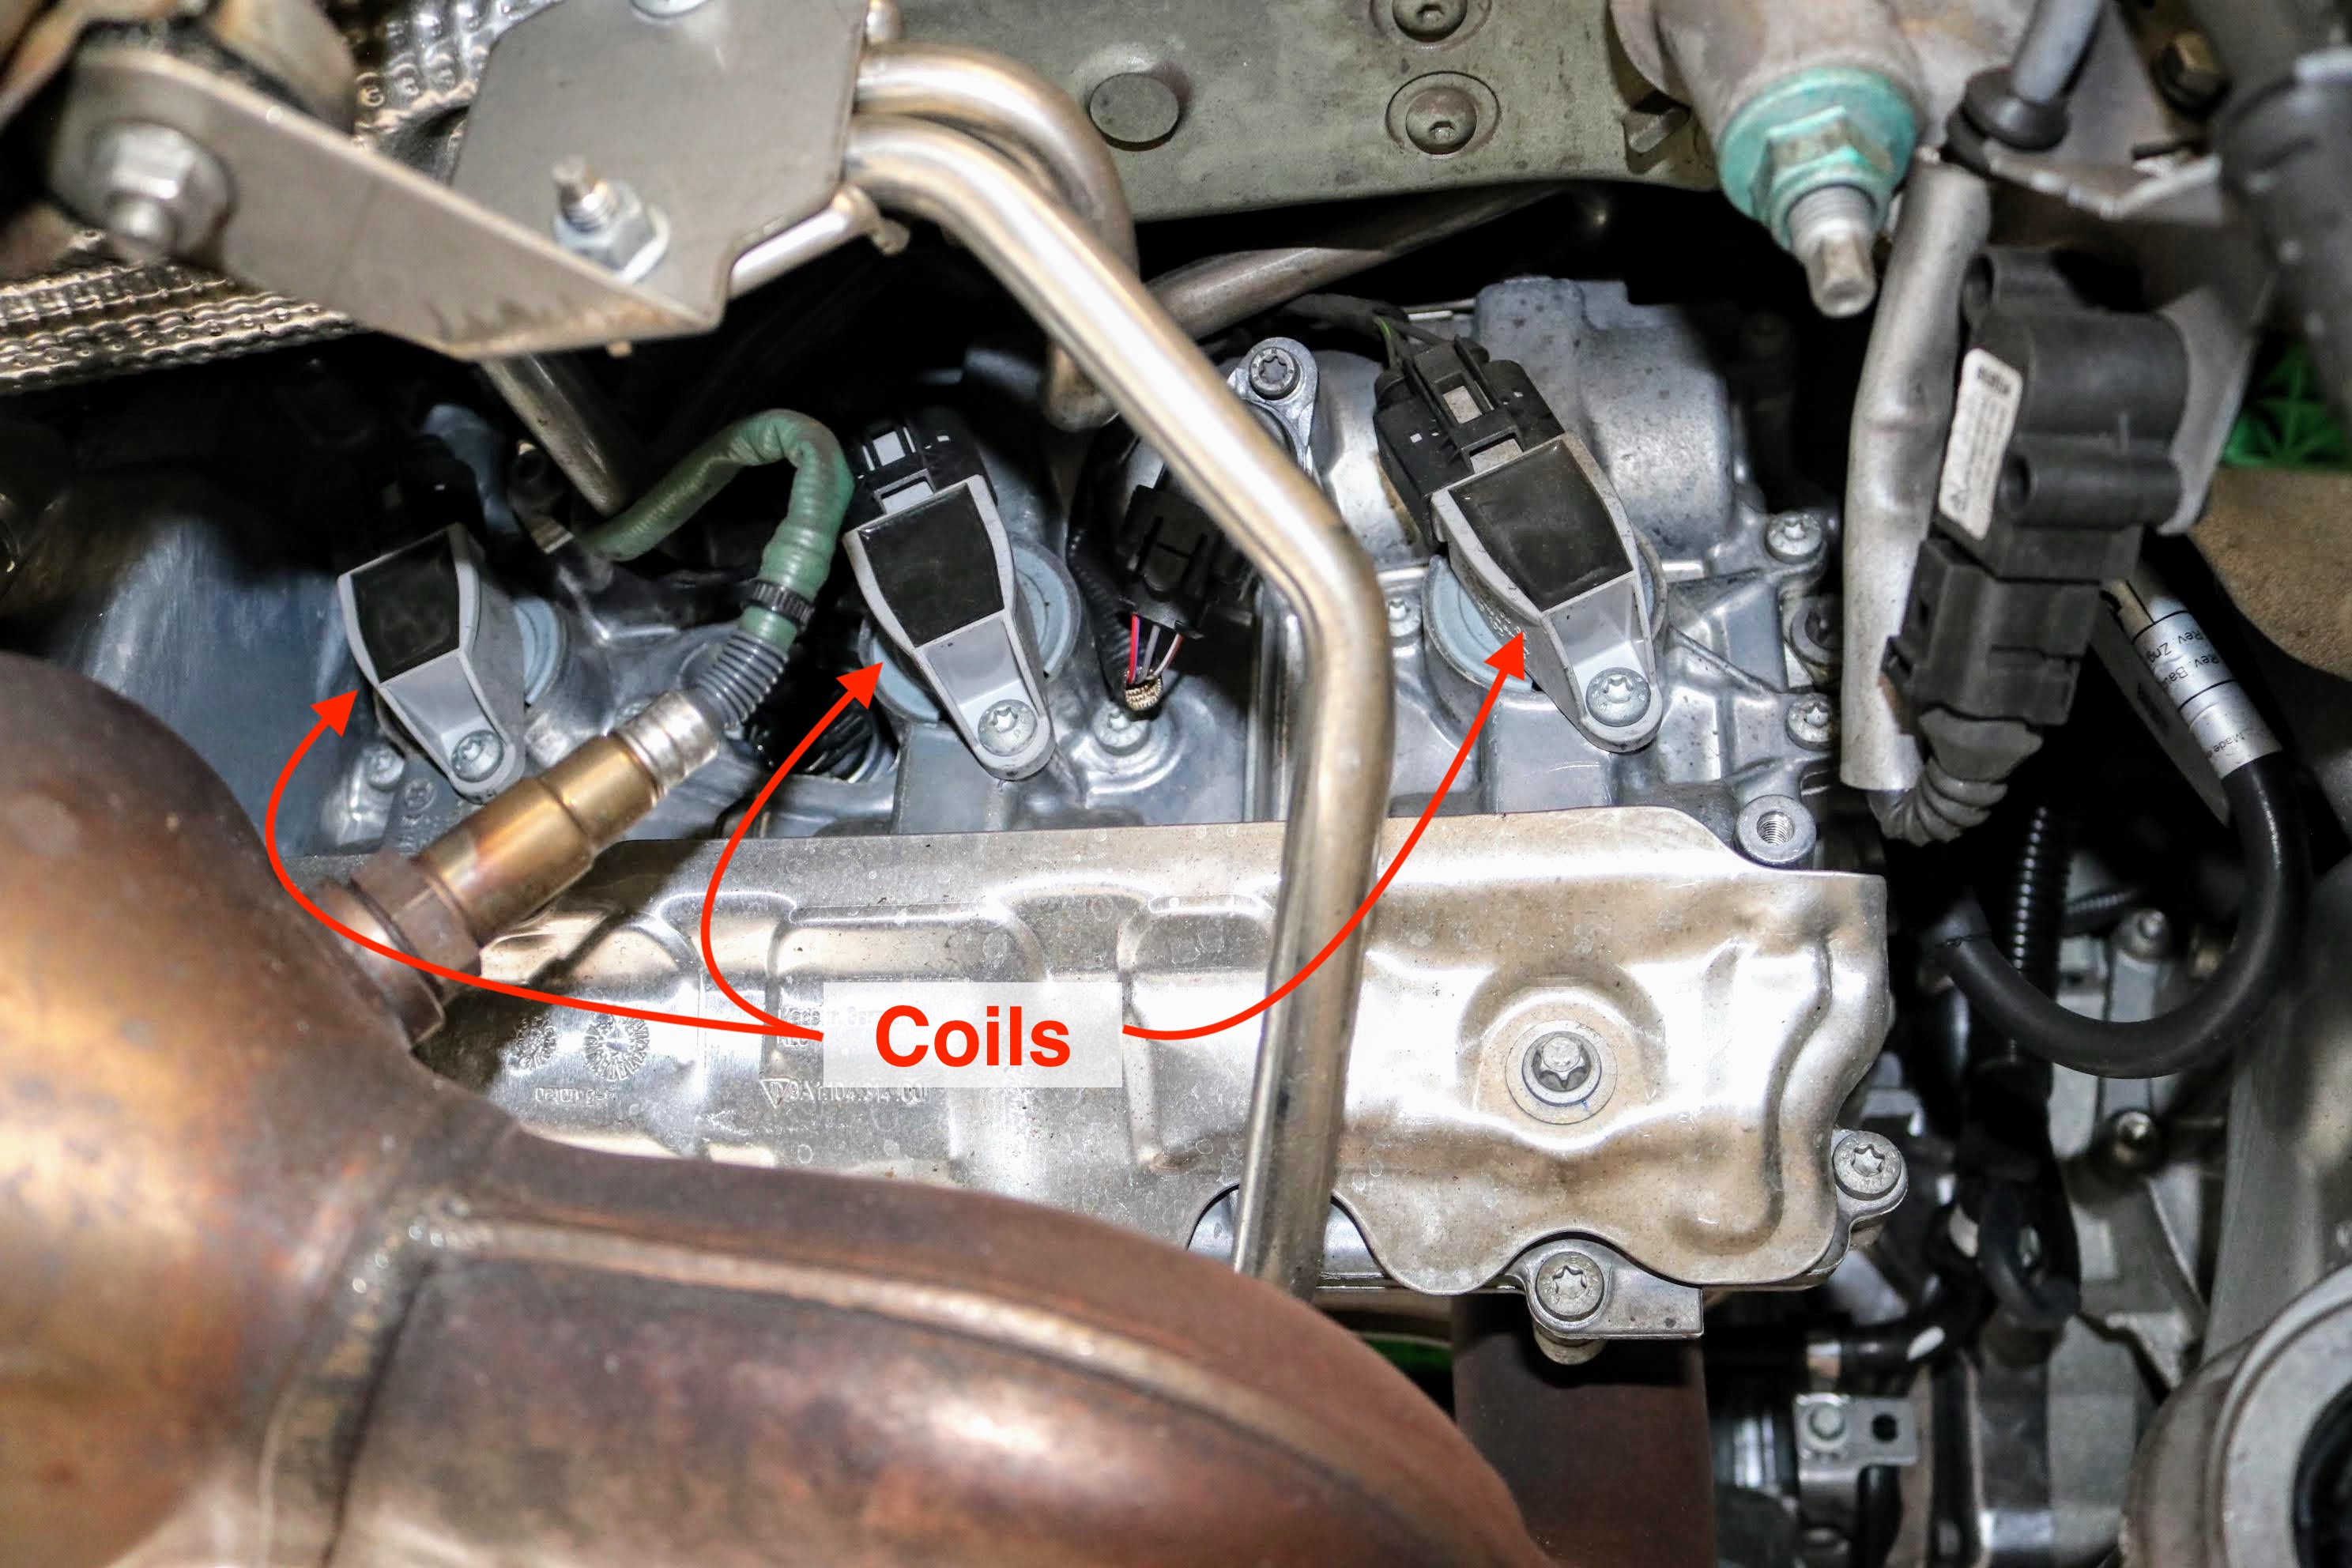
8. With the heat shield removed, the three coils were completely visible. Porsche 911 (991)
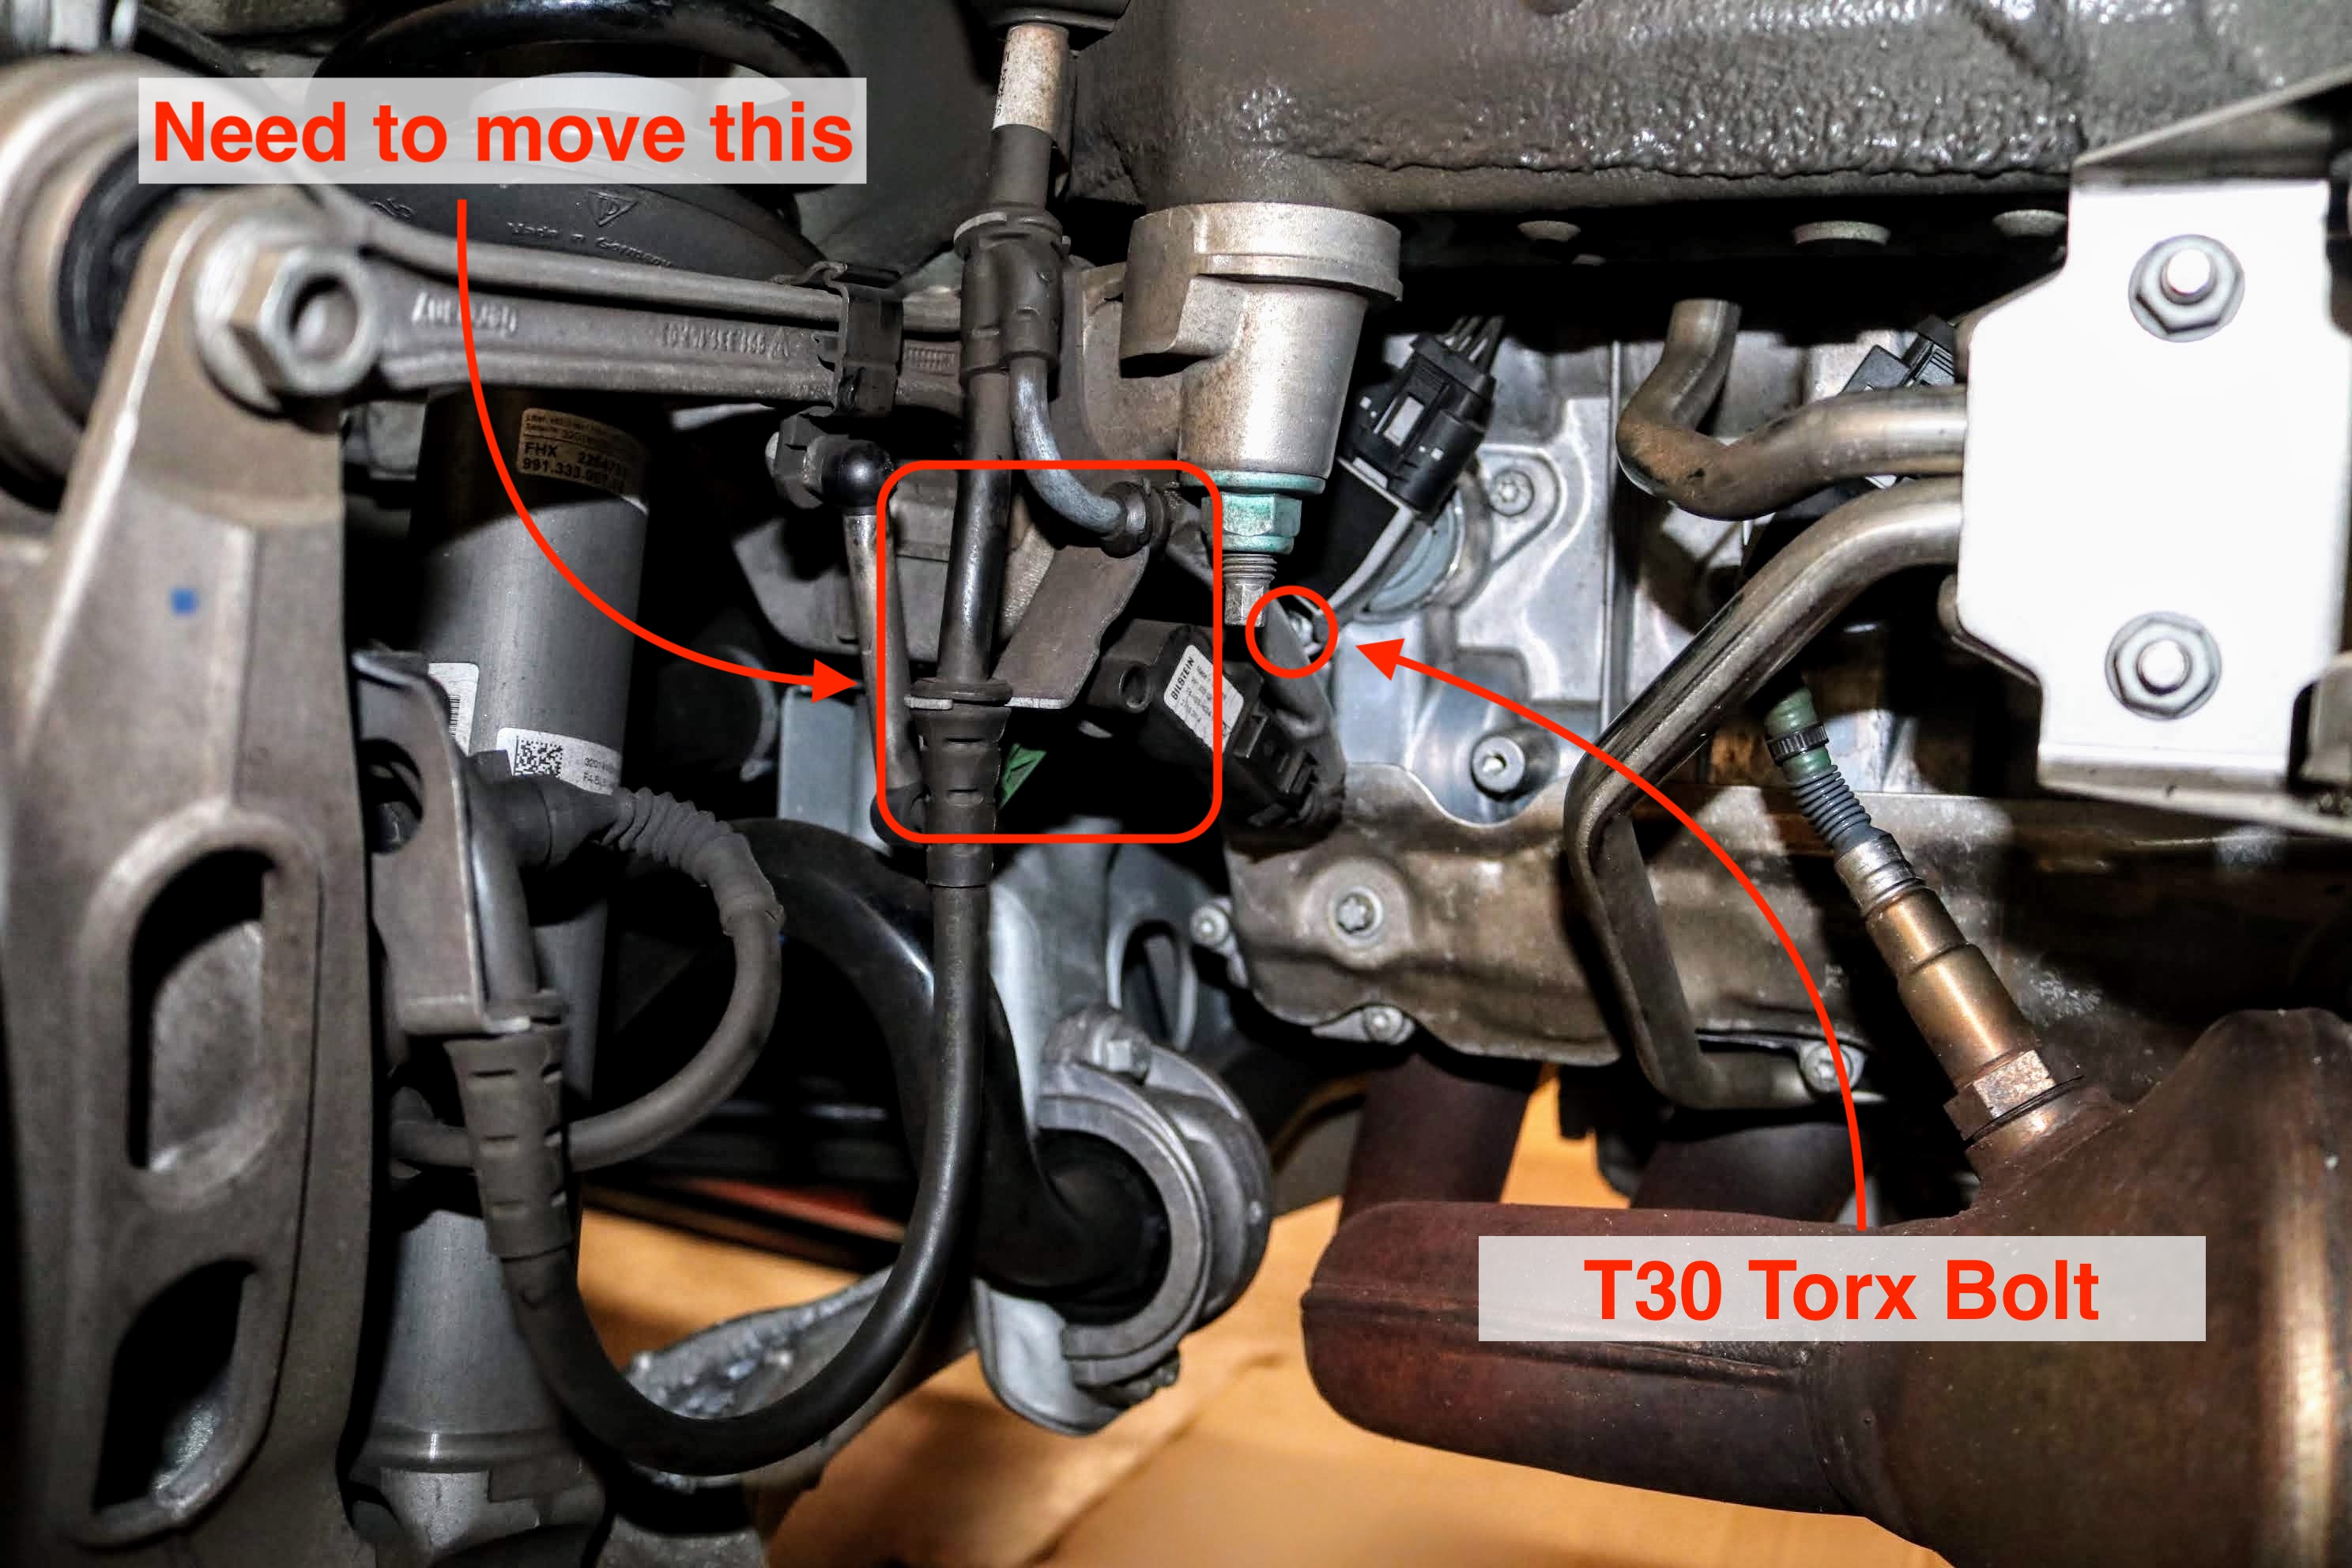
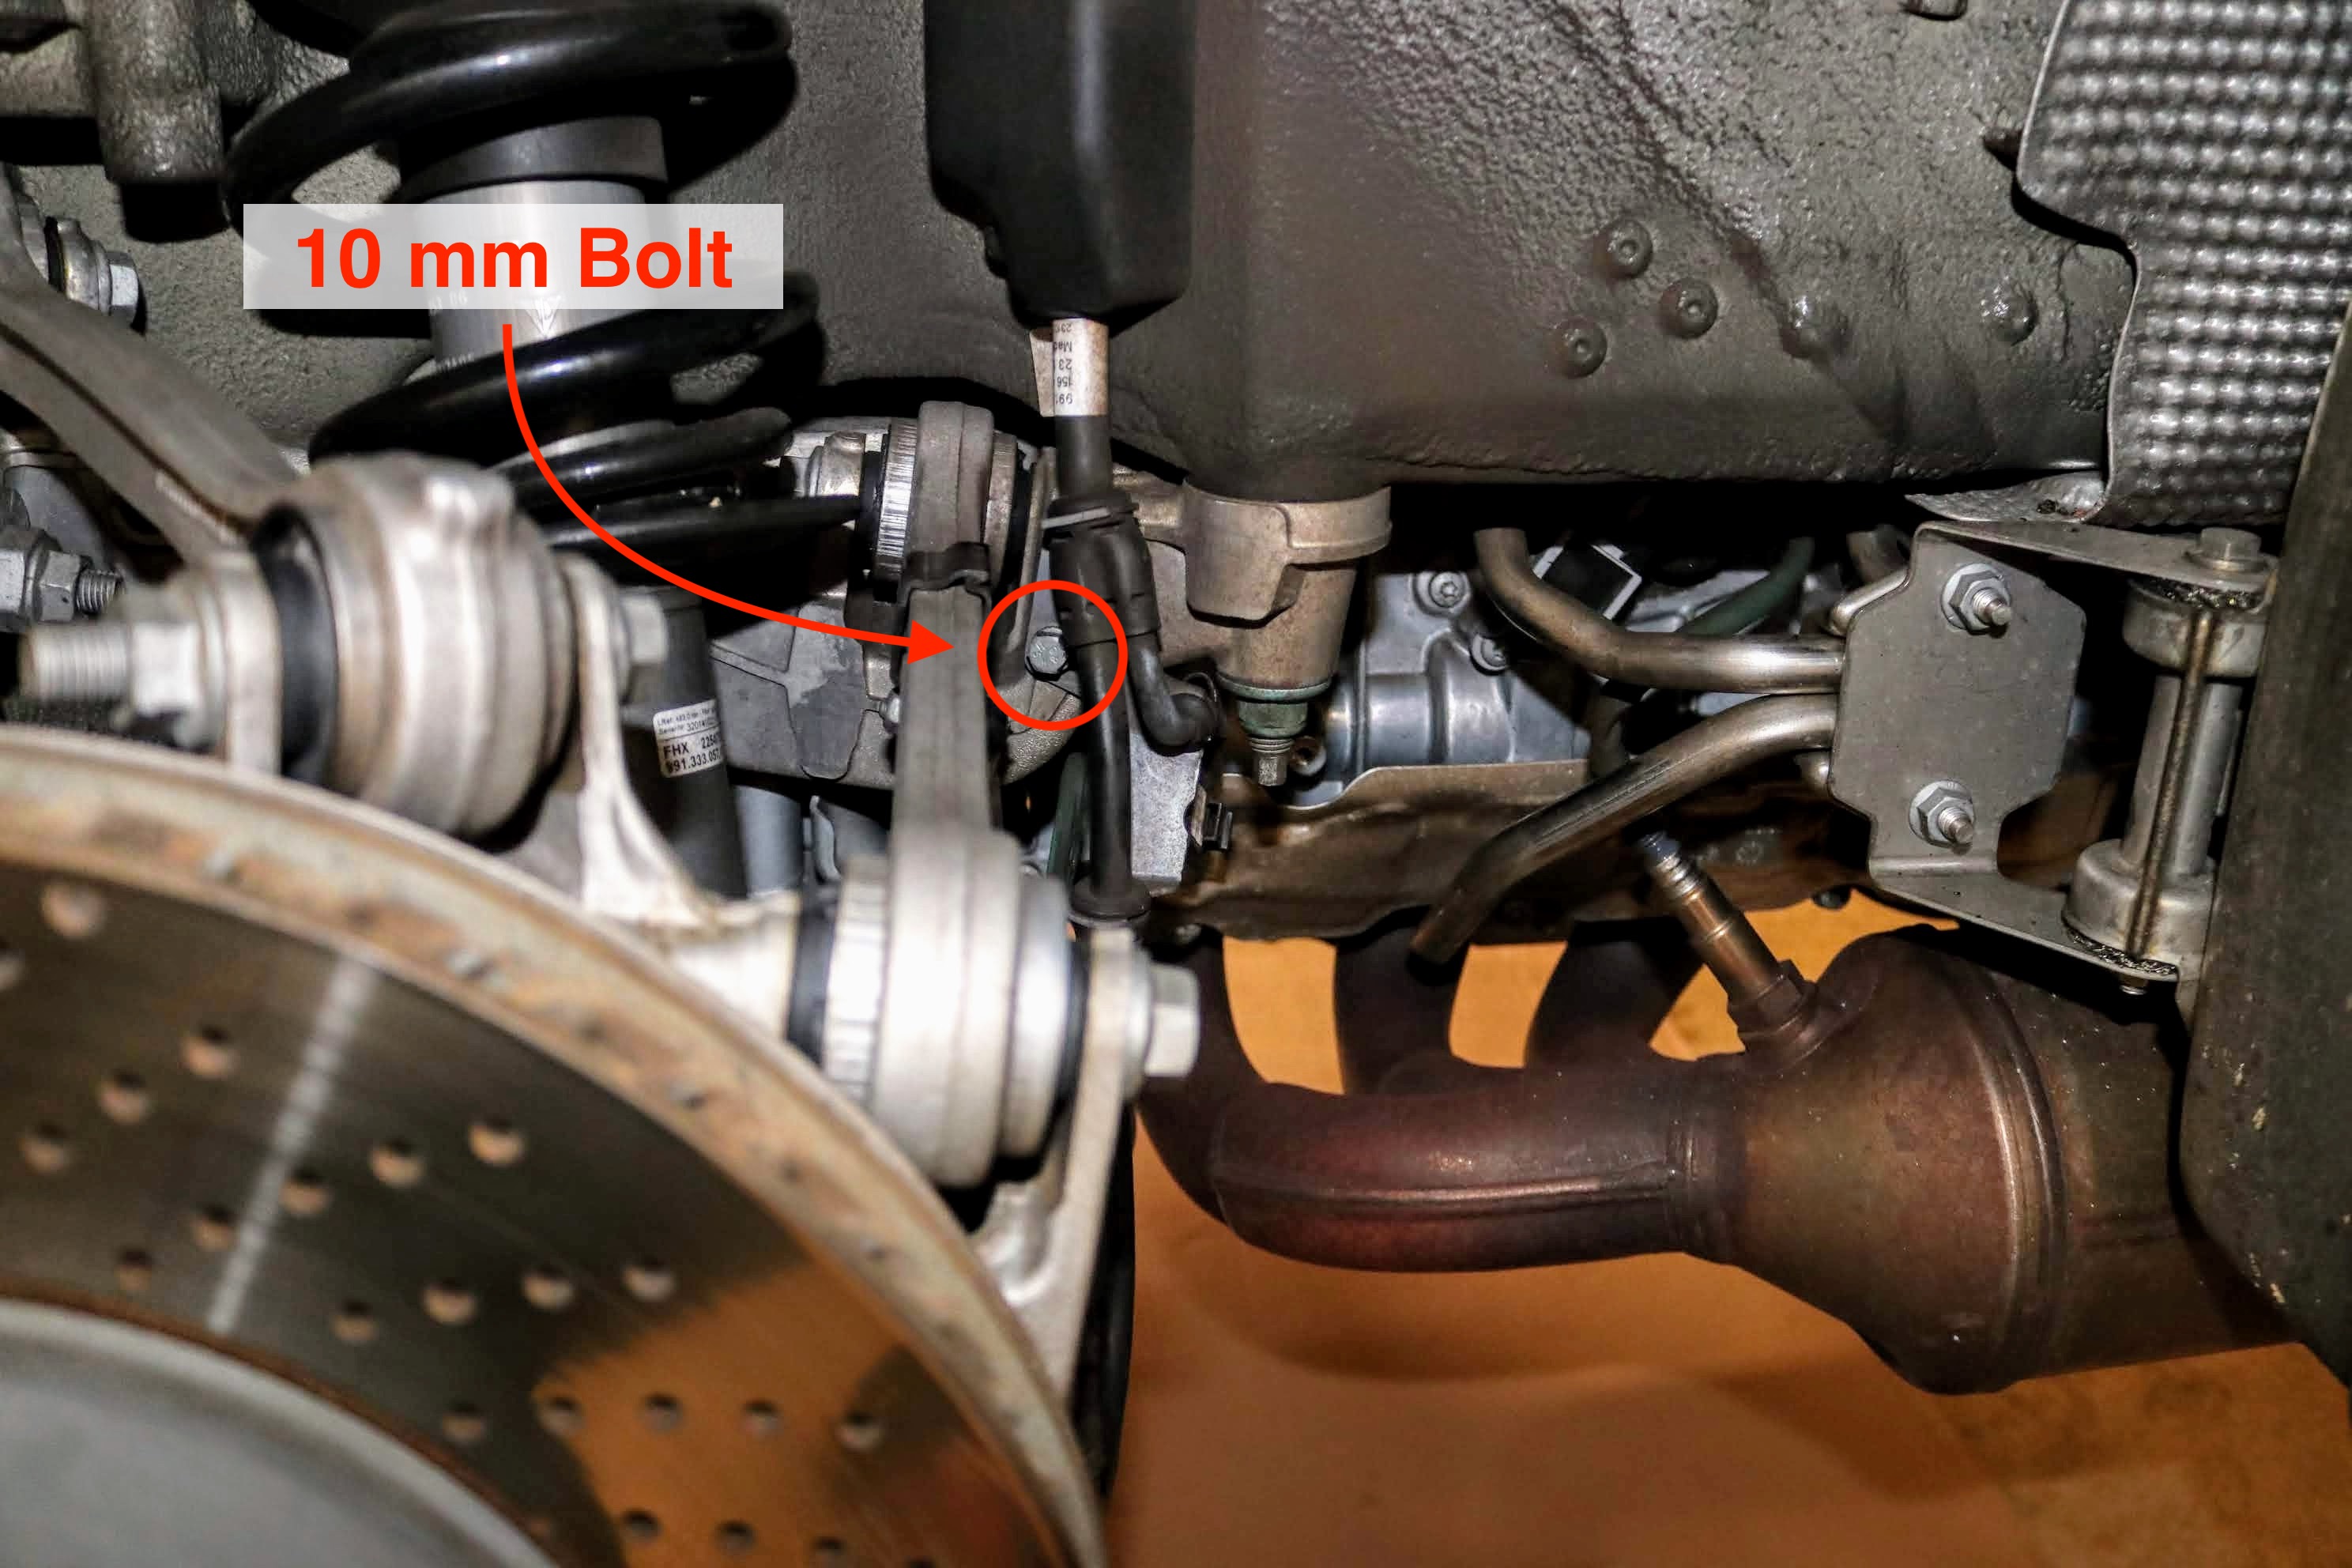
PDCC Option: For cars with the PDCC suspension option, there are components that obstruct the ability to get to the left, front spark plug. To make enough room, we loosened the 10 mm bolt holding the bracket in place. We only loosened it enough to be able to use extensions and a universal joint to access the T30 Torx bolt and spark plug.
Porsche 911 (991) Porsche 911 (991)
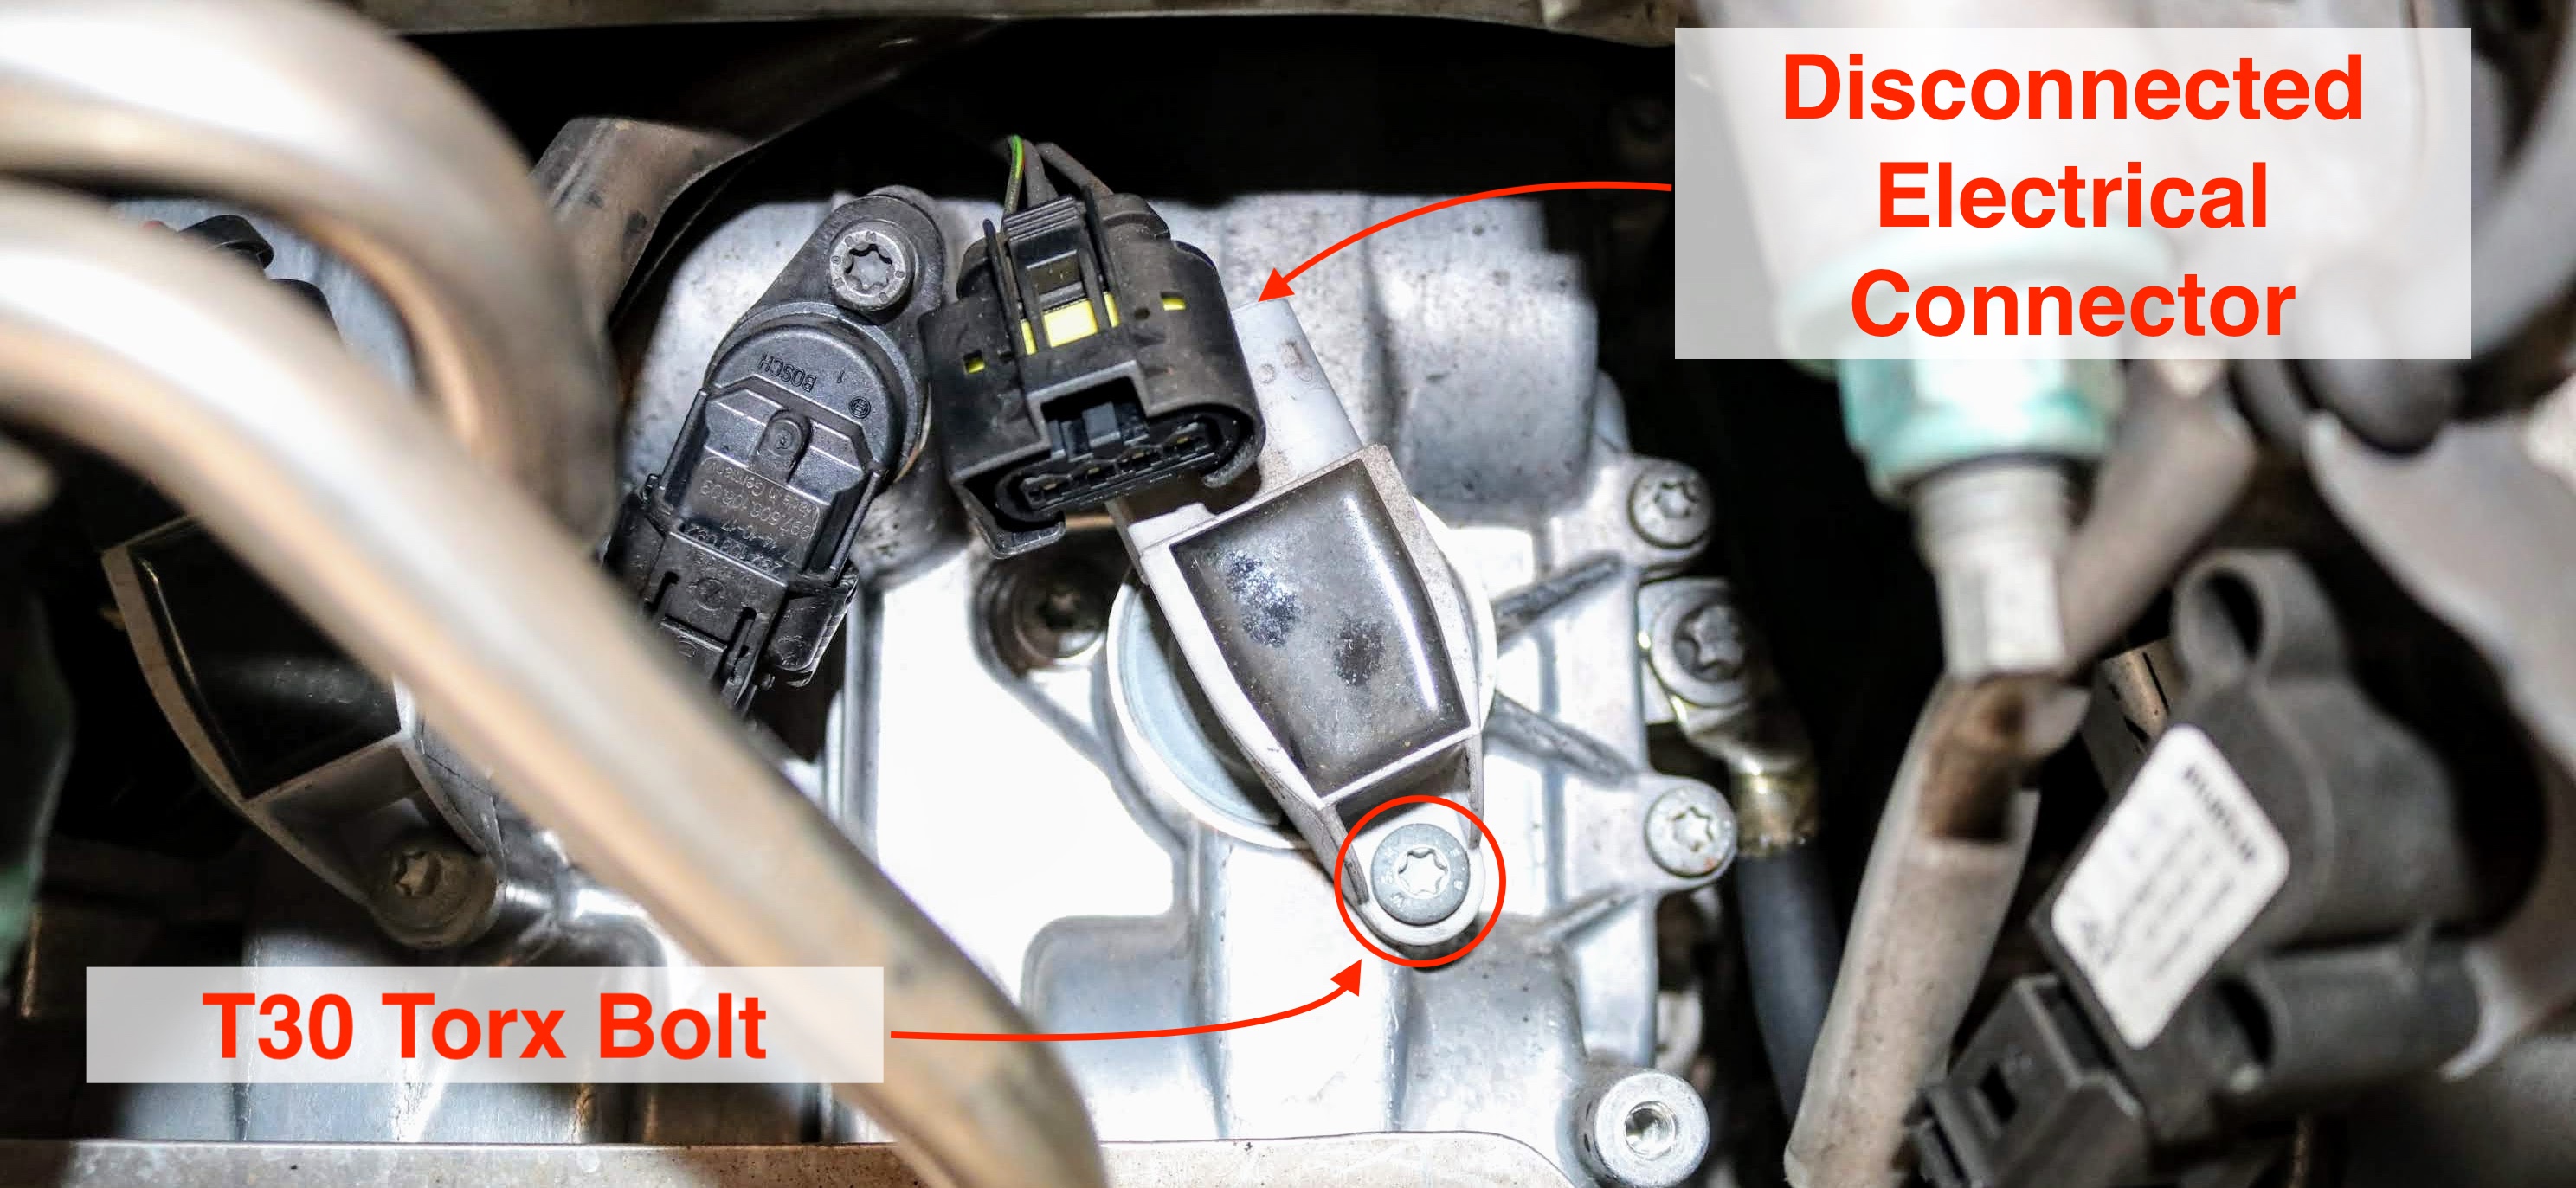
9. The tab on the electrical connector to the coil-on-plug assembly was depressed, while wiggling to free the connector from the coil. Porsche 911 (991)
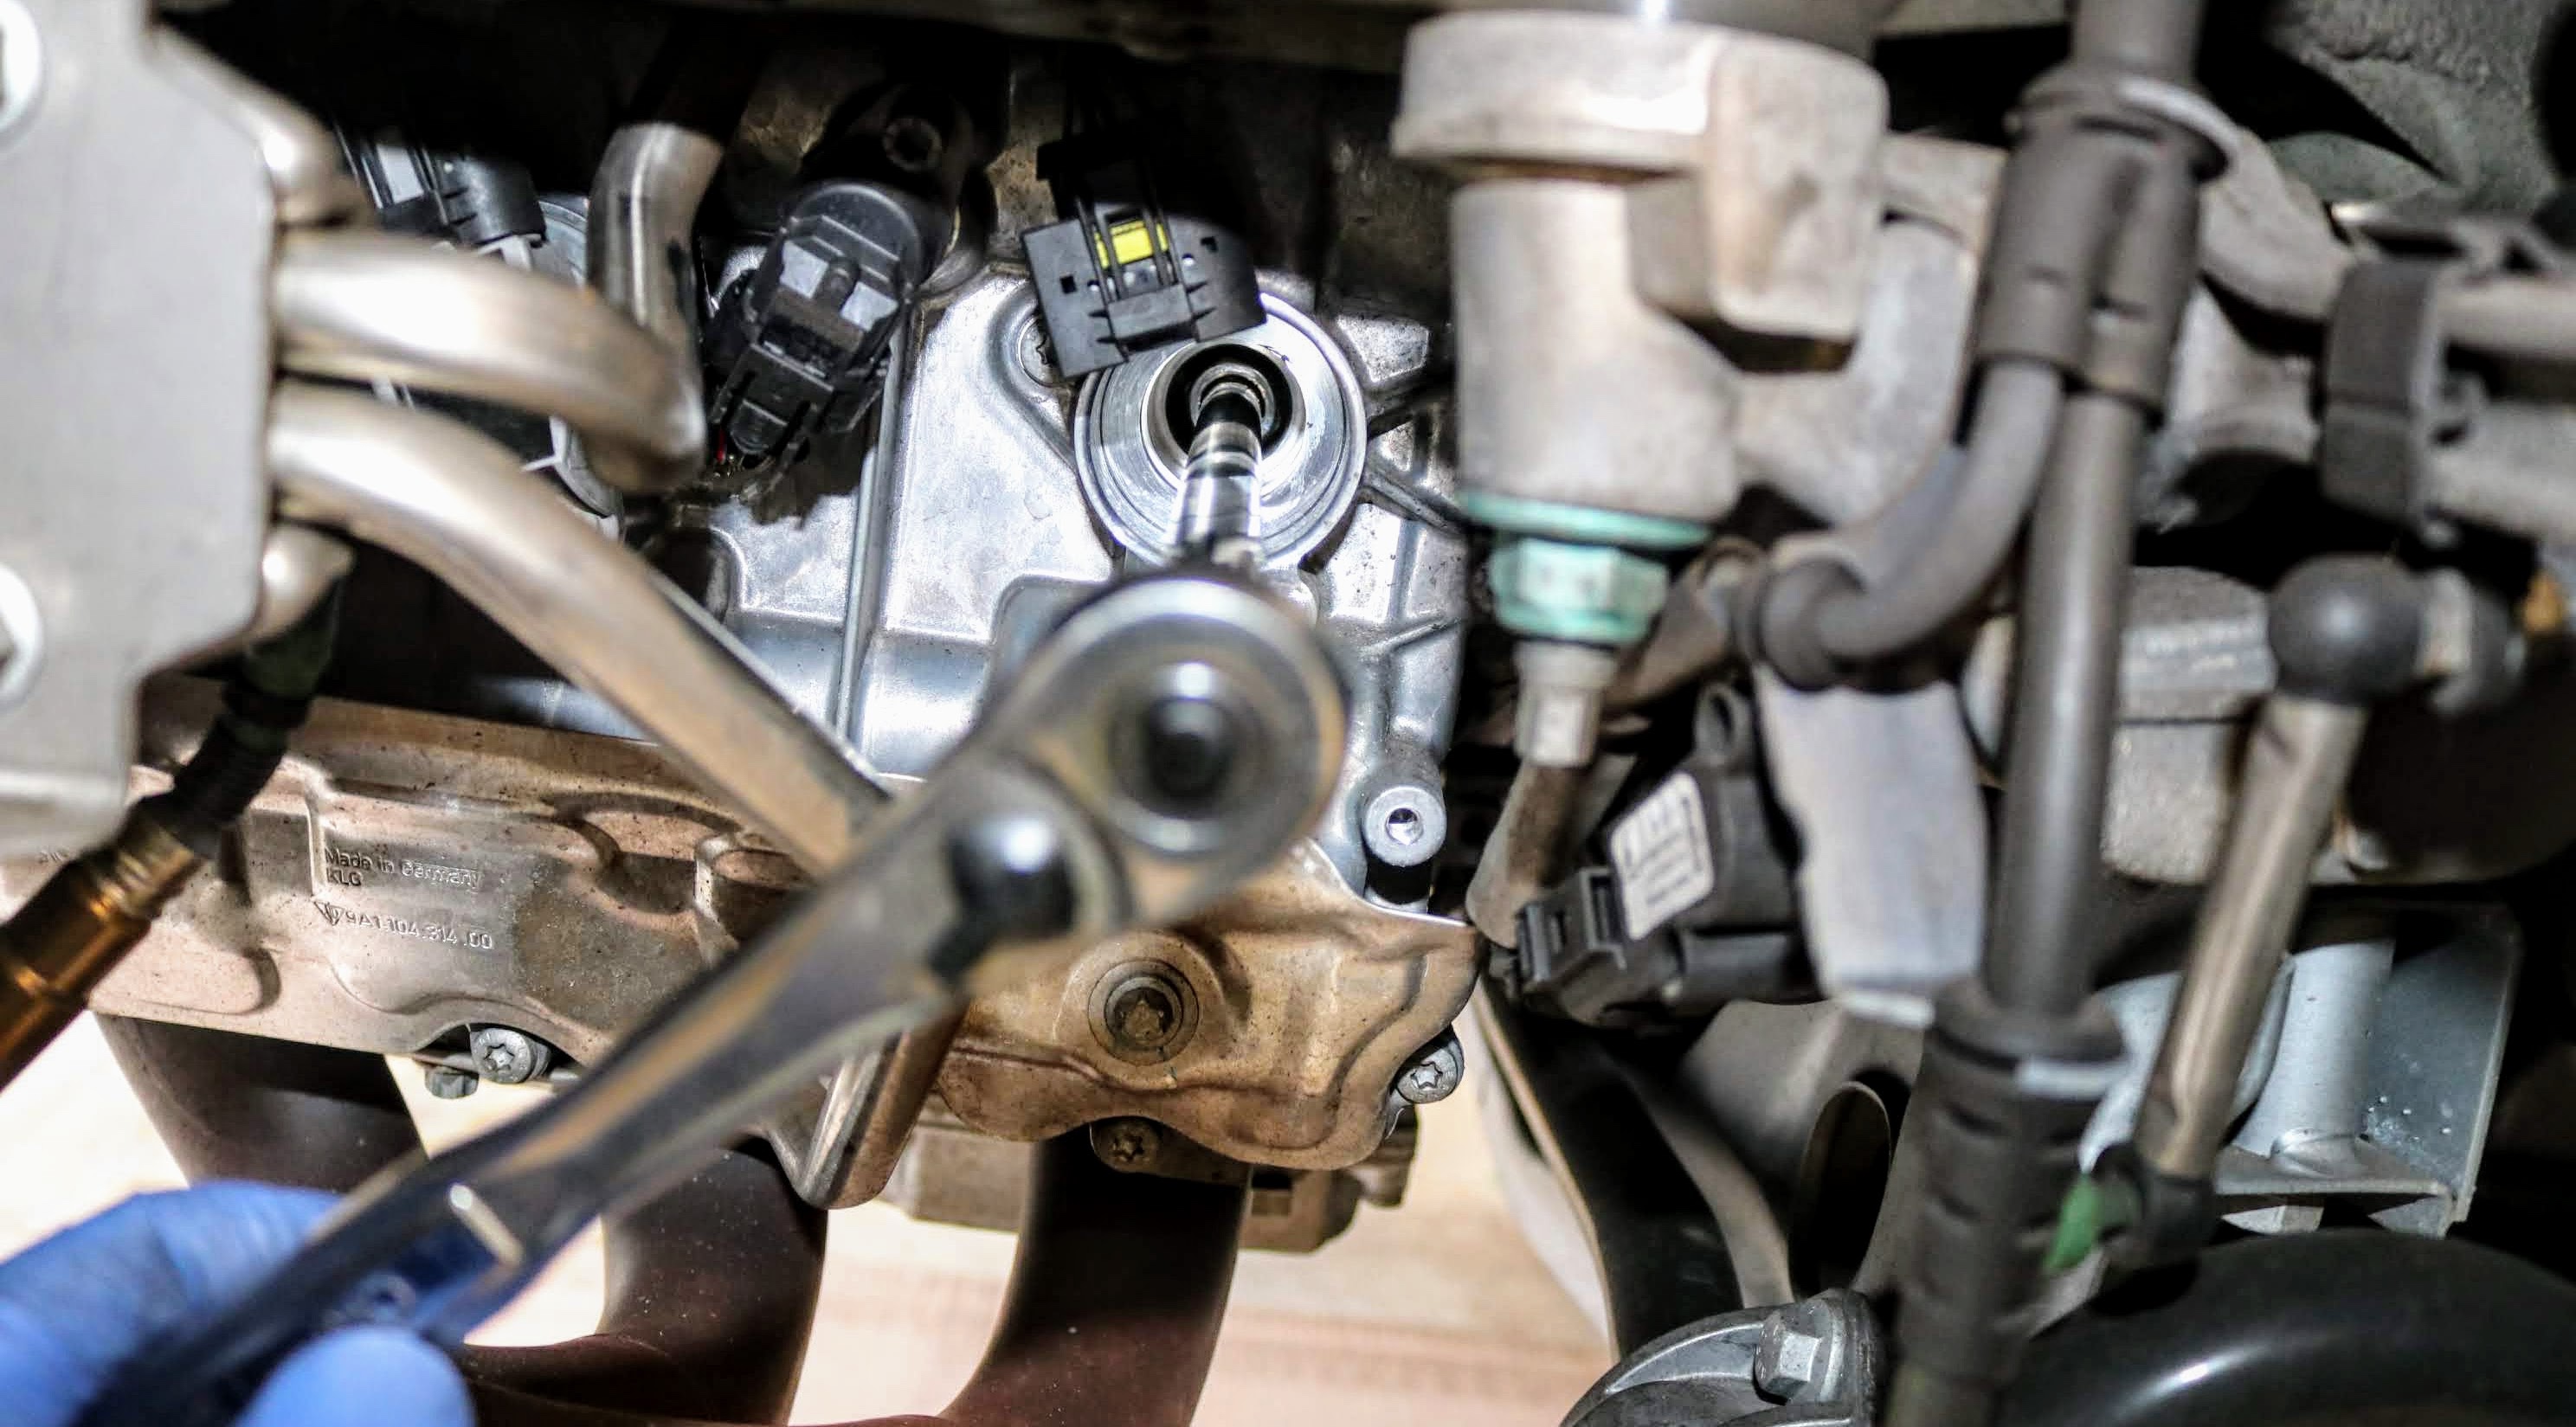
10. Using a T30 (Torx) socket, various extensions and a universal joint, and the 3/8" ratchet, we remove the T30 torx bolt holding the coil in place. To speed things up, sometimes we used the Milwaukee 3/8" powered ratchet to remove the bolts.
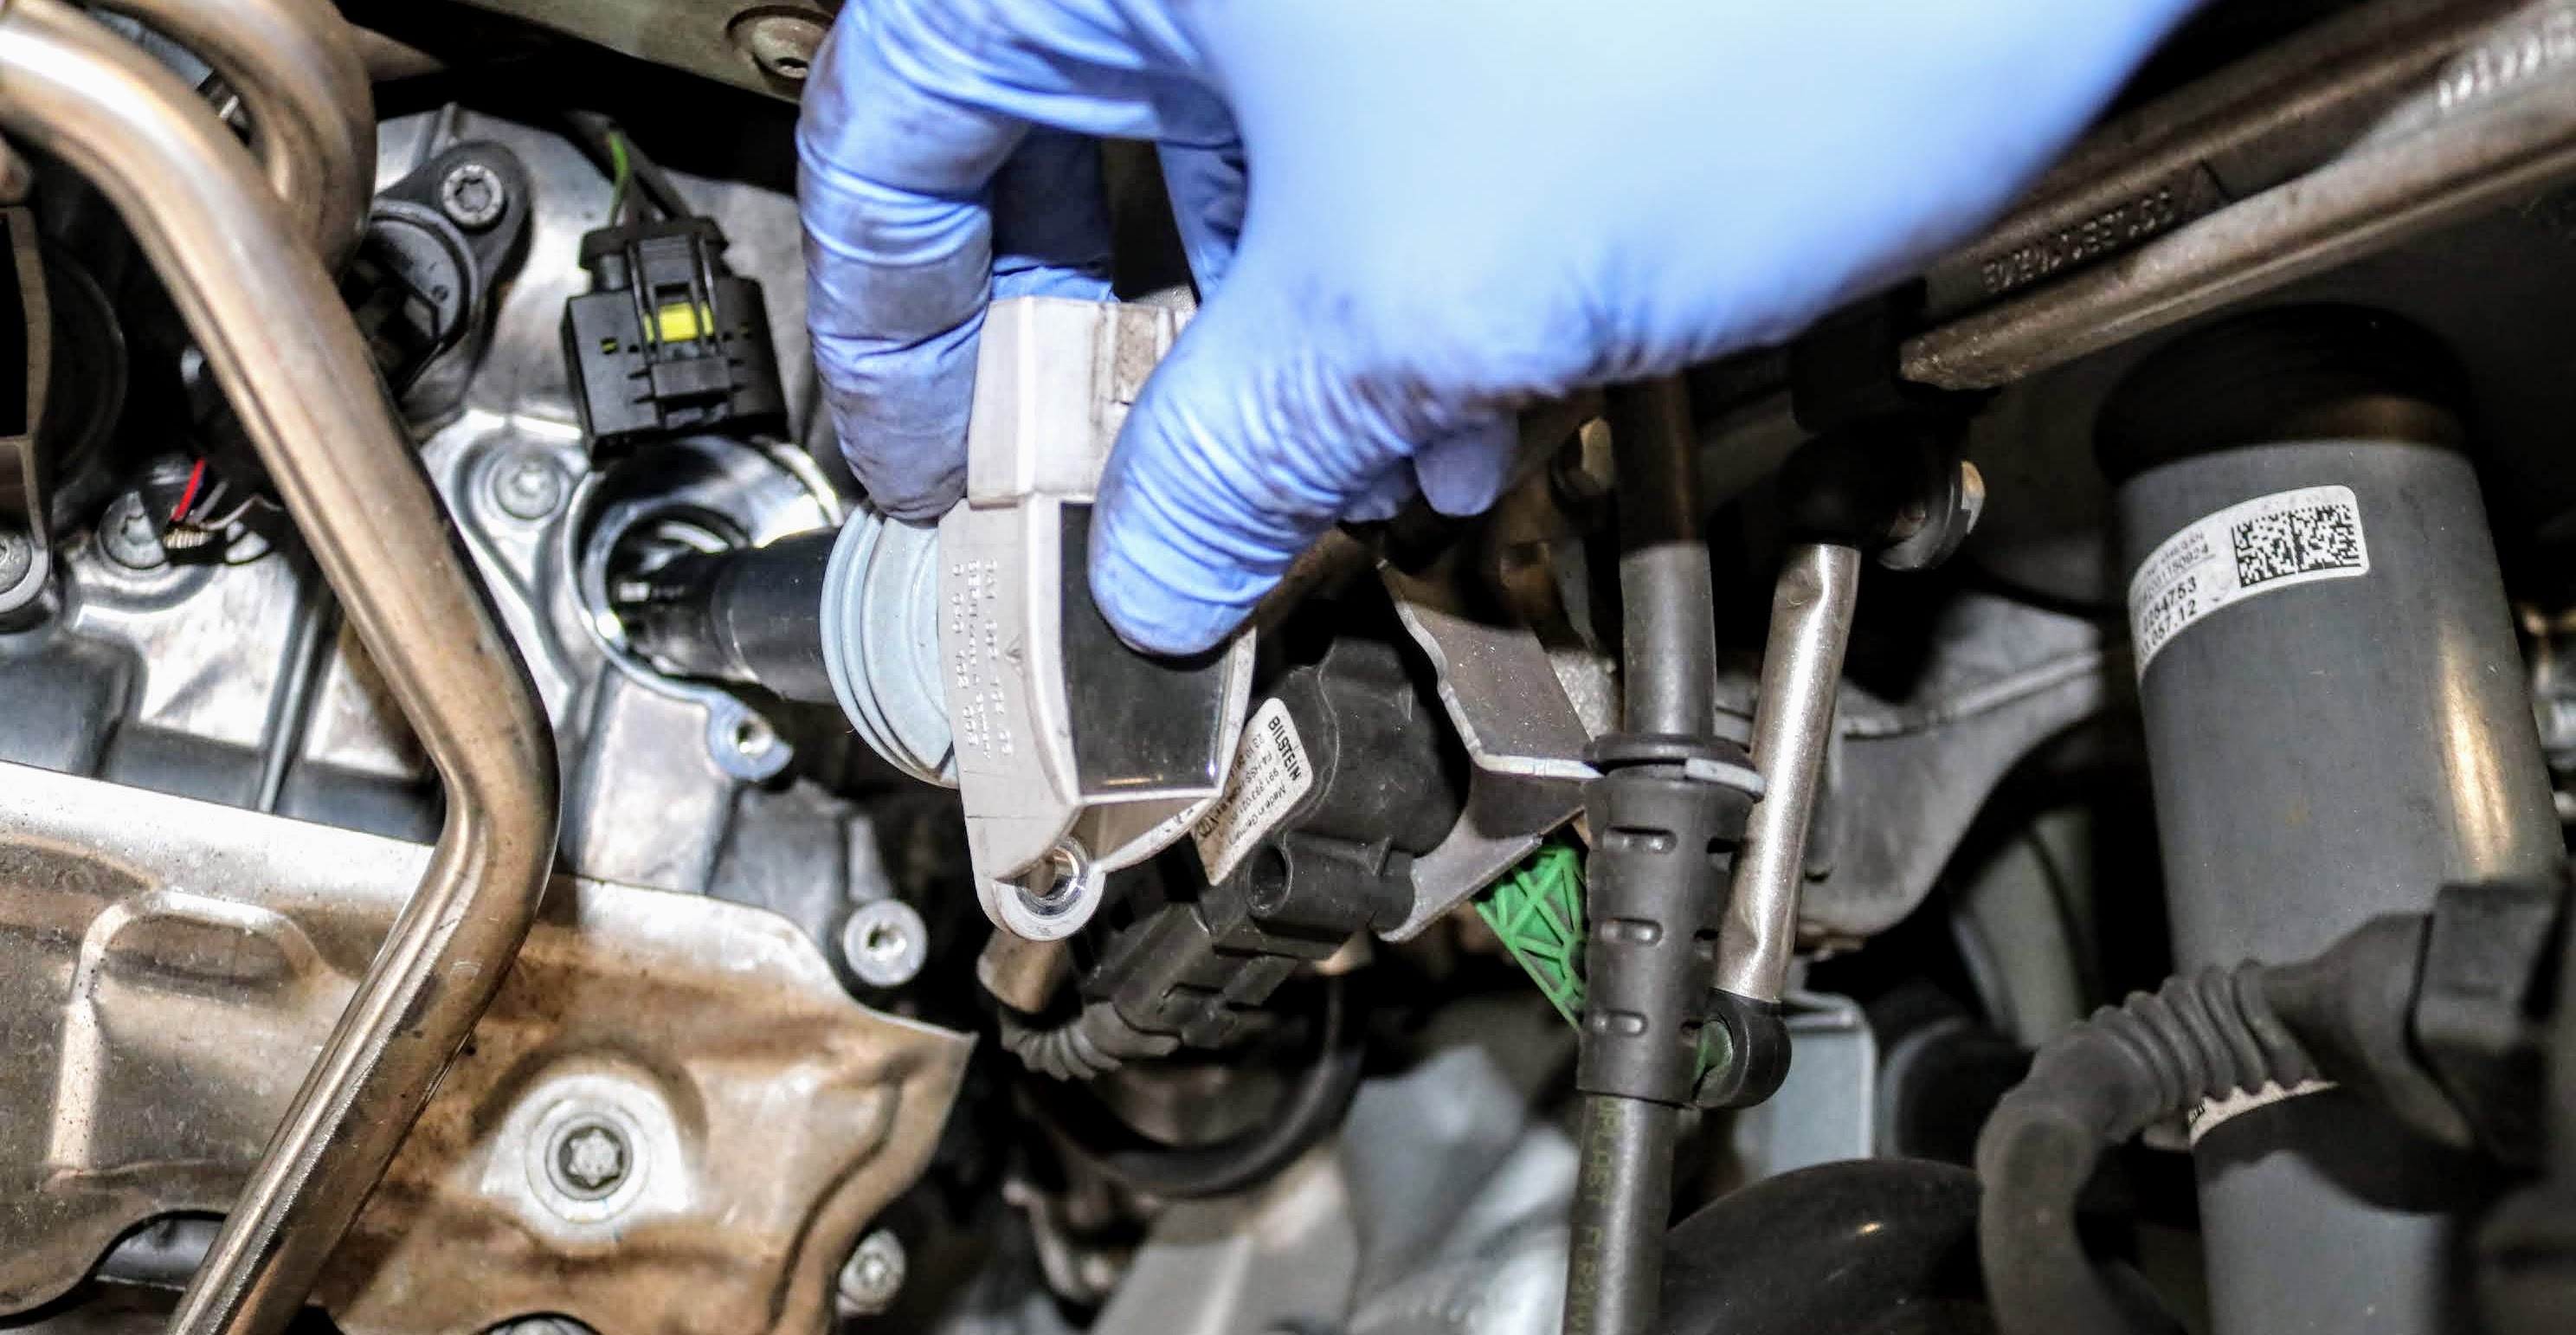
11. Next, we pulled coils out. There is a 3 layer silicon dust seal, so it took a bit of wiggling to remove this from the engine. Porsche 911 (991)
12. Using a 16 mm spark plug socket, various extensions and a universal joint, and a 3/8" ratchet, we loosened and removed the spark plug. Porsche 911 (991)
13. With the spark plug removed, we inspected the it for excessive wear or other abnormalities that can indicate the health of the engine.
14. The new spark plug was installed by placing it in the 16 mm spark plug socket, attached an extension, and hand threaded into the engine. Porsche specifically states NOT to use any anti-seize on the threads.
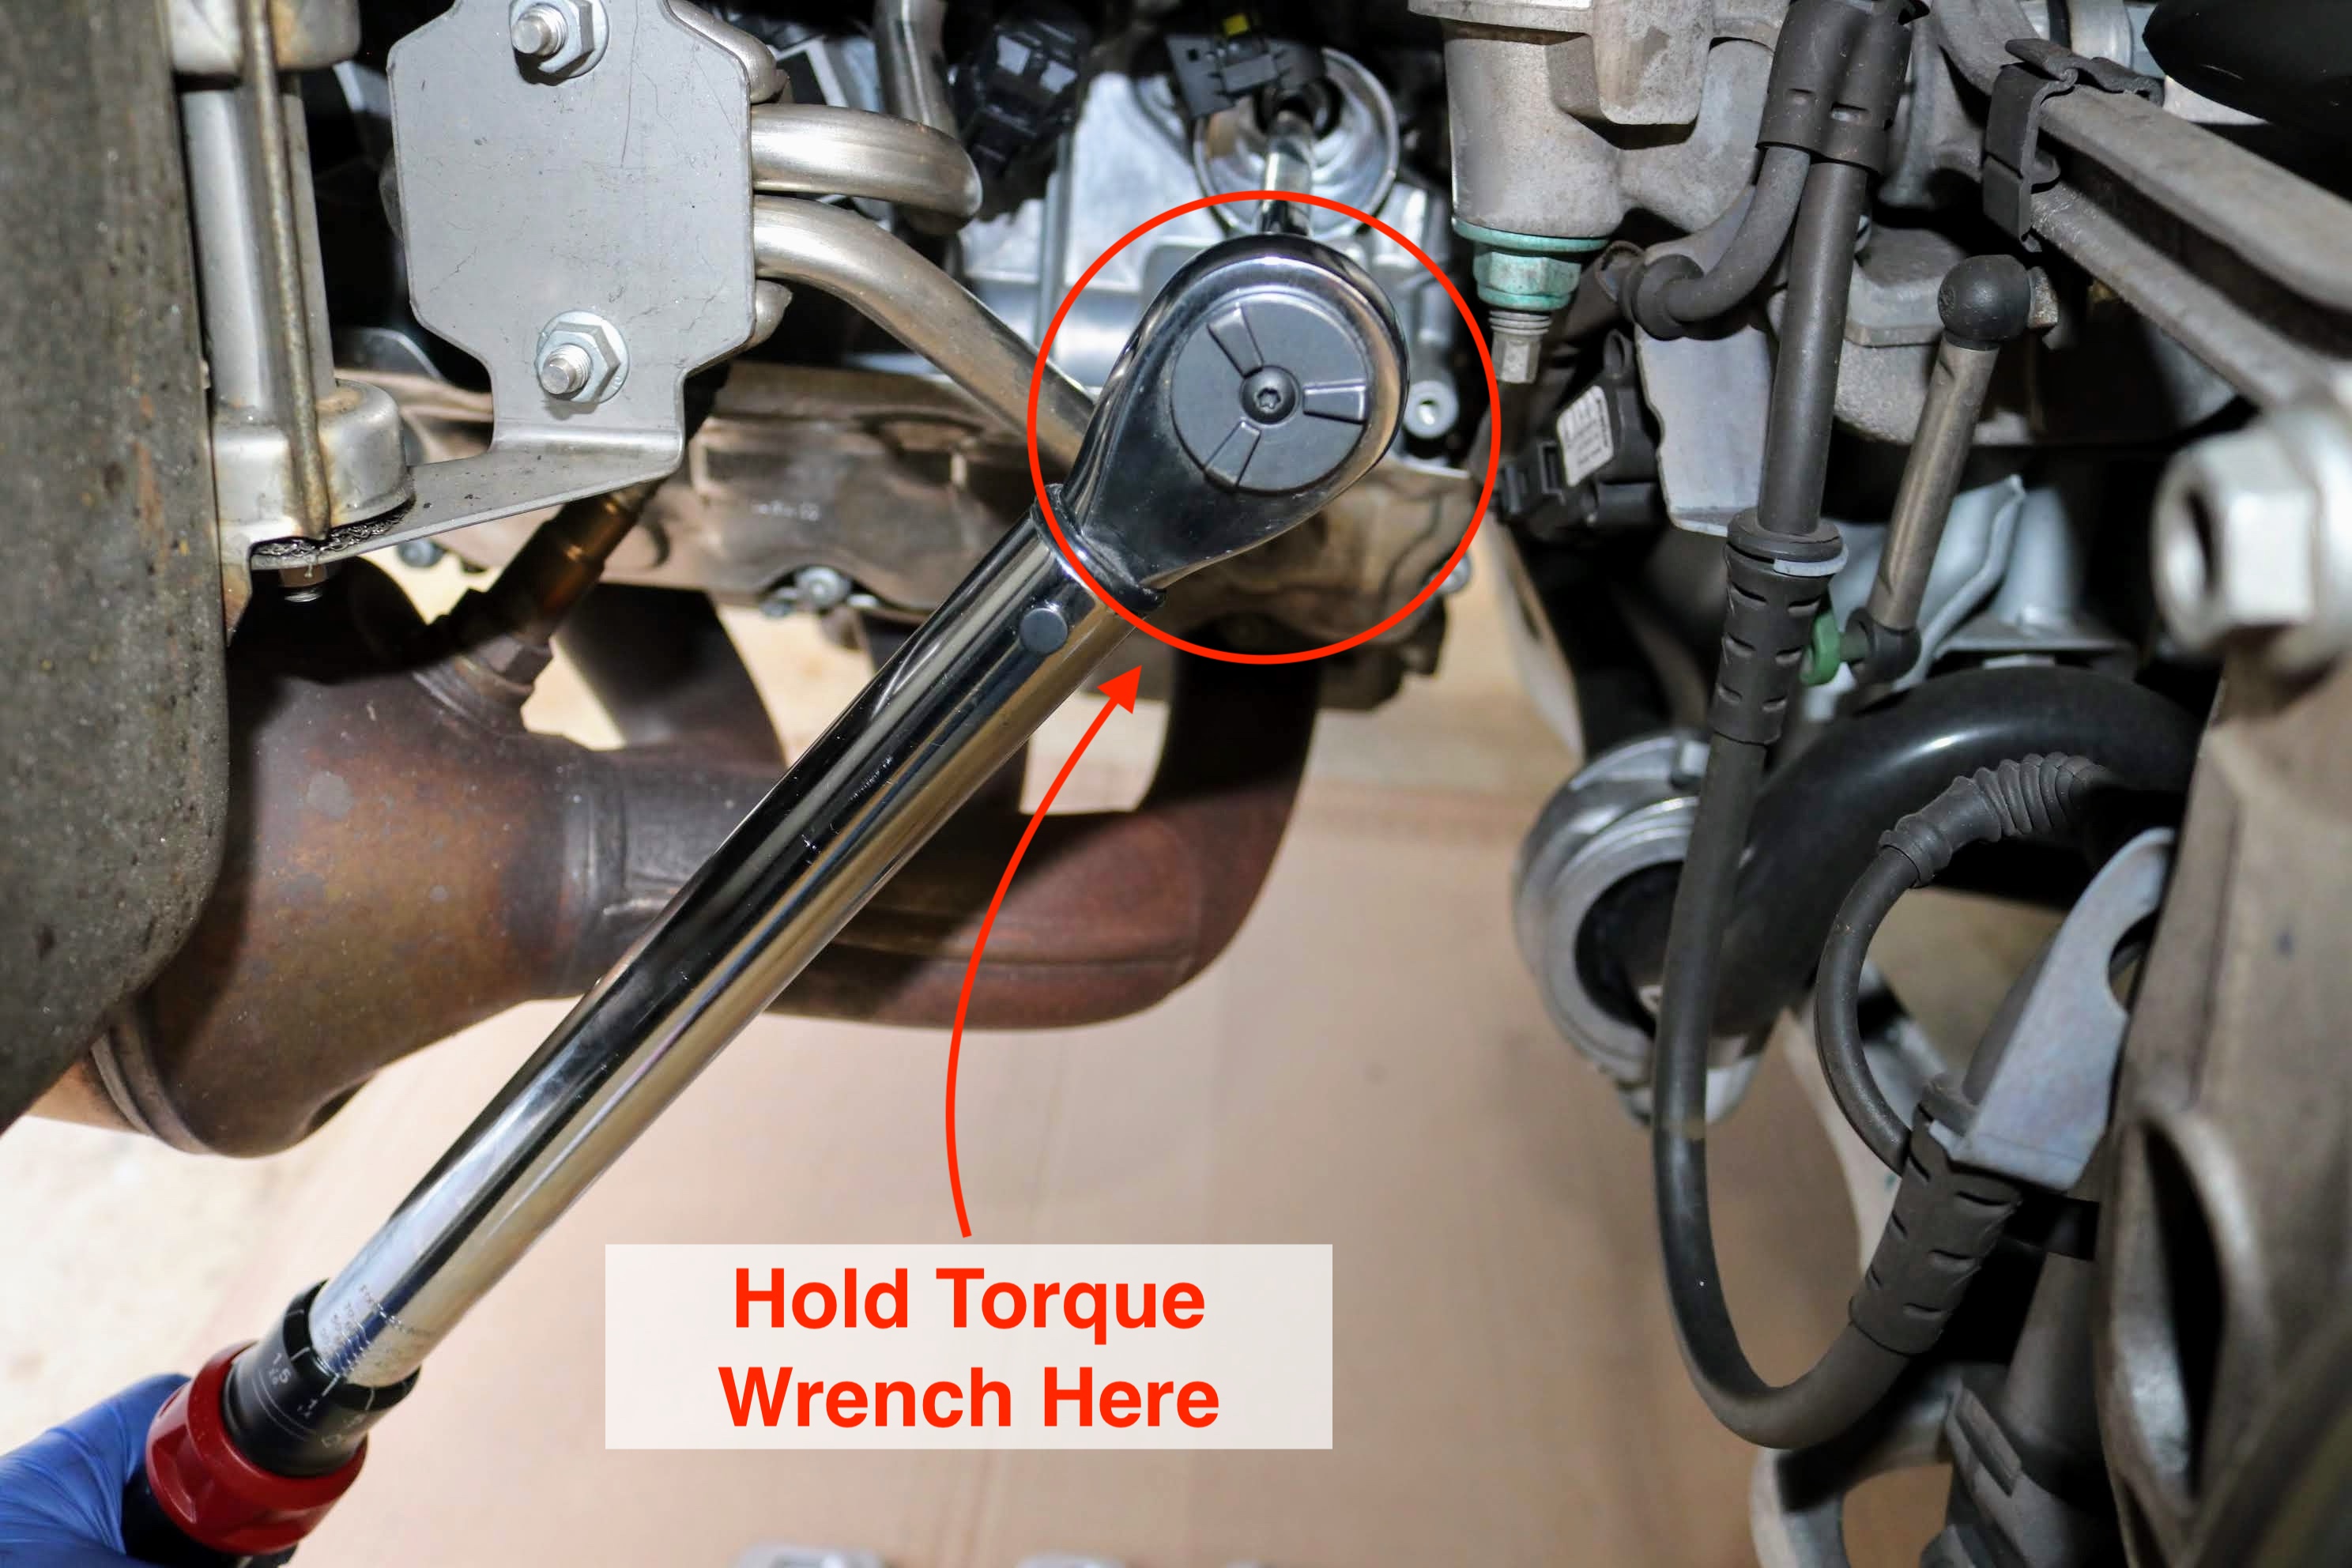
15. Using a 3/8" drive torque wrench, we tightened the spark plug to 21 lbs ∙ ft. Do not over tighten!!!. Although not good practice, you will have to use an extension with the torque wrench. We made sure to hold the 3/8" drive torque wrench with both hands to keep it in line with the spark plug. Porsche 911 (991)
16. Next, we reinstalled the coil by fully pushing it into the engine, while insuring the hole for the securing bolt aligns properly. We hand tightened the T30 torx bolt and did a light tighten with a T30 (Torx) socket and 3/8" ratchet. Porsche 911 (991)
17. We then reconnected the electrical connector to the coil by pressing them together. We made sure that they were fully and securely connected, by giving a light tug that they didn't move.
18. Step 8. through Step 17. was repeated for each of the six spark plugs.
19. With all of the spark plugs replaced, we reinstalled the heat shields on each side and securing them with the two E10 torx bolts. We hand tightened and then lightly tightened with a E30 (External Torx) socket and 3/8" ratchet. Porsche 911 (991)
20. Finally, we reinstalled the wheels by repeating Steps 2. through 4. in reverse order. With the wheels installed, we used the 1/2" drive torque wrench and 19 mm socket to tighten each wheel lug bolt to 118 lbs ∙ ft. NOTE: After the next drive, we checked the torque of each of the wheel lug bolts again. Porsche 911 (991)