Overview

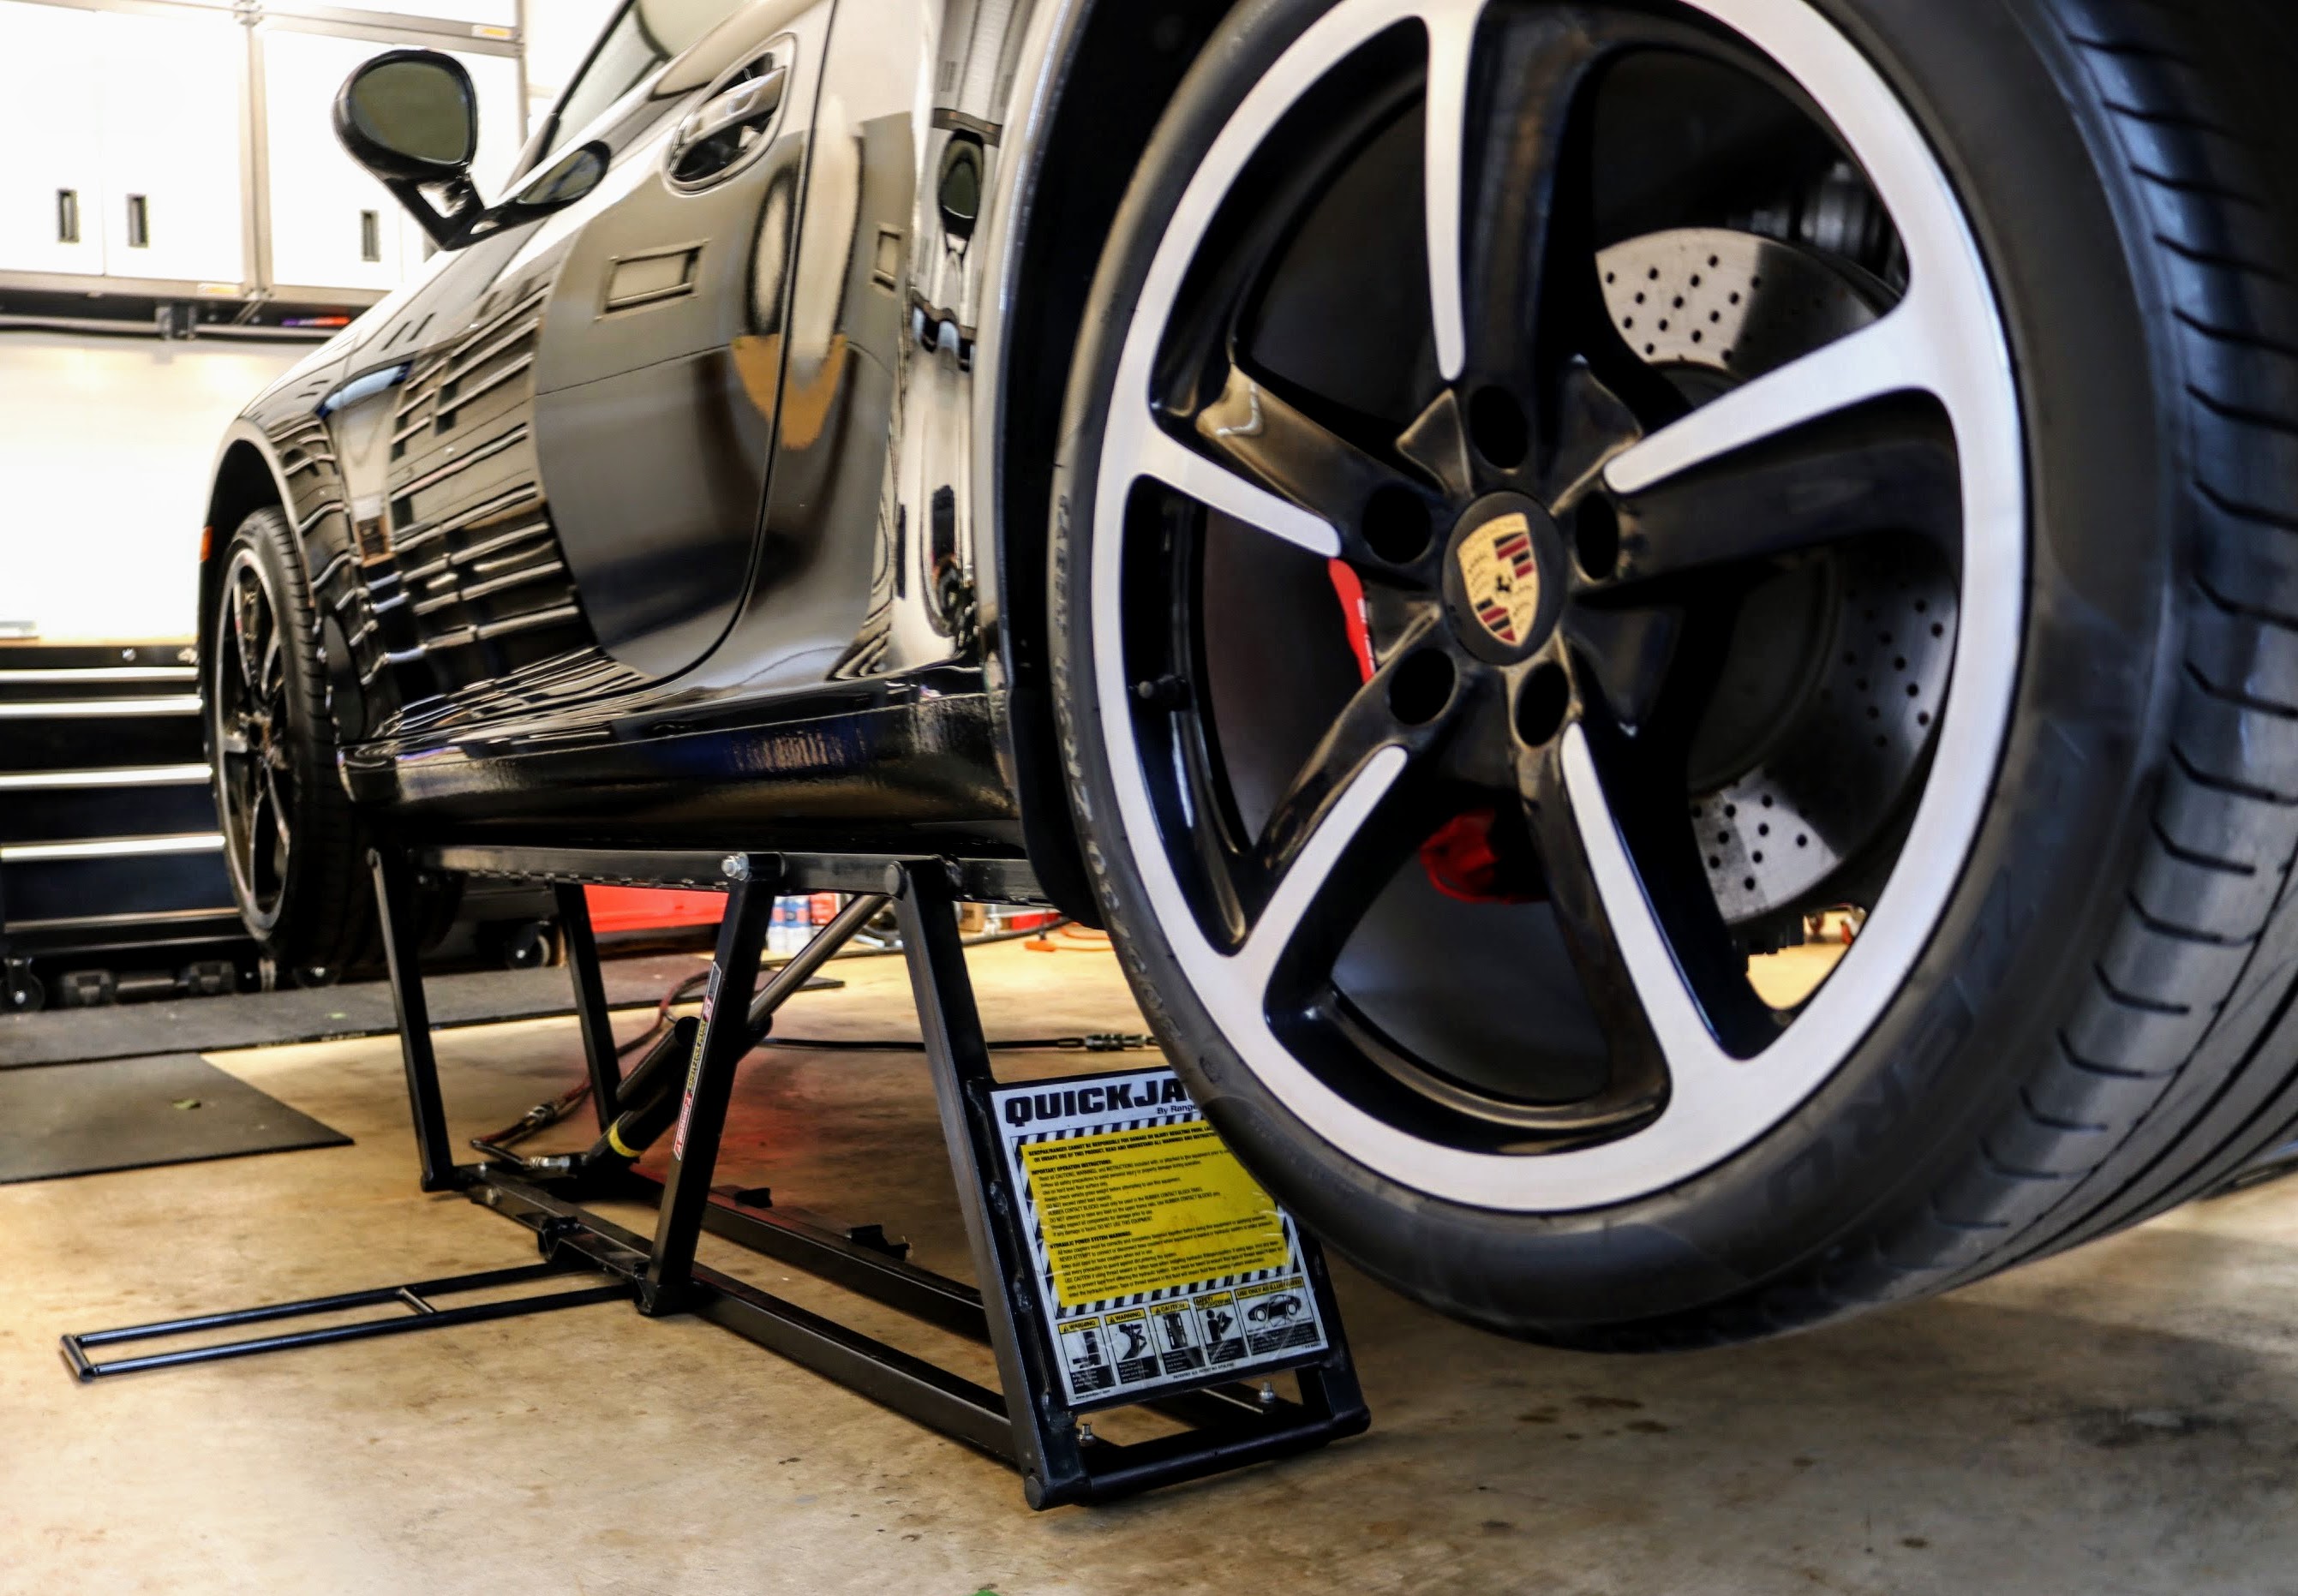
This guide goes through the steps we used to perform an engine oil change on a Porsche 911 (991.1) Carrera S. As far as maintenance goes, this was a relatively simple job. After performing the oil change, there are a few important things to note. It is definitely a necessity to have the car lifted enough such that you can get a ratchet wrench and oil pan under the engine of the car. We used a QuickJack, which gave us plenty of space to get under the car to reach the drain plug. We measured the amount of oil that was drained, since knowing this amount will help provide a "sanity check" of the amount of new oil to add. For reference, we drained 7.2 - 7.4 L of oil. Since Porsche uses a dry sump lubrication system, it is easy to overfill the oil and a pain to remove the oil if too much is added.


Parts Used

Part Quantity Part No. Links to ones we used
Oil Filter 1 Porsche #948.107.222.00 (also #948.107.322.00) Suncoast Oil Filter Kit
Oil Filter O-Ring 1 Porsche #948.107.322.00 (91.0 x 4.0) Suncoast Oil Filter Kit
Drain Plug Sealing Ring 1 1 Porsche #900.123.106.30 (A 18 x 24) Suncoast Oil Filter Kit
Oil 8 L Mobil-1 0W-40 Full Synthetic Amazon

1 This is a copper crush washer. We use these automotive self-centered bonded seal/gasket washers that work like copper crush washers, but do not require to be tightened as much.


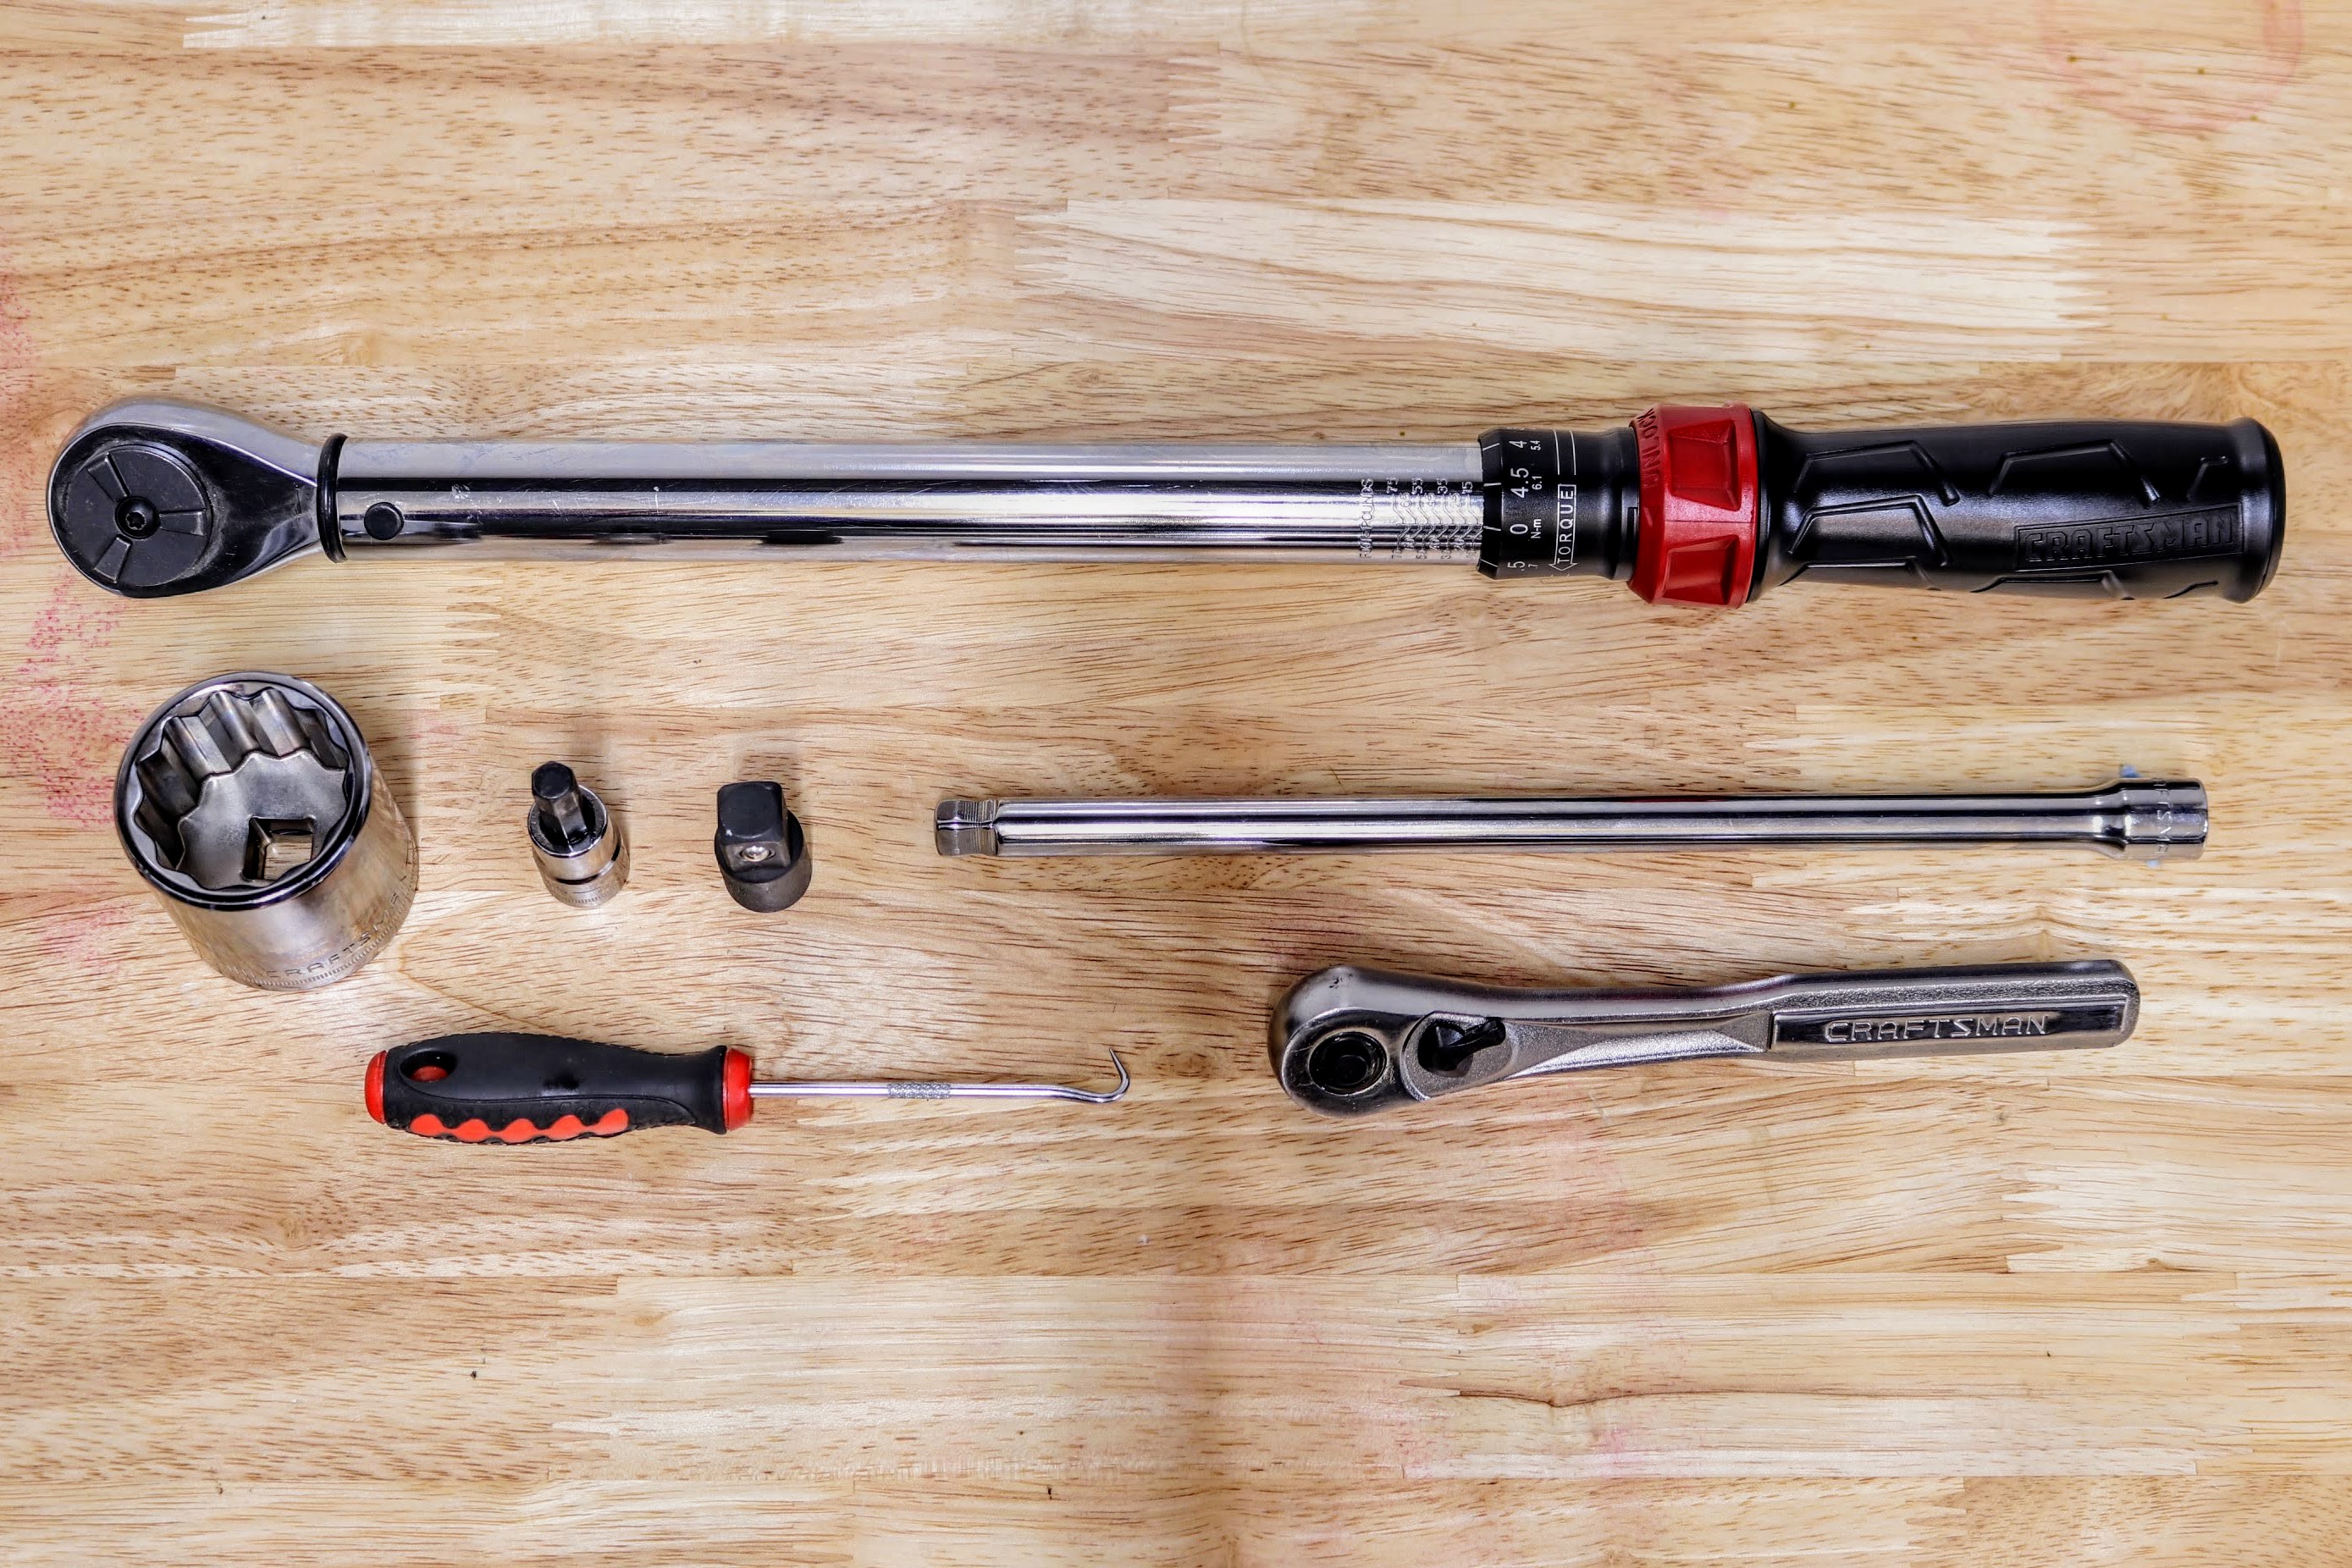
Tools Used

Tool Link
Quick Jack BL-5000XL portable lift Amazon
Jack Stands Amazon
Large Oil Pan Amazon
Funnel Amazon
3/8" Drive Ratchet Amazon
3/8" Drive Torque Wrench Amazon
3/8" Drive Extension Amazon
36 mm 12-Point Socket, 1/2" Drive Amazon
8 mm Hex Key Socket, 3/8" Drive Amazon
3/8" Female to 1/2" Male, Drive Adapter Amazon
Precision Pick/Hook Tool Amazon


Tools used for a Porsche 911 (991.1) oil change

Procedure Used


1. First, we warmed the car to operating temperature. We like to take the car for a short (~15 min) drive to get the oil circulating and evenly heated.
2. We lifted the car off the ground - enough for us to get under the middle of the car to reach the oil filter. We used a QuickJack along with a few jack stands to be on the safe side while under the car. Porsche 911 (991) on the QuickJack BL-5000XL portable lift
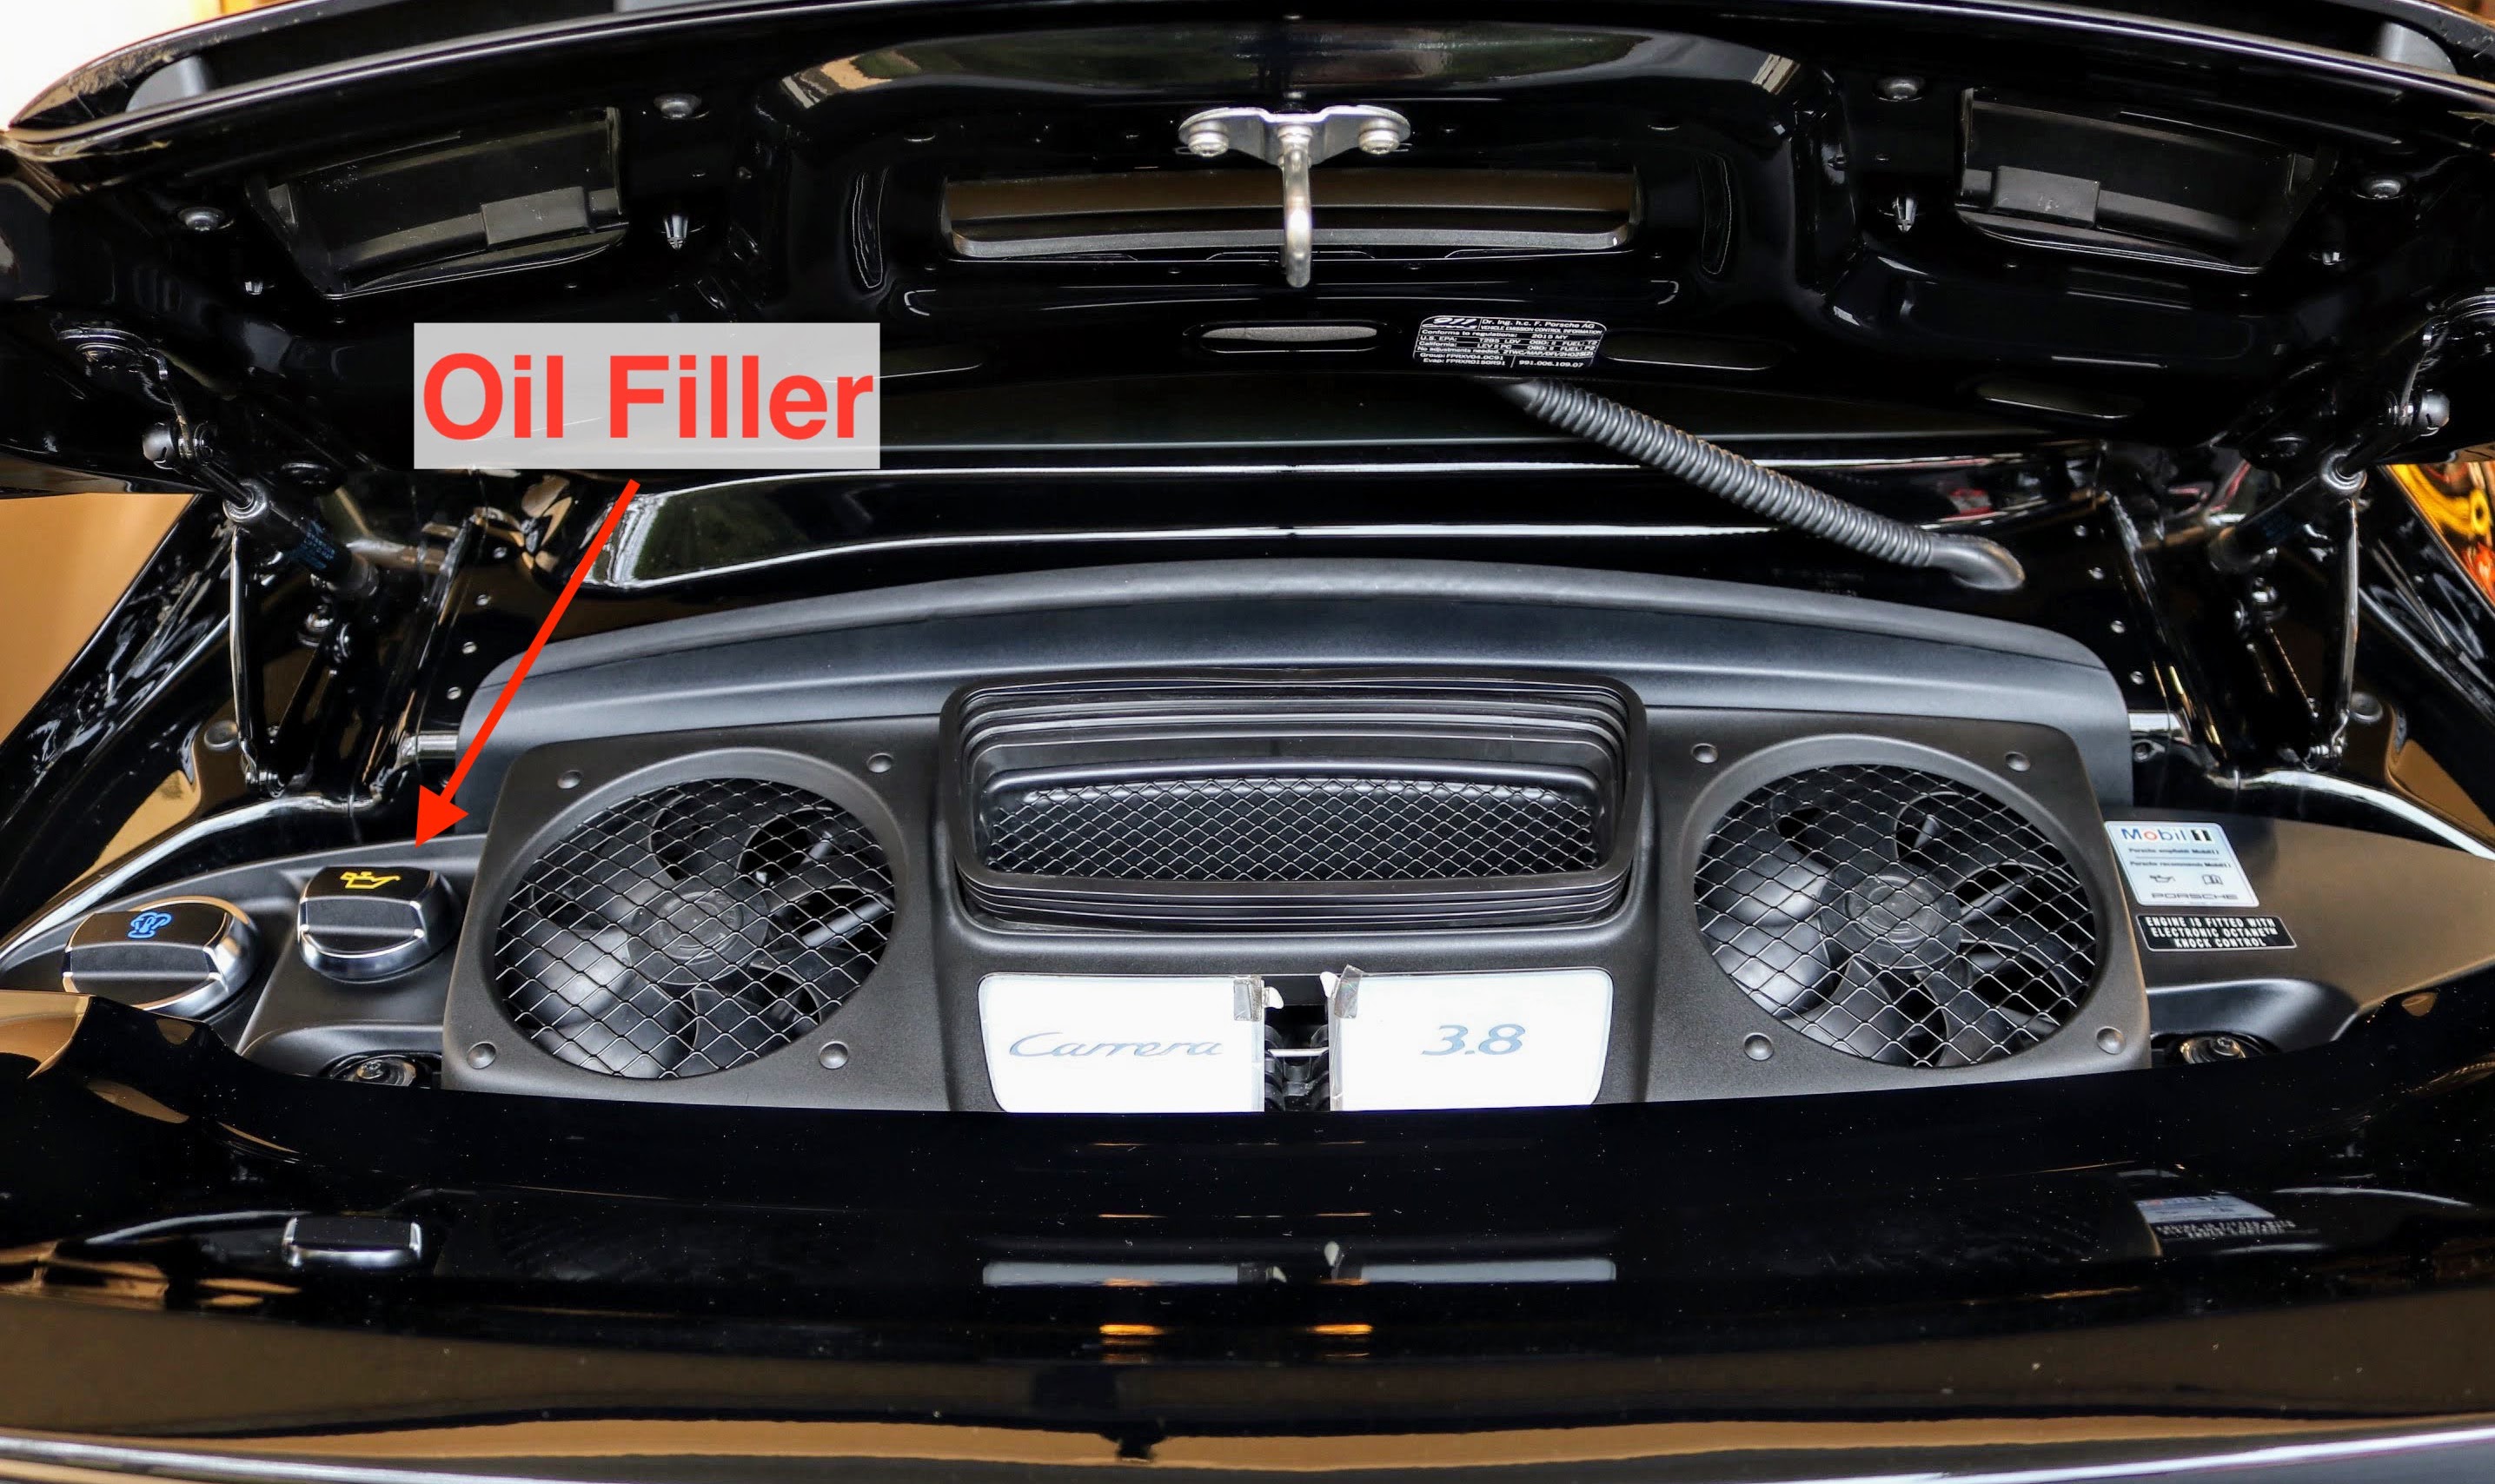
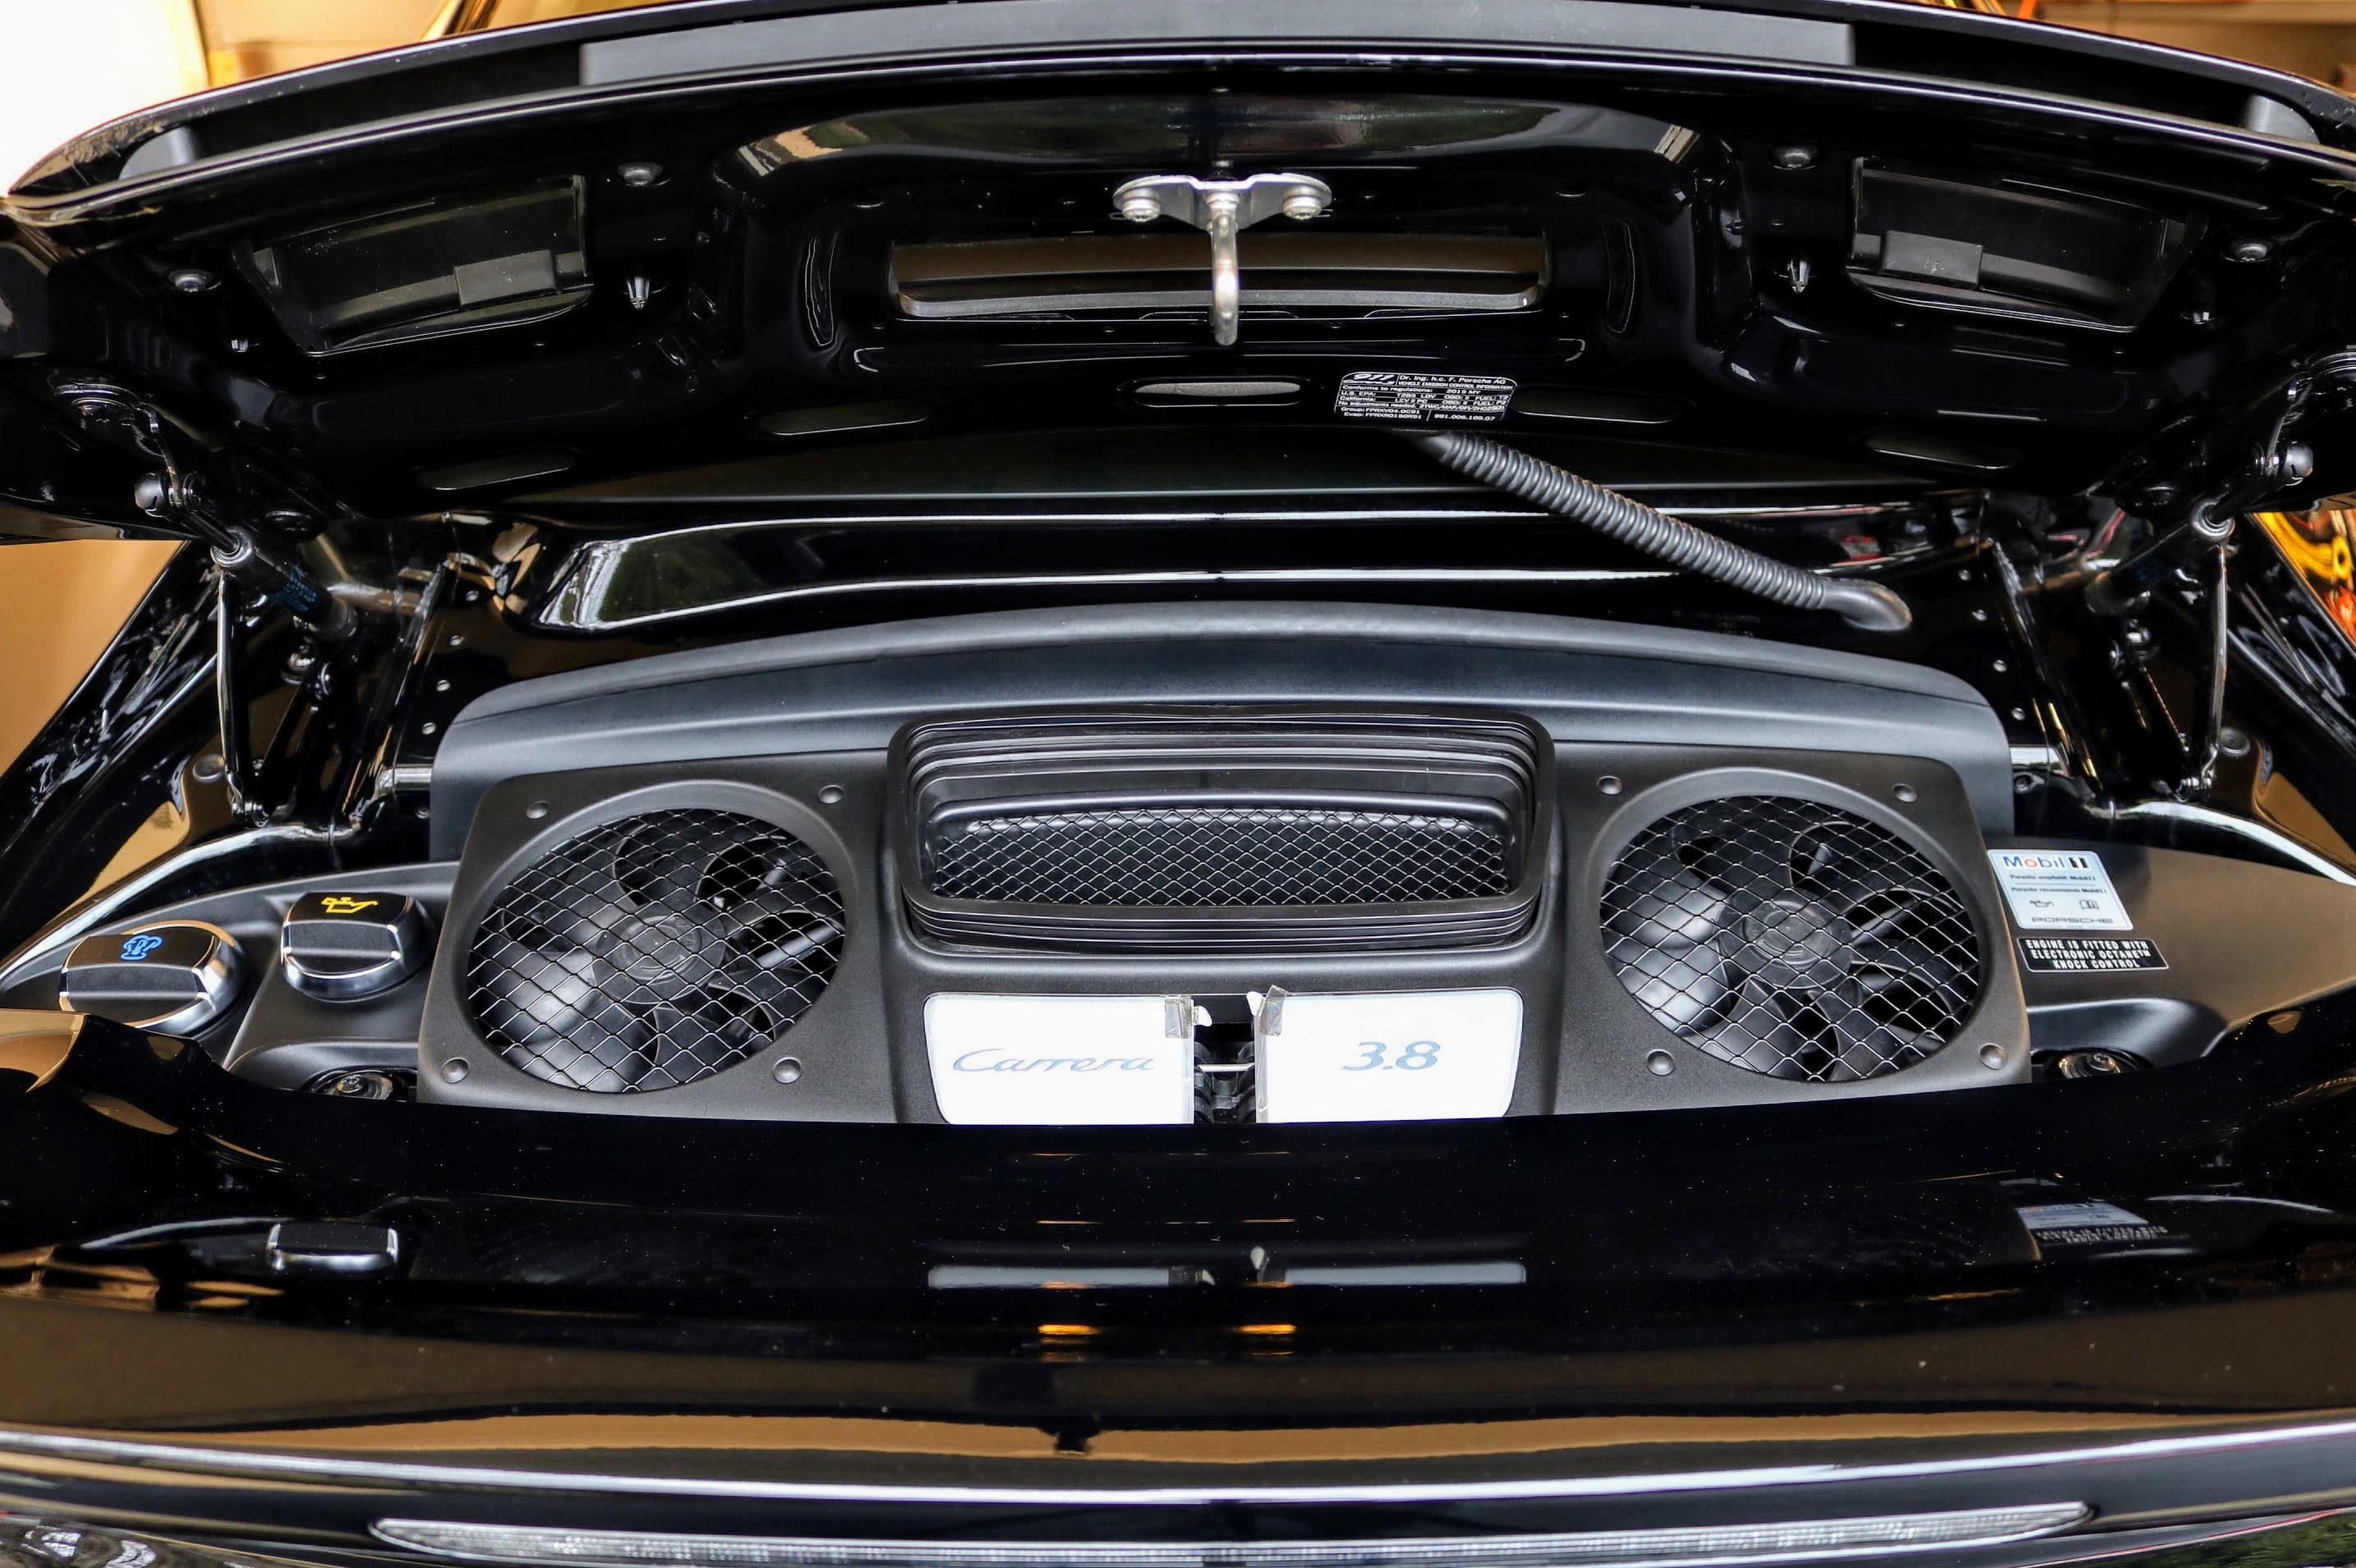
3. Before removing any oil, we checked that we could fully open the oil filler cap, which is located on the left side of the rear compartment. We leave the cap on, but completely loose. This allows air to easily displace the oil as it is drained. Although, it should never be an issue for this car, insuring that the filler cap could be removed before draining any fluid is a good practice. It is better to be safe than realizing the filler cap is seized closed after draining all of the oil - which would leave us with an immobile vehicle! Porsche 911 (991.1) engine compartment cover and oil filler
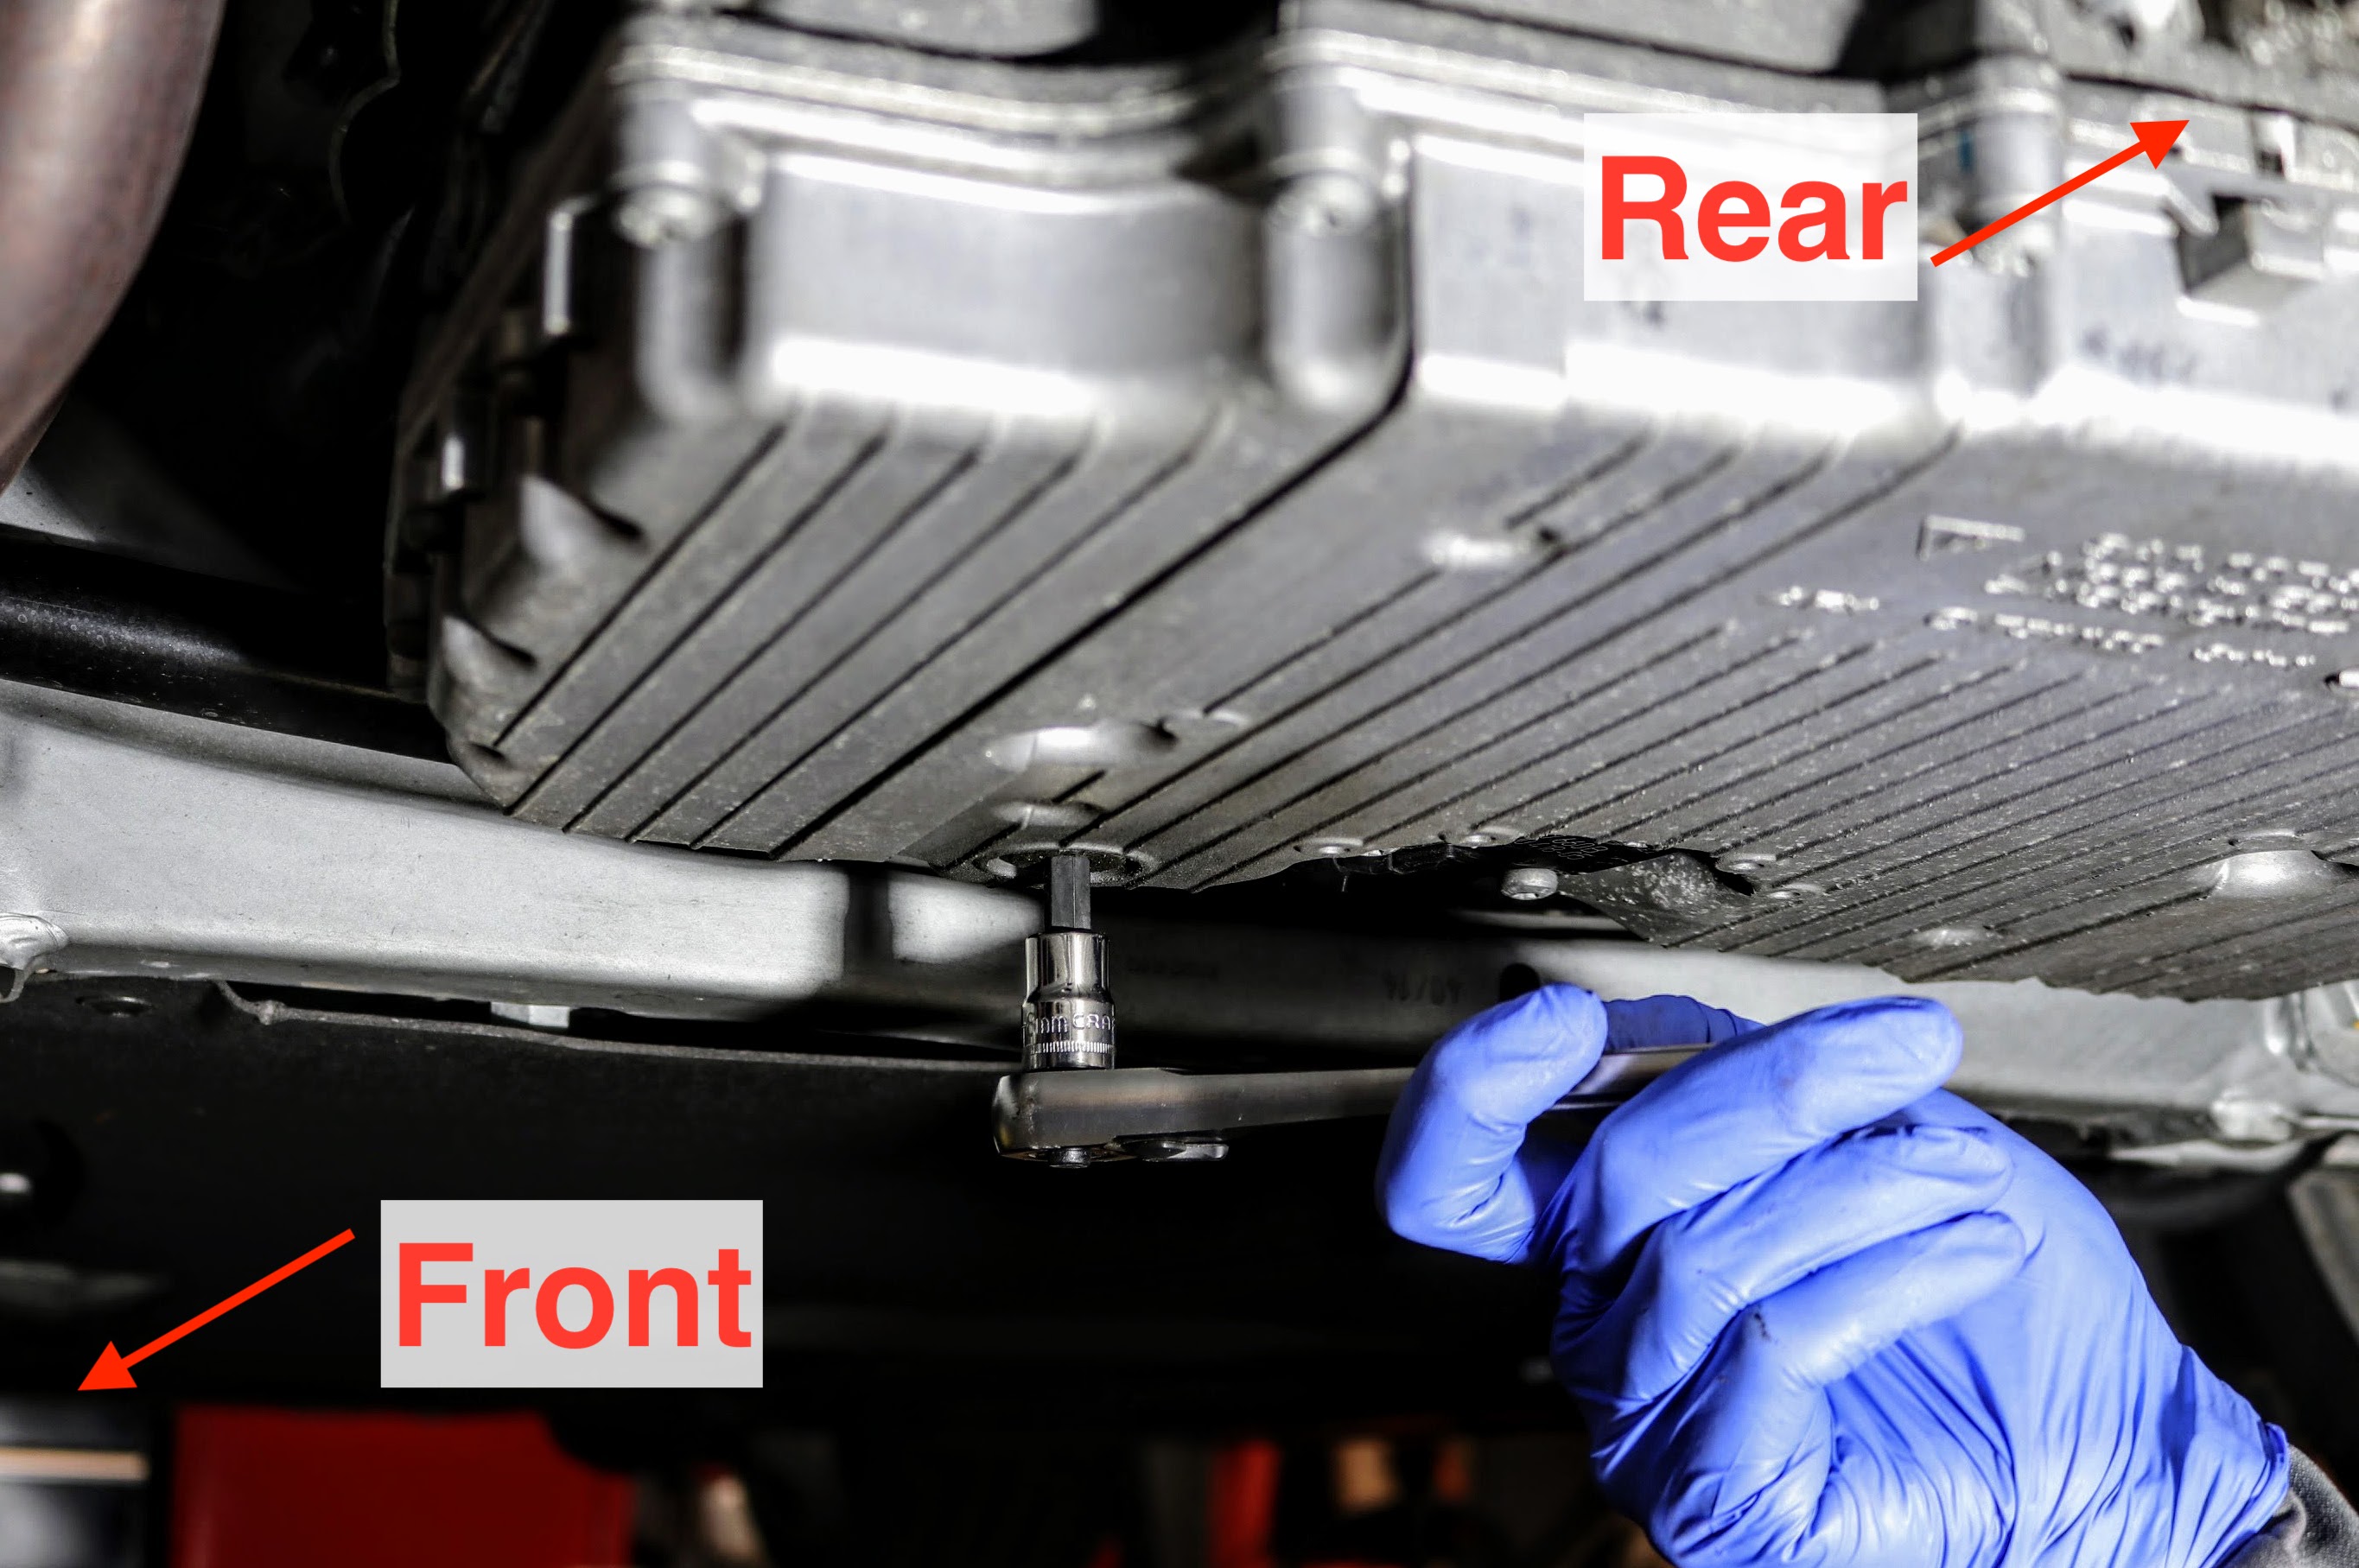
4. With the filler cap opened, and a large oil pan under the drain plug, we loosened the drain plug with the 8 mm hex key socket. Roughly 7.4 L of oil drained. Porsche 911 (991.1) oil drain plug removal
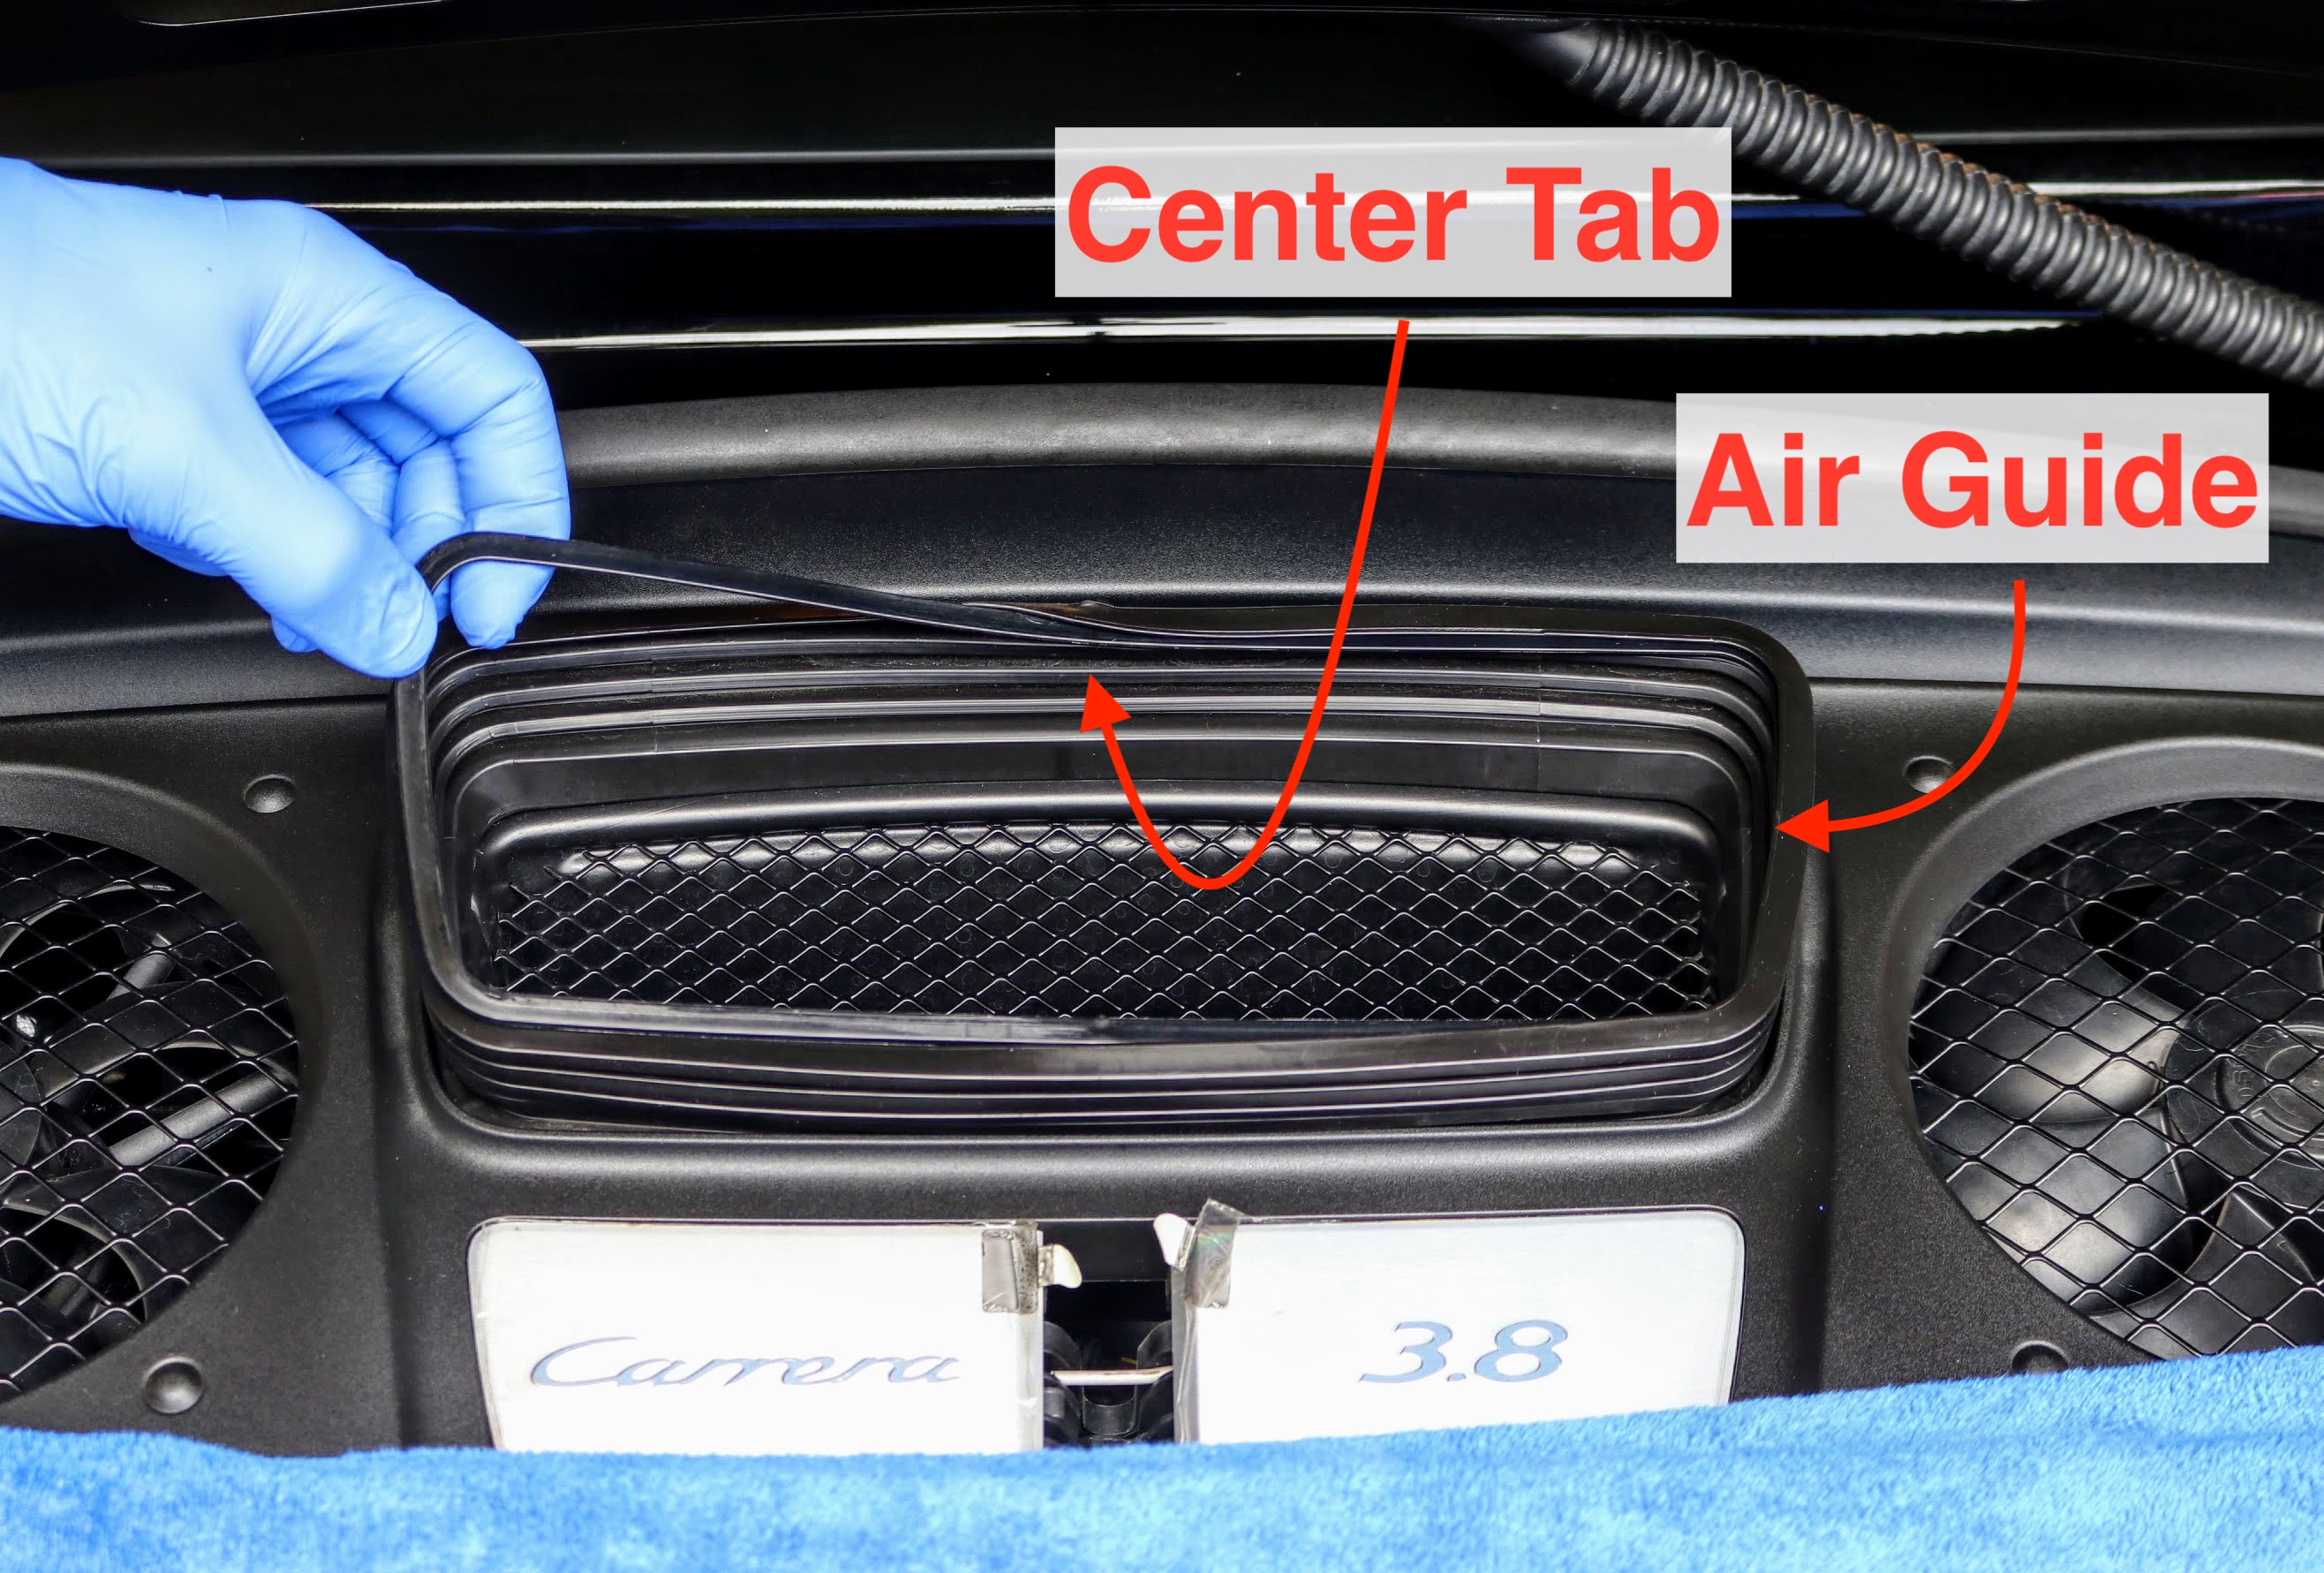
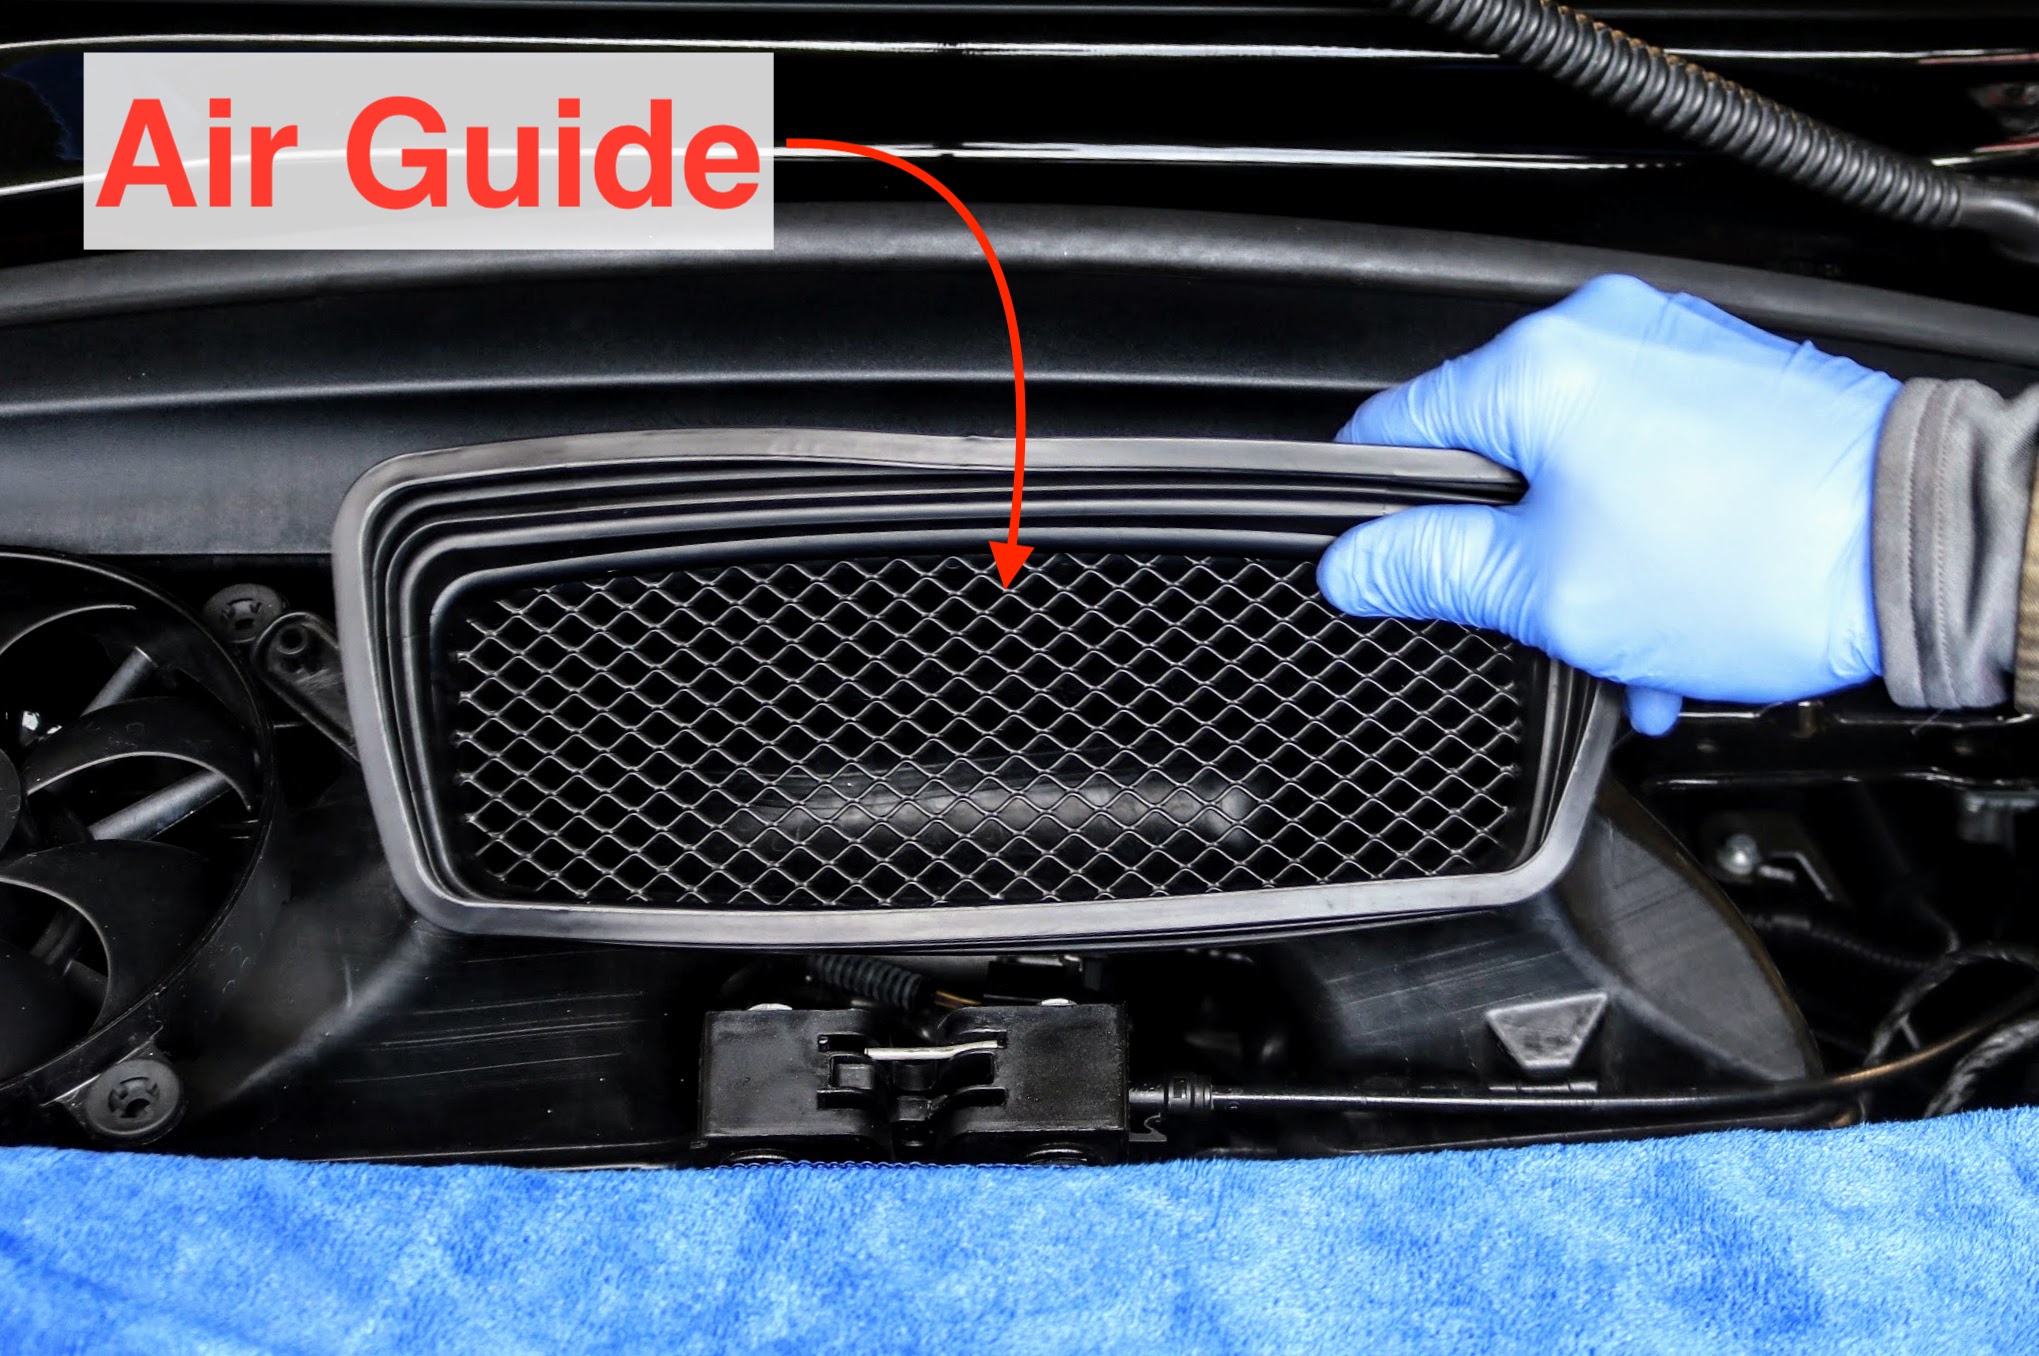
5. While the oil was draining, we moved to the top of the engine compartment. To gain access to the oil filter, the inner plastic retaining piece of the air guide intake was removed by pulling it out of the rubber intake. The plastic piece is attached at the top center. Porsche 911 (991.1) air guide retaining piece
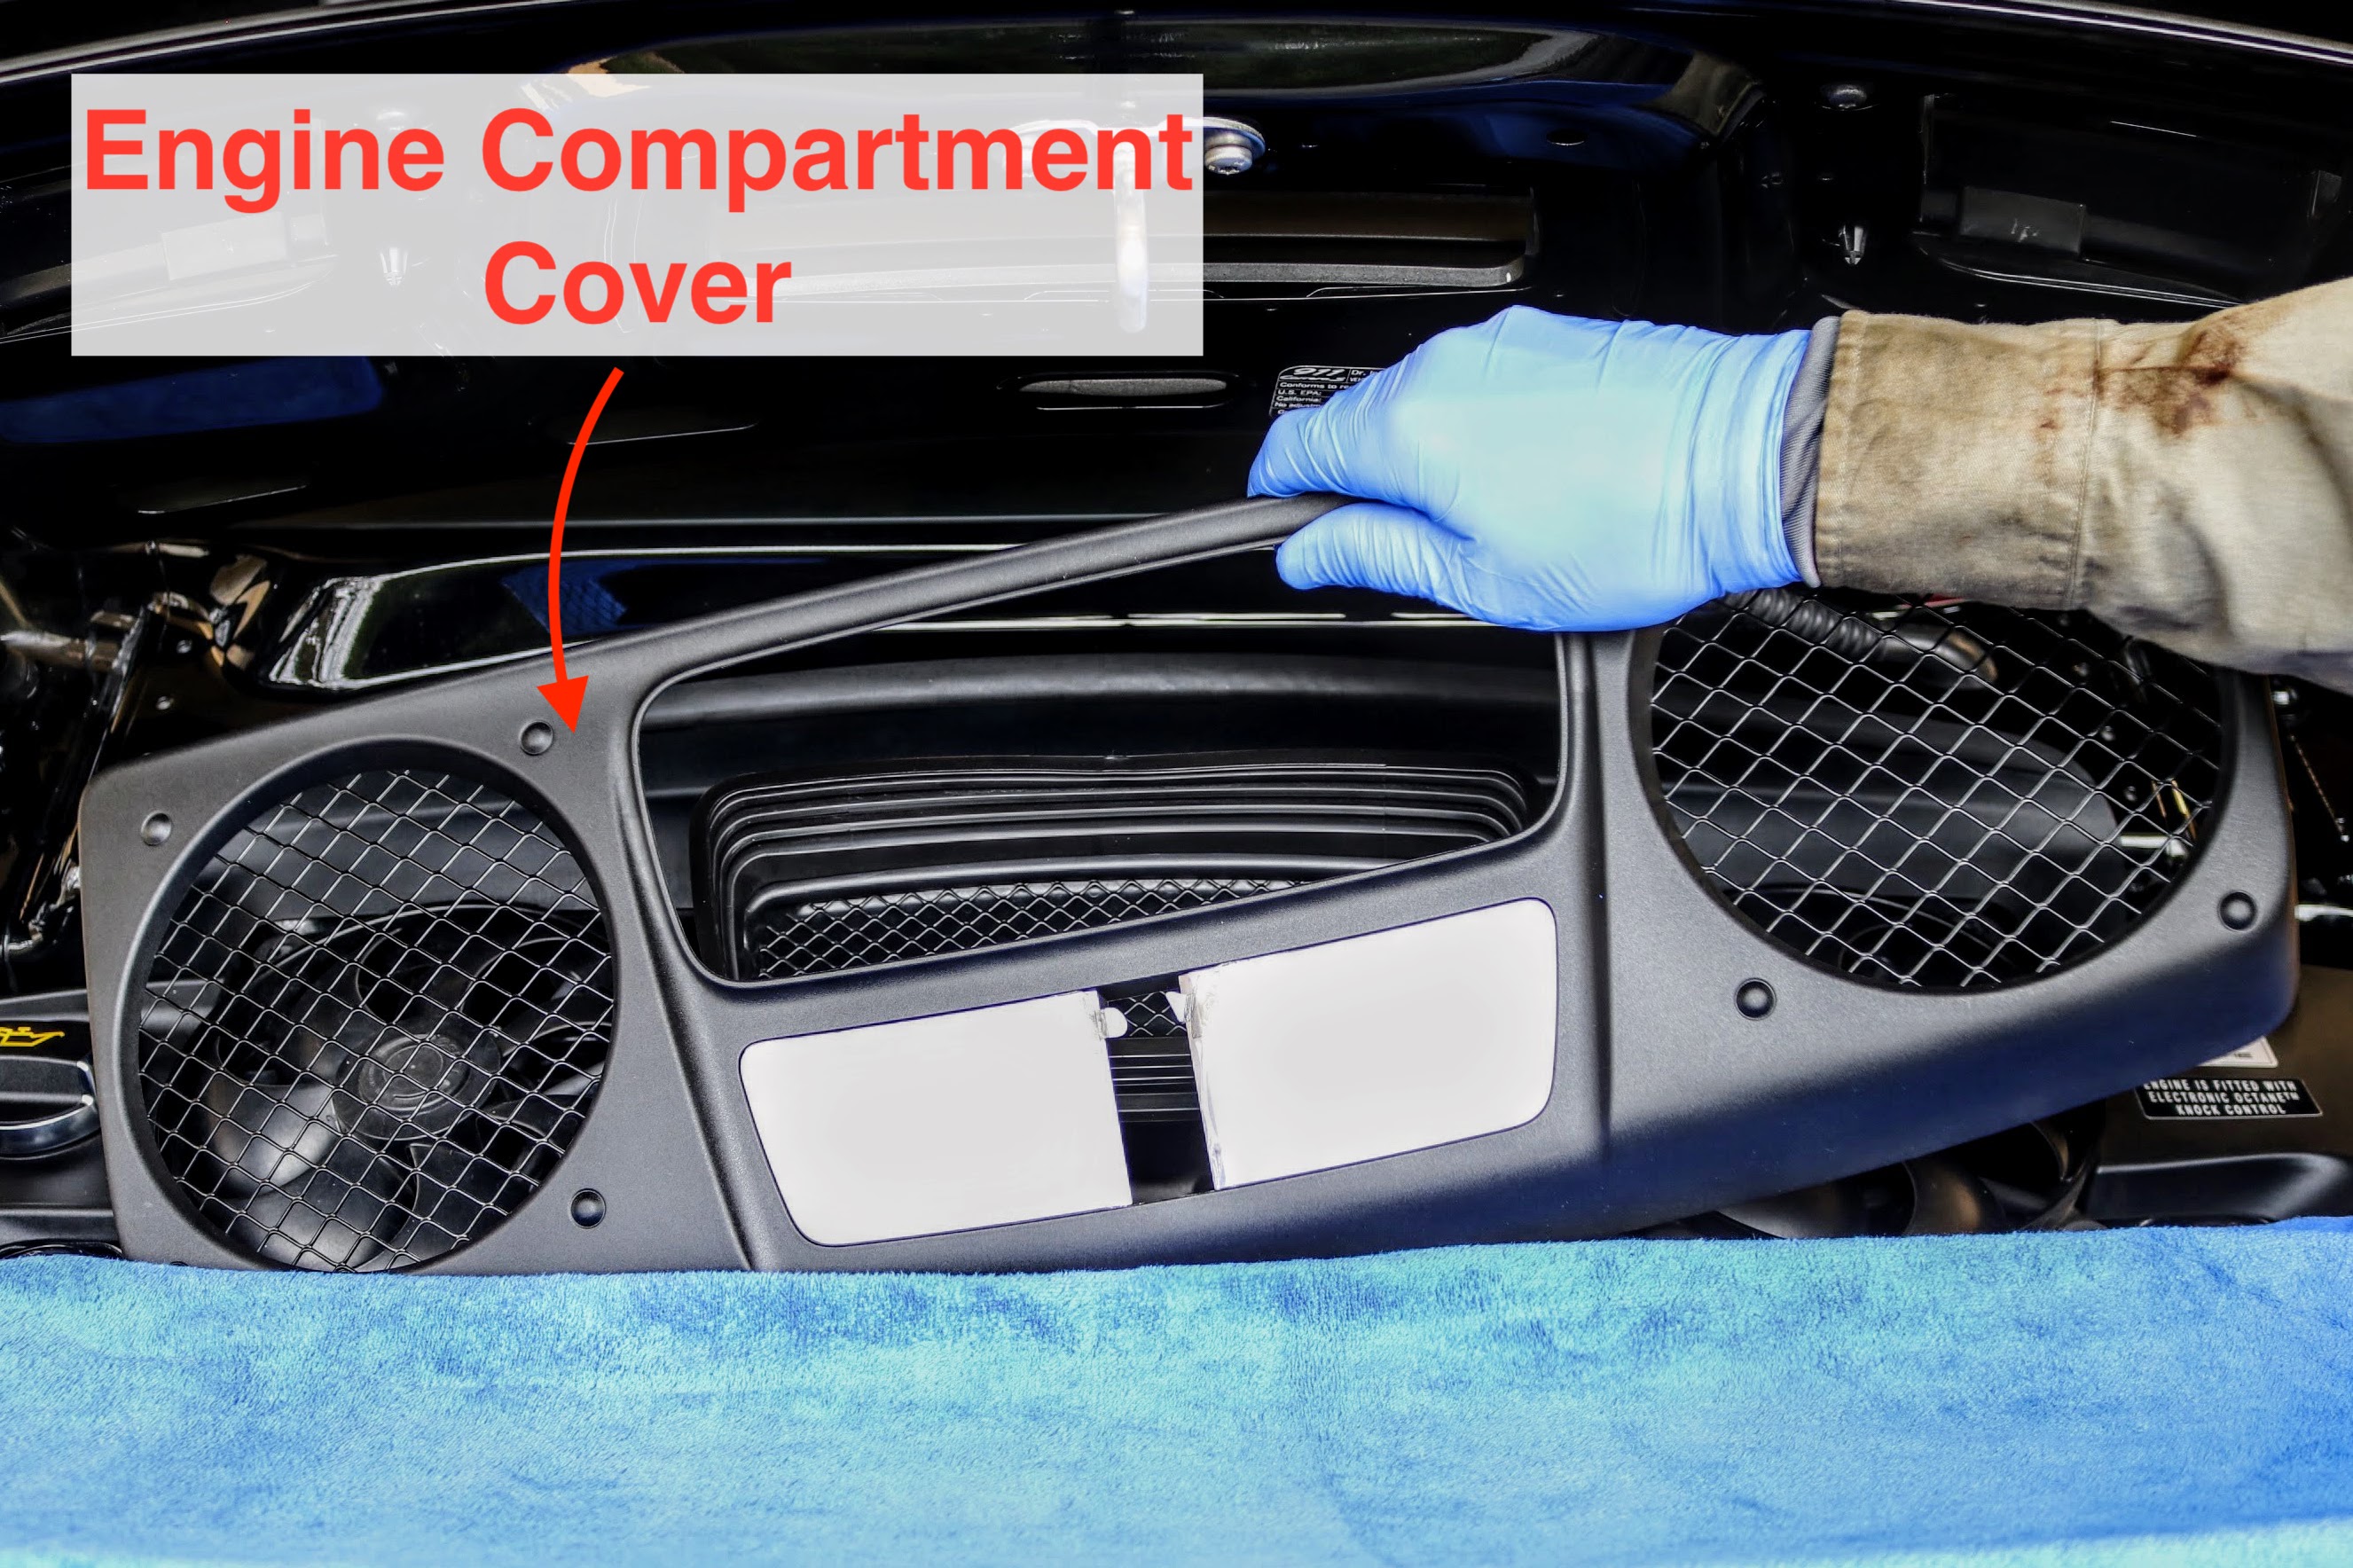
6. Next, the engine compartment cover was removed by simply pulling upwards from the edges. Porsche 911 (991.1) engine compartment cover removal
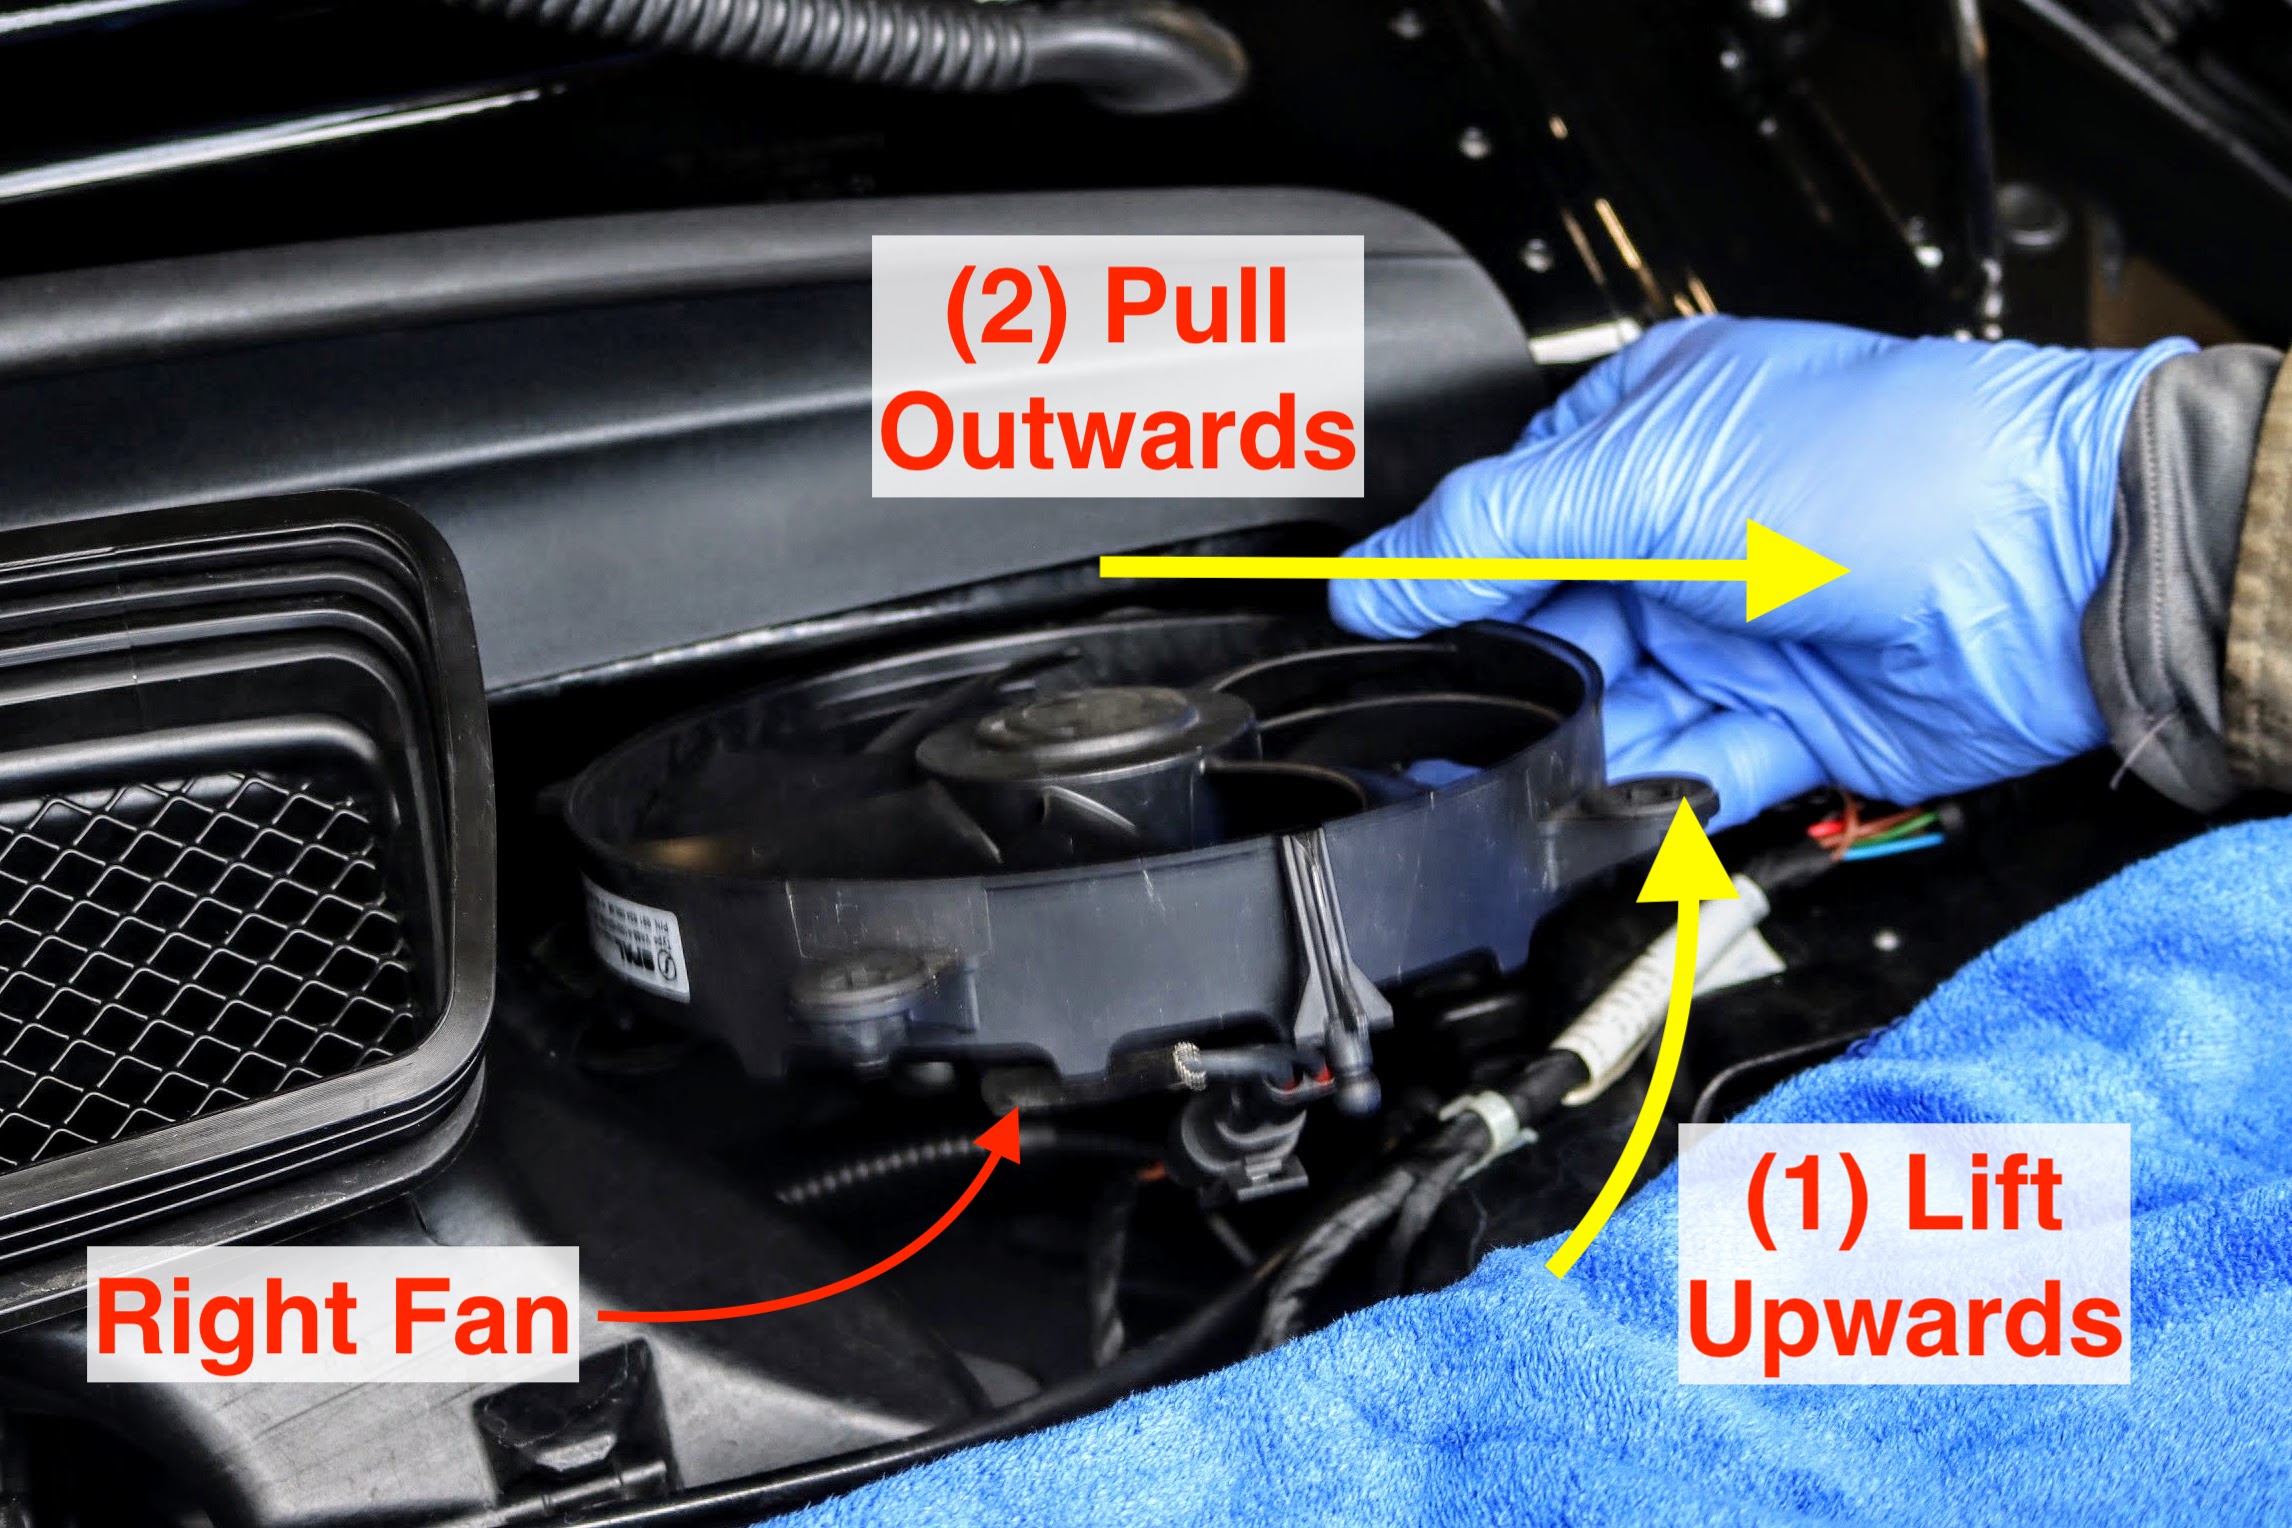
7. The right side fan was removed by pulling slightly upward on the bottom and then pulling the fan towards the rear. The fan is held in by the same plastic/rubber style fasteners as the engine compartment cover. NOTE: the fans may turn on at anytime. Either be extremely careful not put any fingers between the fan blades, or disconnect the battery when working with the fan. Porsche 911 (991.1) right side engine fan removal
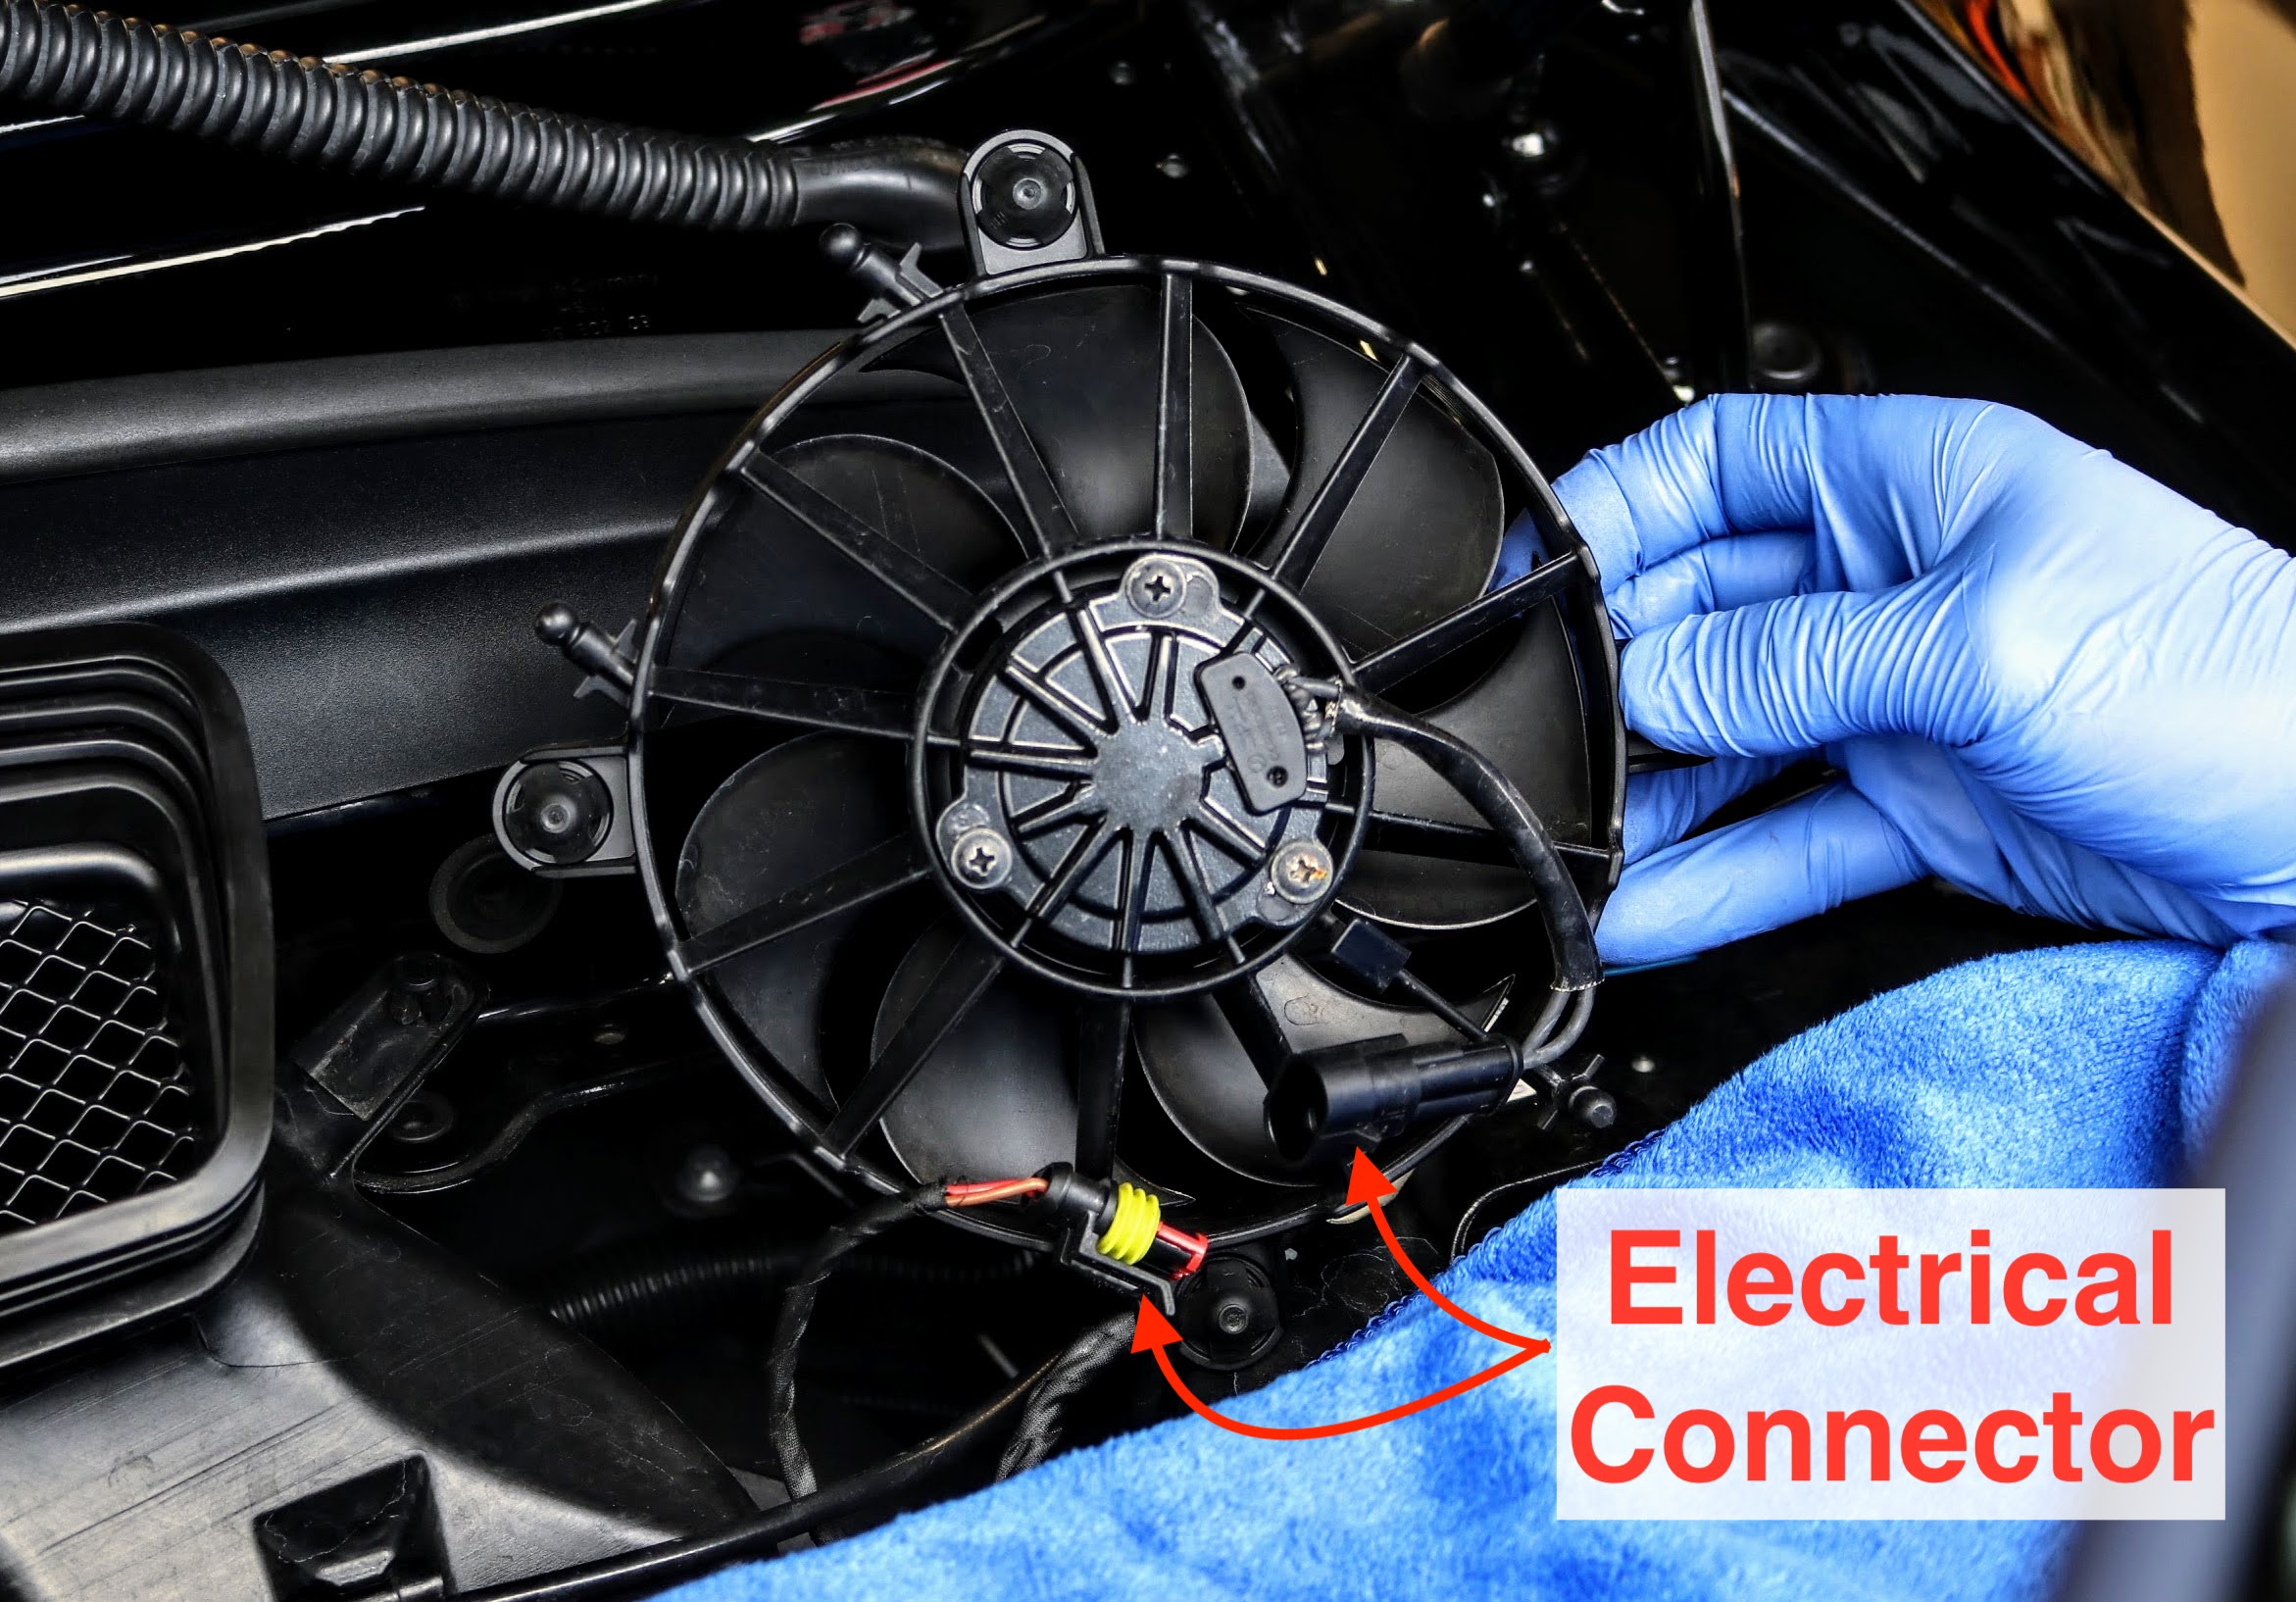
8. To be able to move the fan out of the way, we disconnected the electrical connector, located on the rear of the fan. Porsche 911 (991.1) right side engine fan electrical connector removal
9. With the right fan now fully removed, we removed the air guide intake piece by pulling upwards. It is attached near the top with a couple of the same style of plastic/rubber fasteners. NOTE: we may have been able to get away with not removing the air guide. Porsche 911 (991.1) air guide removal
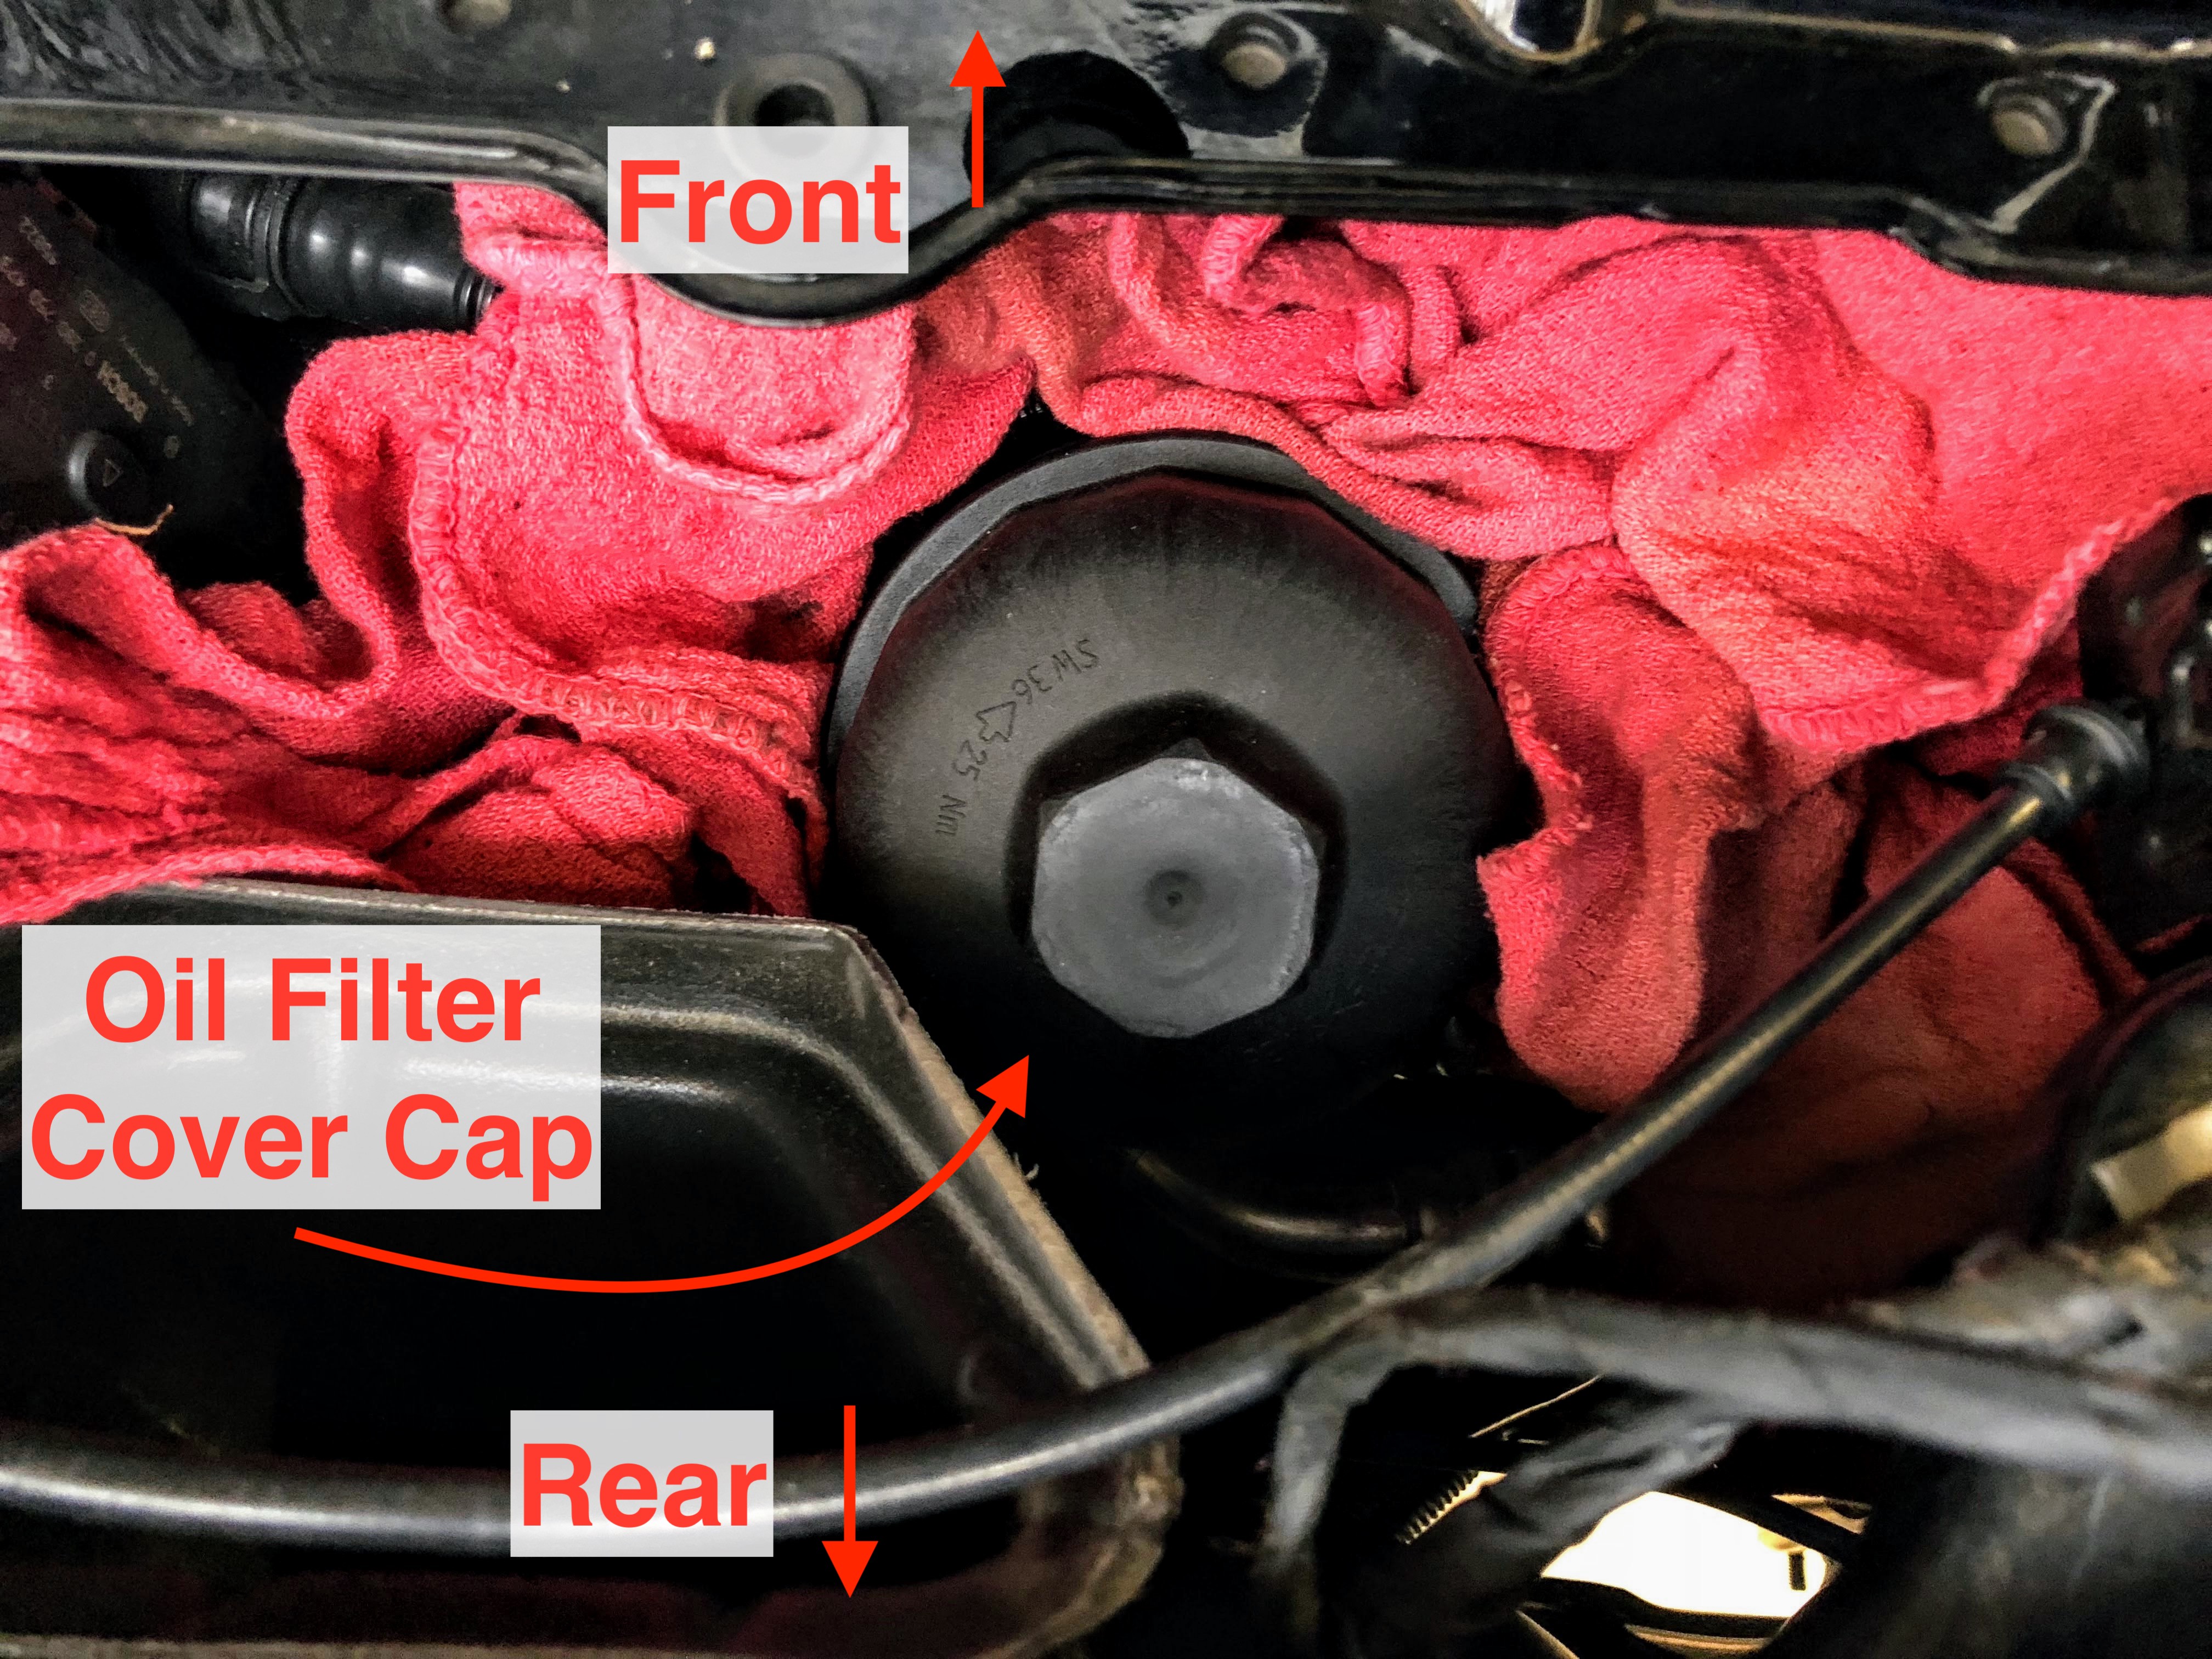
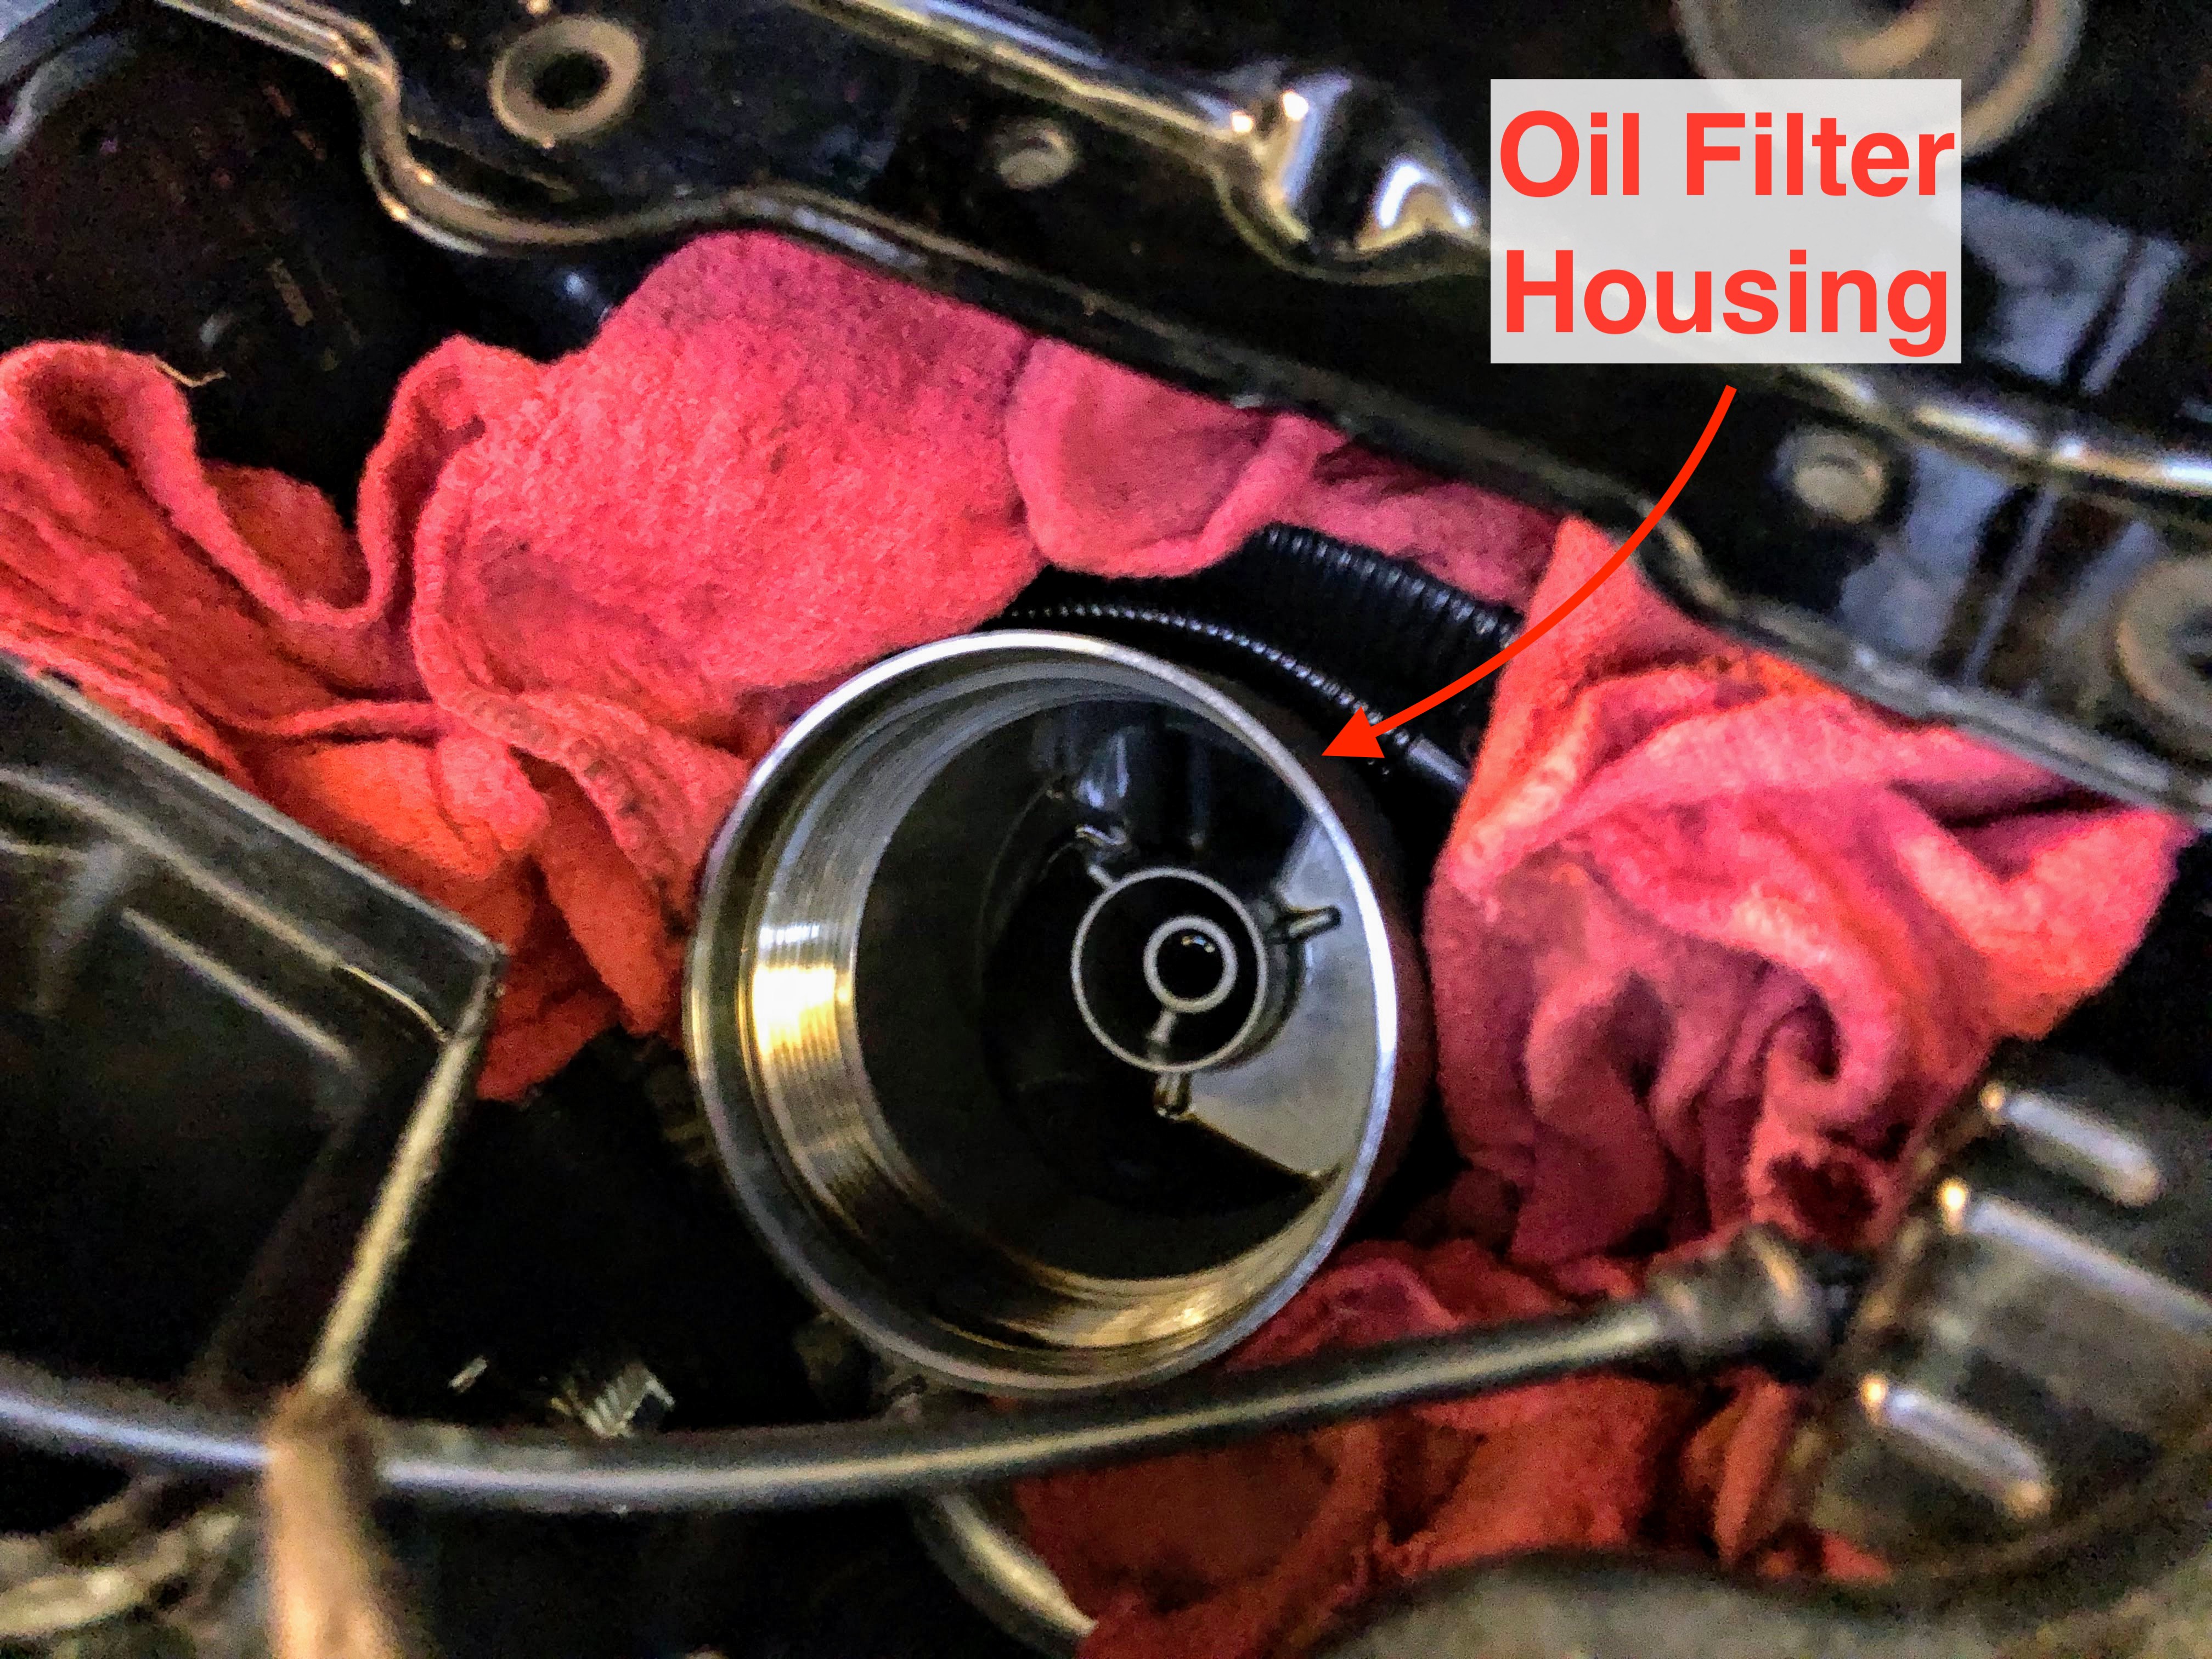
10. At this point, we now had access to the oil filter. We placed a few shop rags to catch any oil that would drip when removing the filter. NOTE: The engine may be hot. Porsche 911 (991.1) oil filter housing
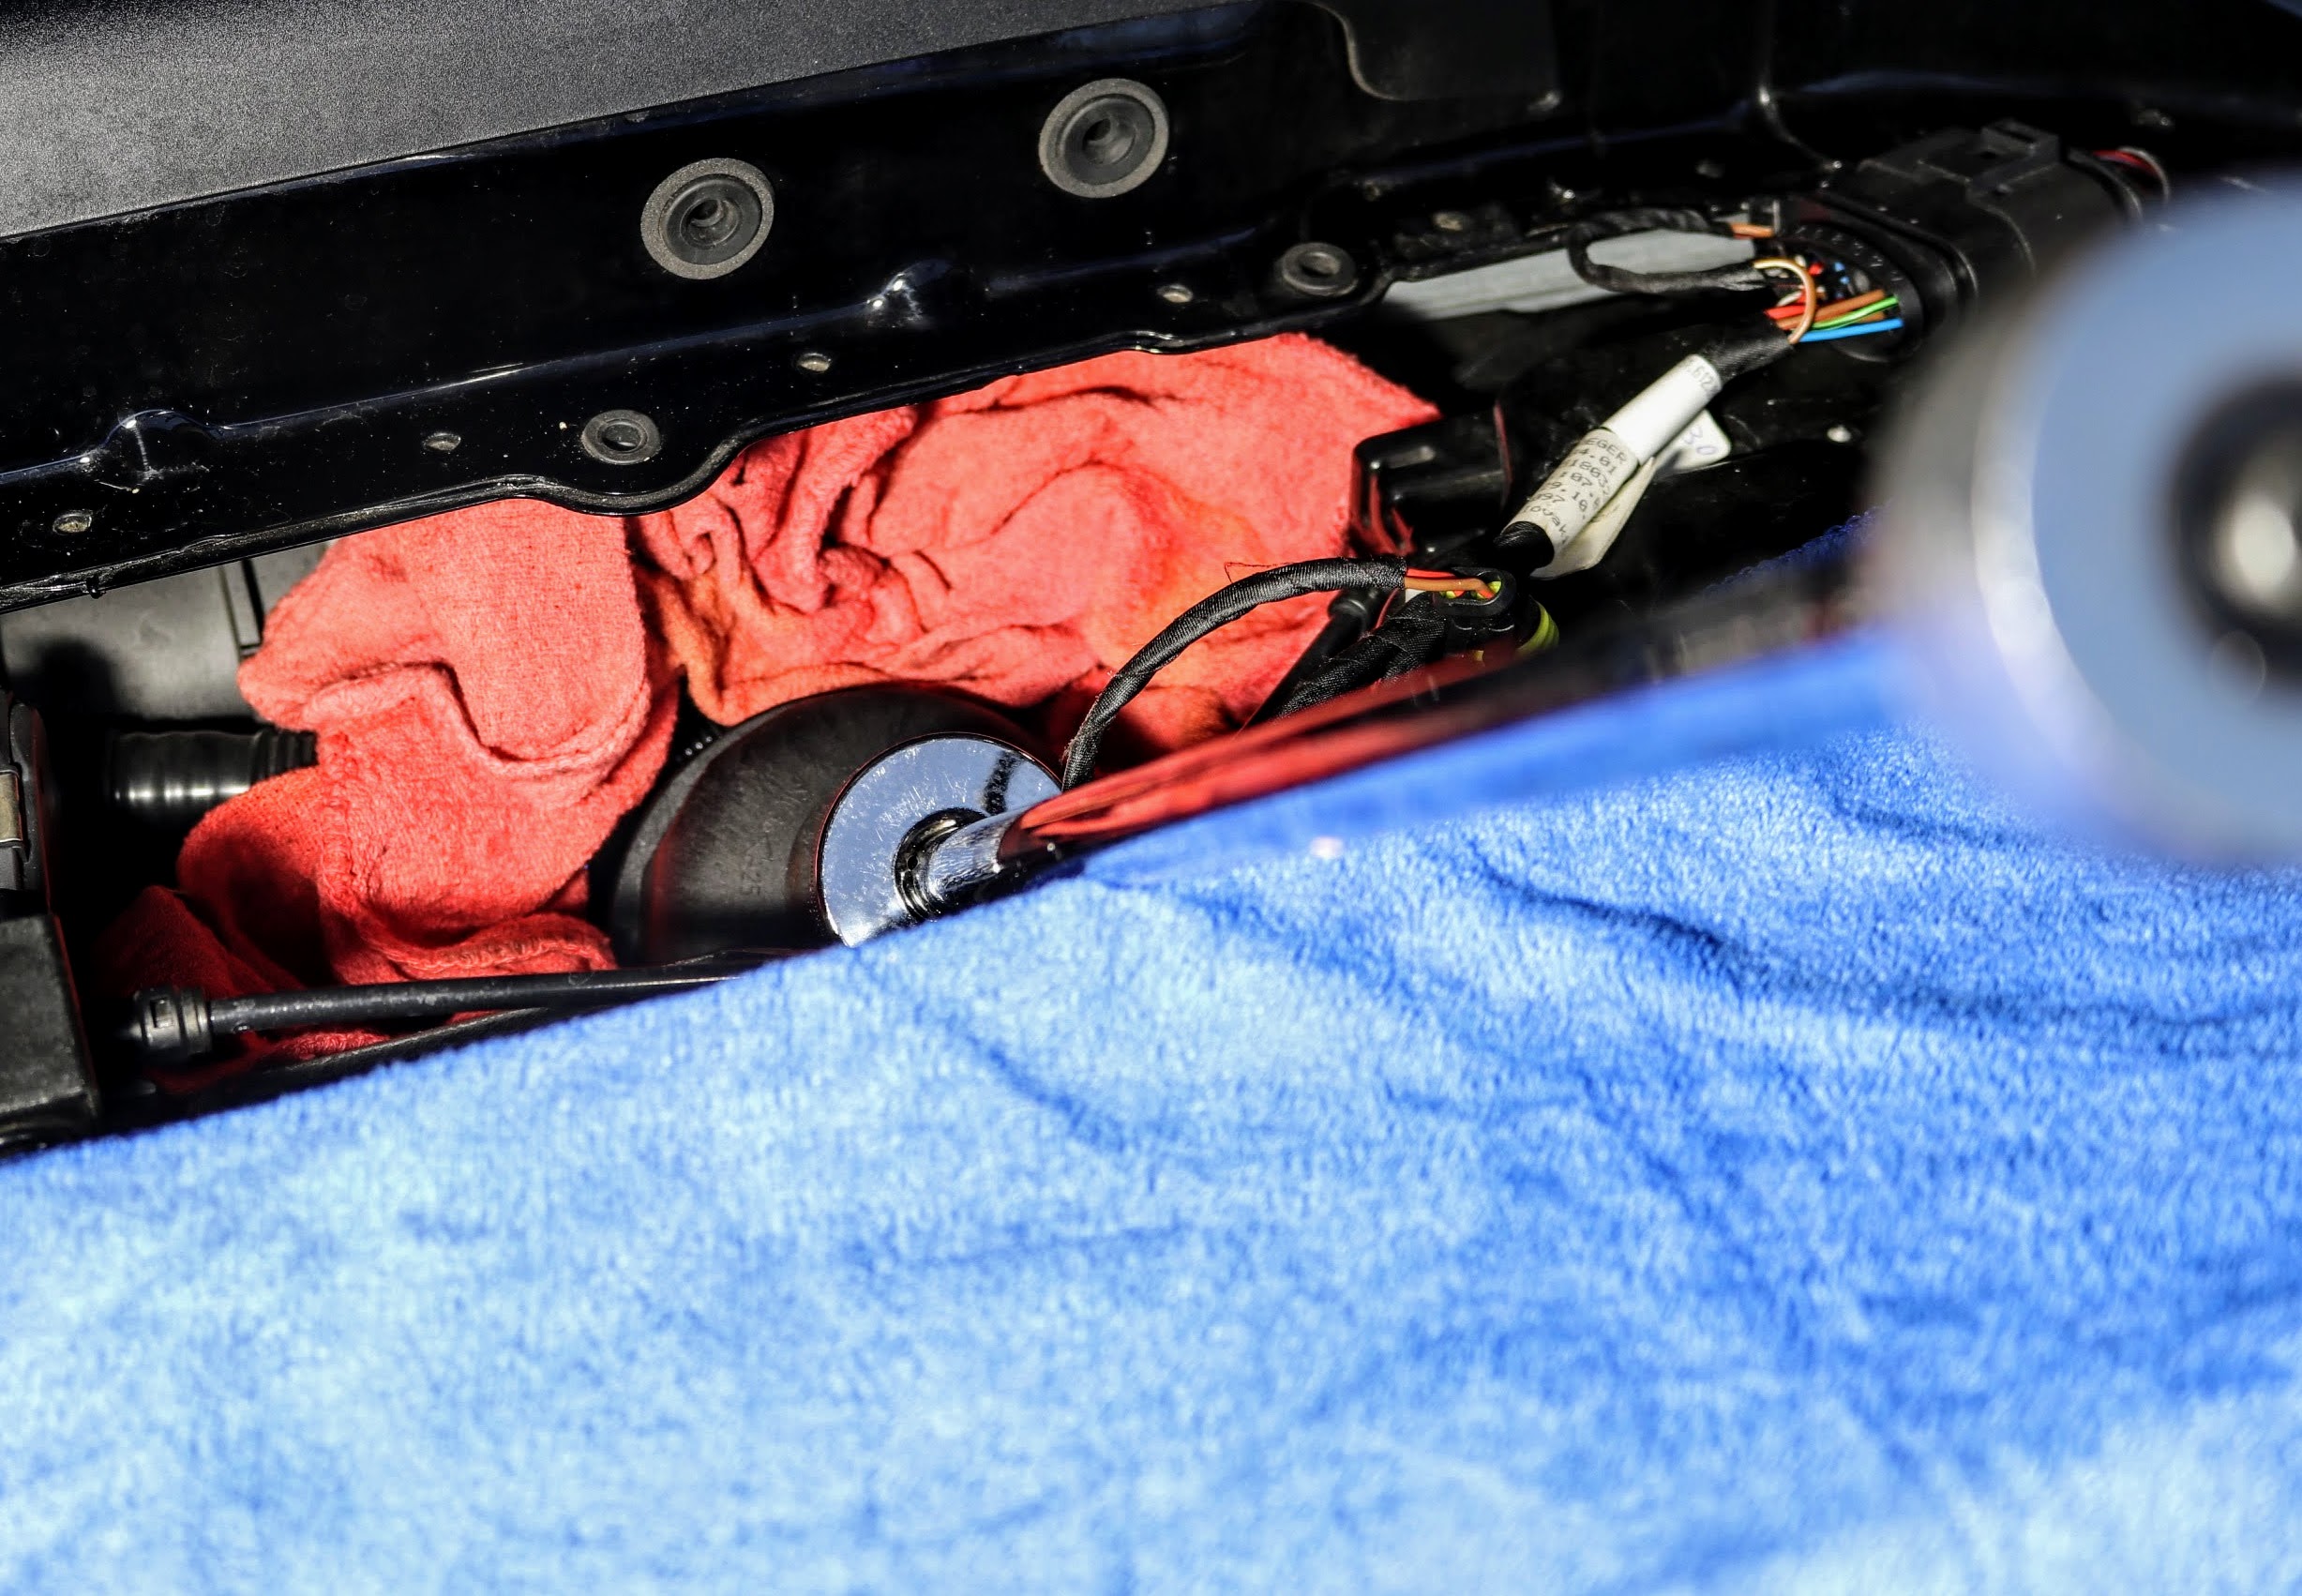
11. Next, we used a 36 mm socket and aextension to open the oil filter cover cap by turning counter-clockwise. NOTE: since the 36 mm socket is 1/2" drive, we used a 3/8" female to 1/2" male drive adapter. Porsche 911 (991.1) loosening oil filter cover cap
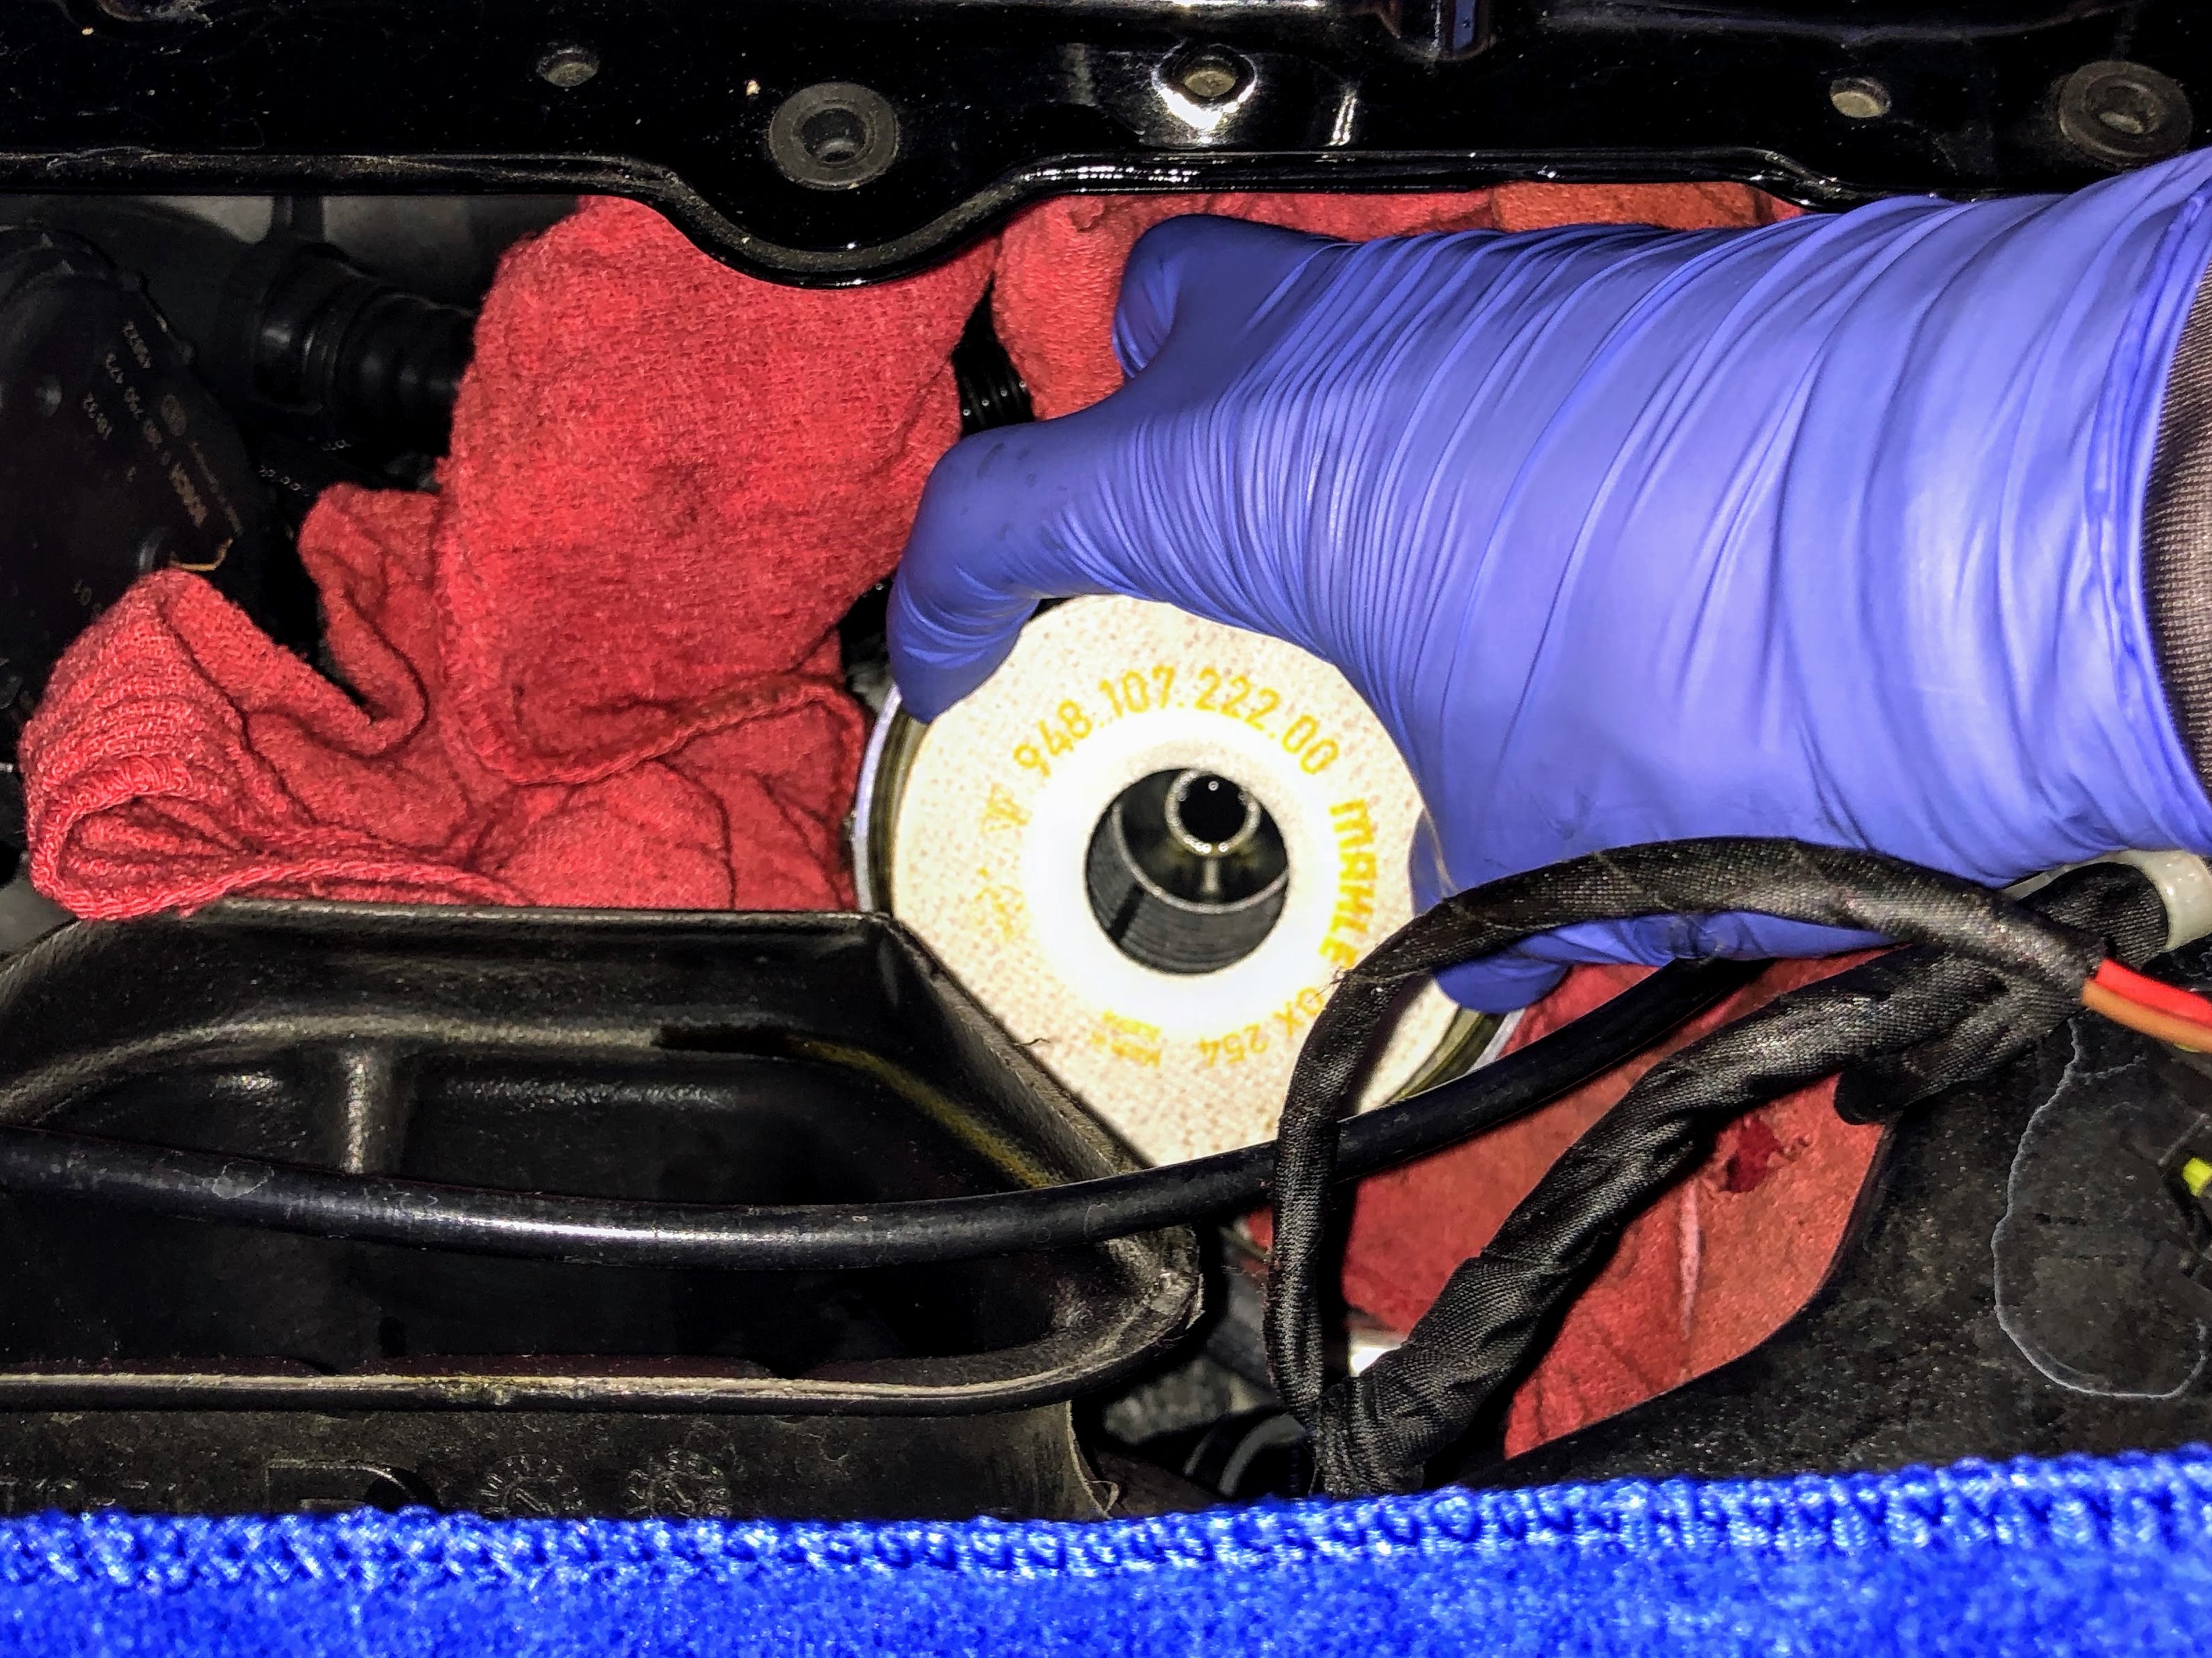
12. The old oil filter element was removed by pulling it upwards, out of the filter housing. It does take a little bit of force to remove. We also had a plastic bag near by to quickly put the filter in order to avoid dripping oil everywhere. Porsche 911 (991.1) oil filter removal
13. The new oil filter element was replaced -in the same orientation as the old one - by pushing it downward. Insure that the filter element is seated all the way and not loose. It should not be able to move. Porsche 911 (991.1) oil filter intstallation
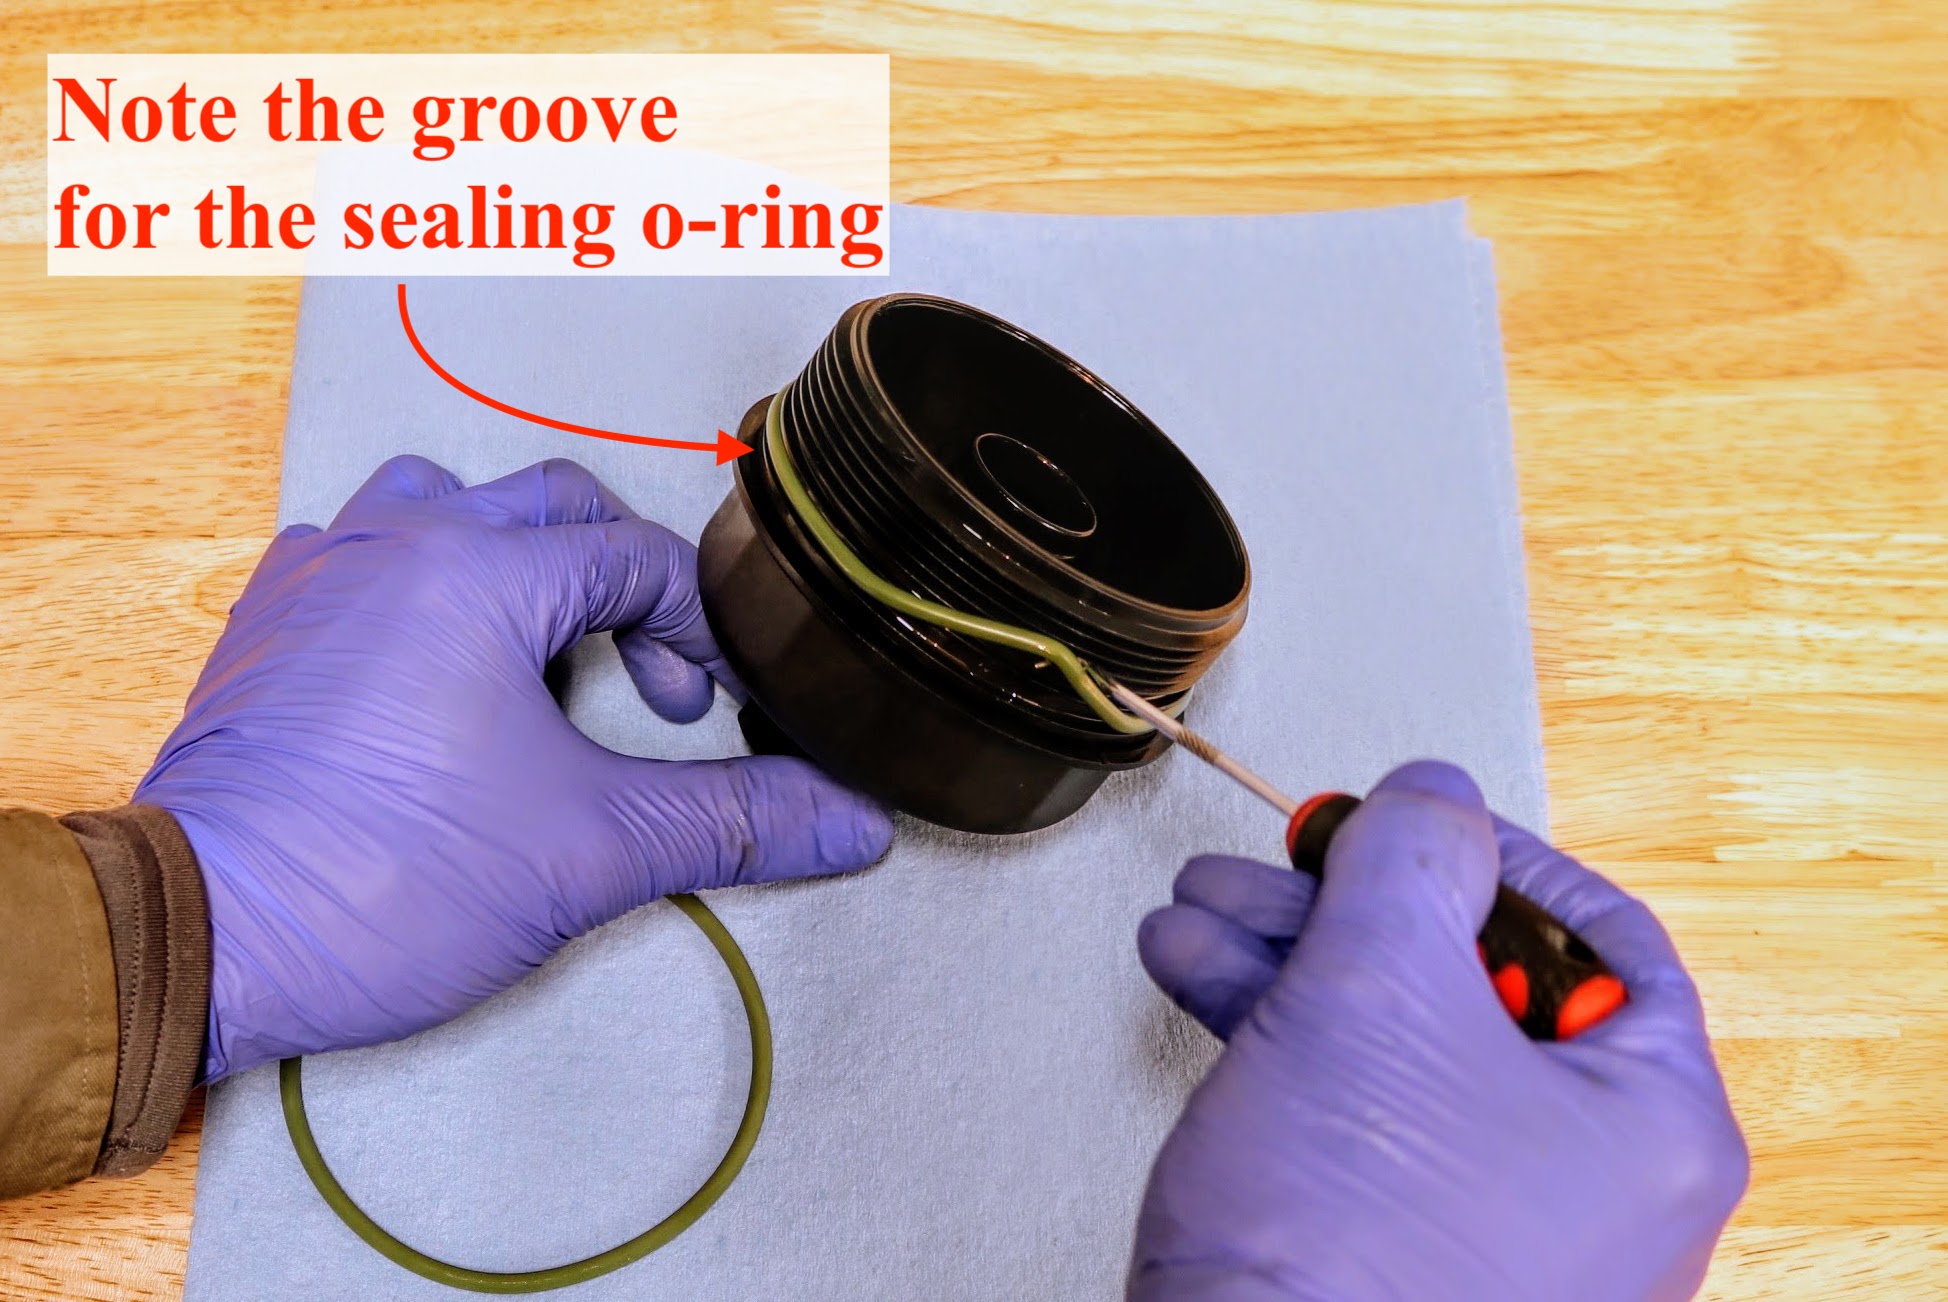
14. Before refitting the oil filter cover cap, the sealing O-ring was removed using a pick/hook tool to gently pull off the sealing O-ring. Be sure to note exactly where the sealing O-ring is positioned on the cap before removing. Porsche 911 (991.1) oil filter cover cap sealing ring removal
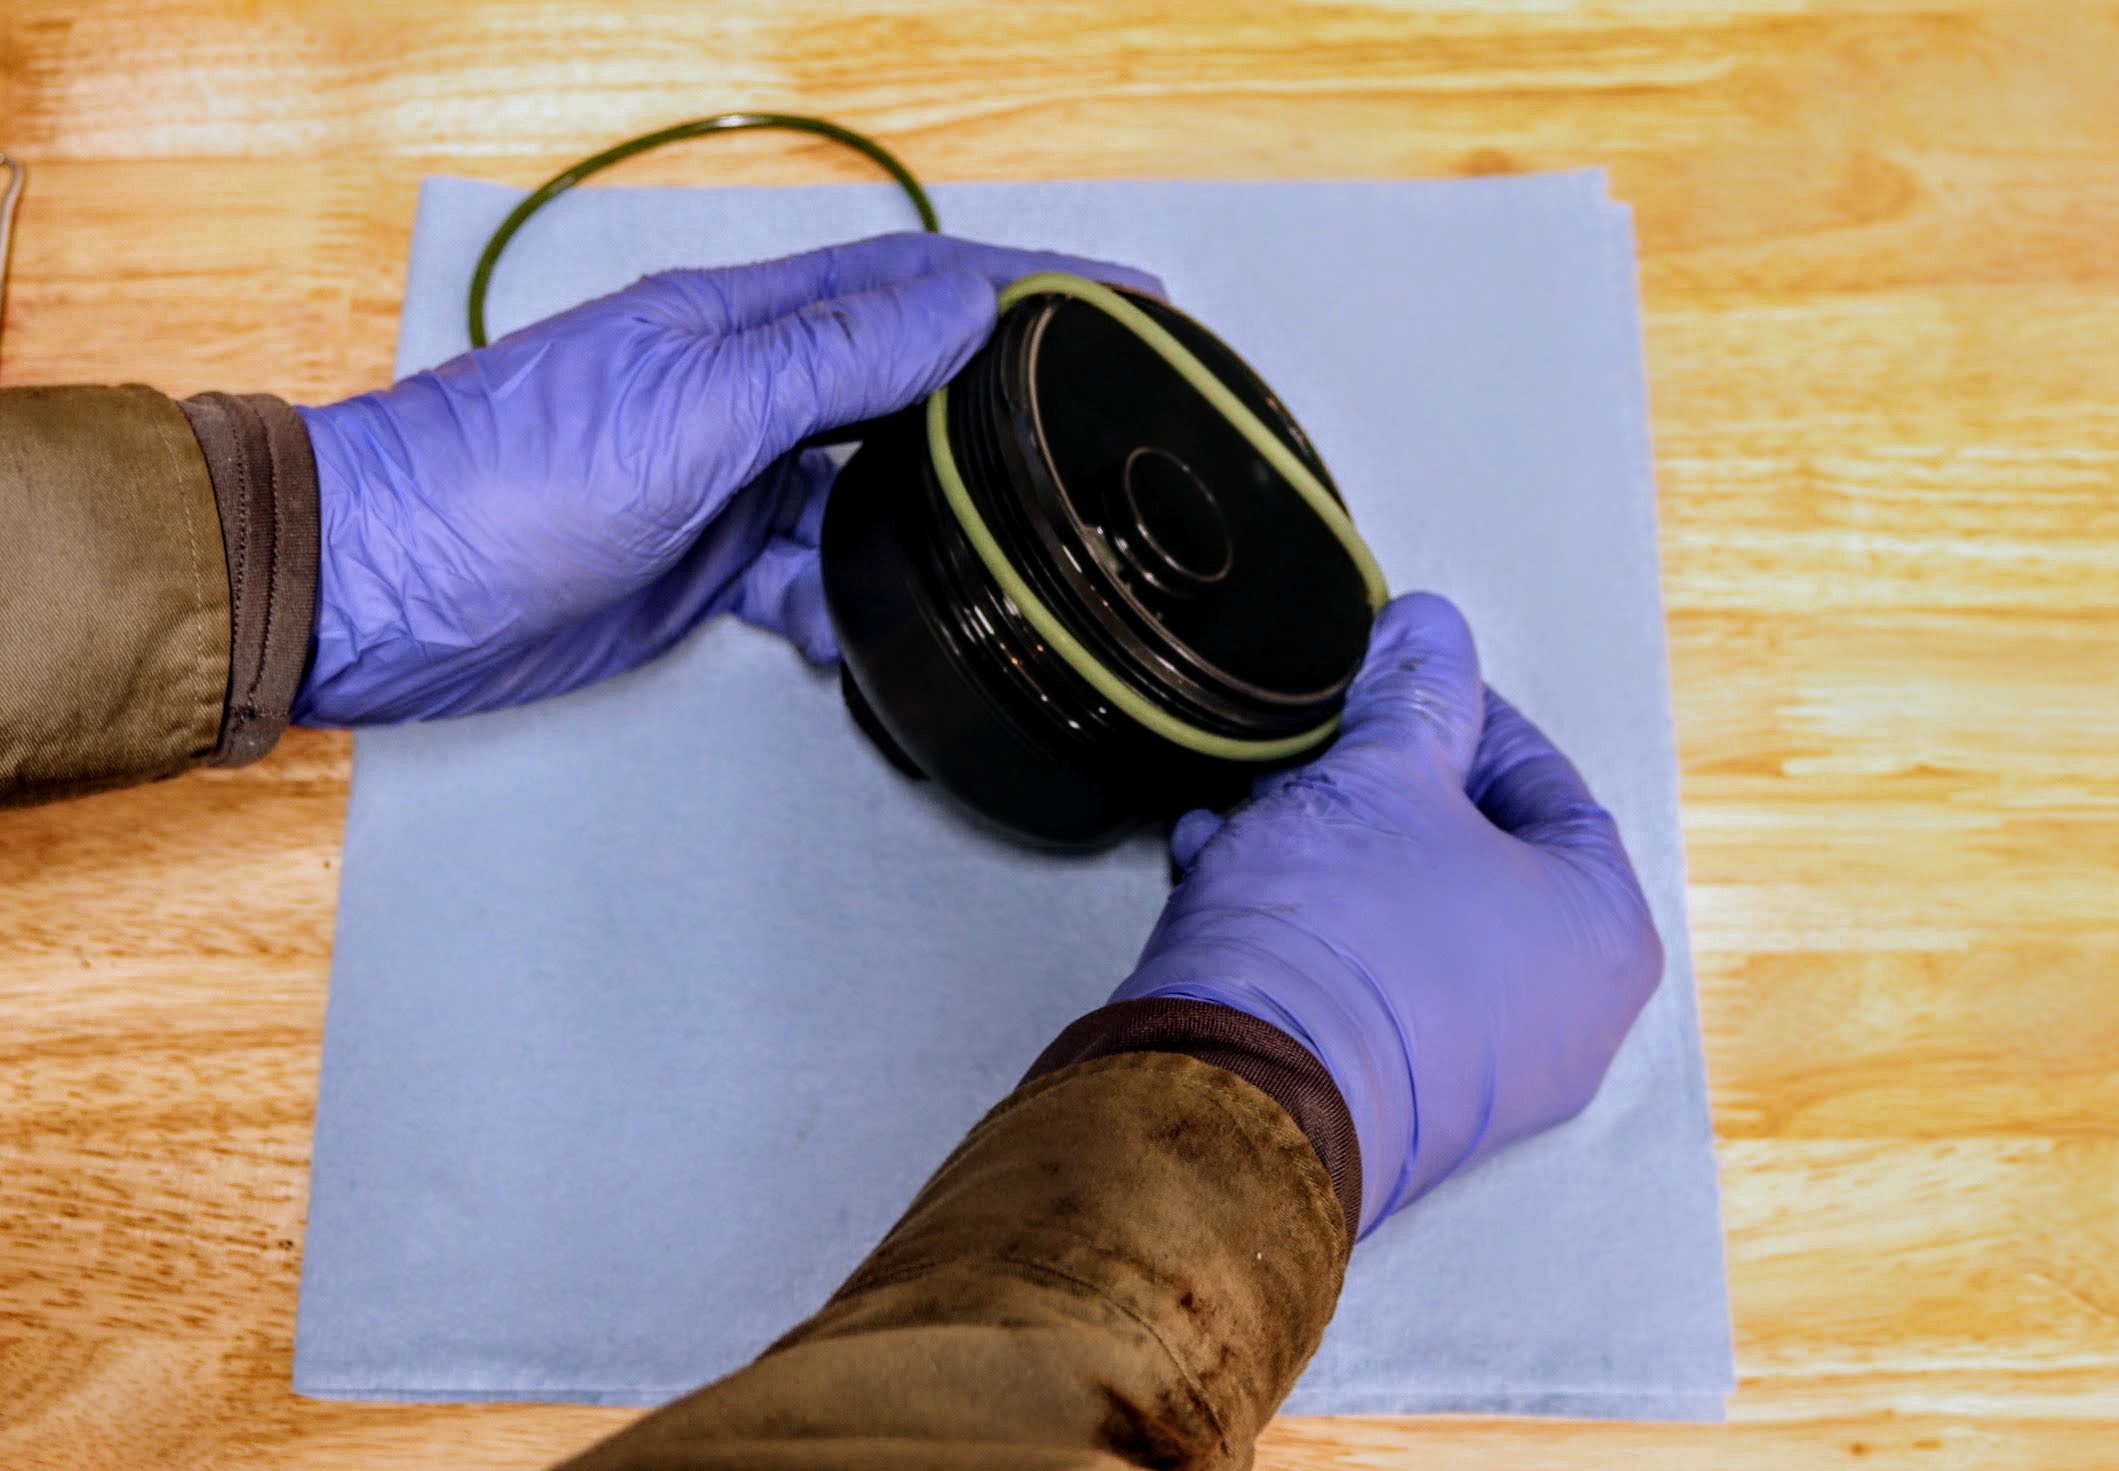
15. Next, the new sealing O-ring was installed by gently rolling the new O-ring onto the oil filter cover cap. Be sure that the sealing O-ring is put in the same position as the old one was. Beware not to push it on too far. Porsche 911 (991.1) oil filter cover cap sealing ring installation
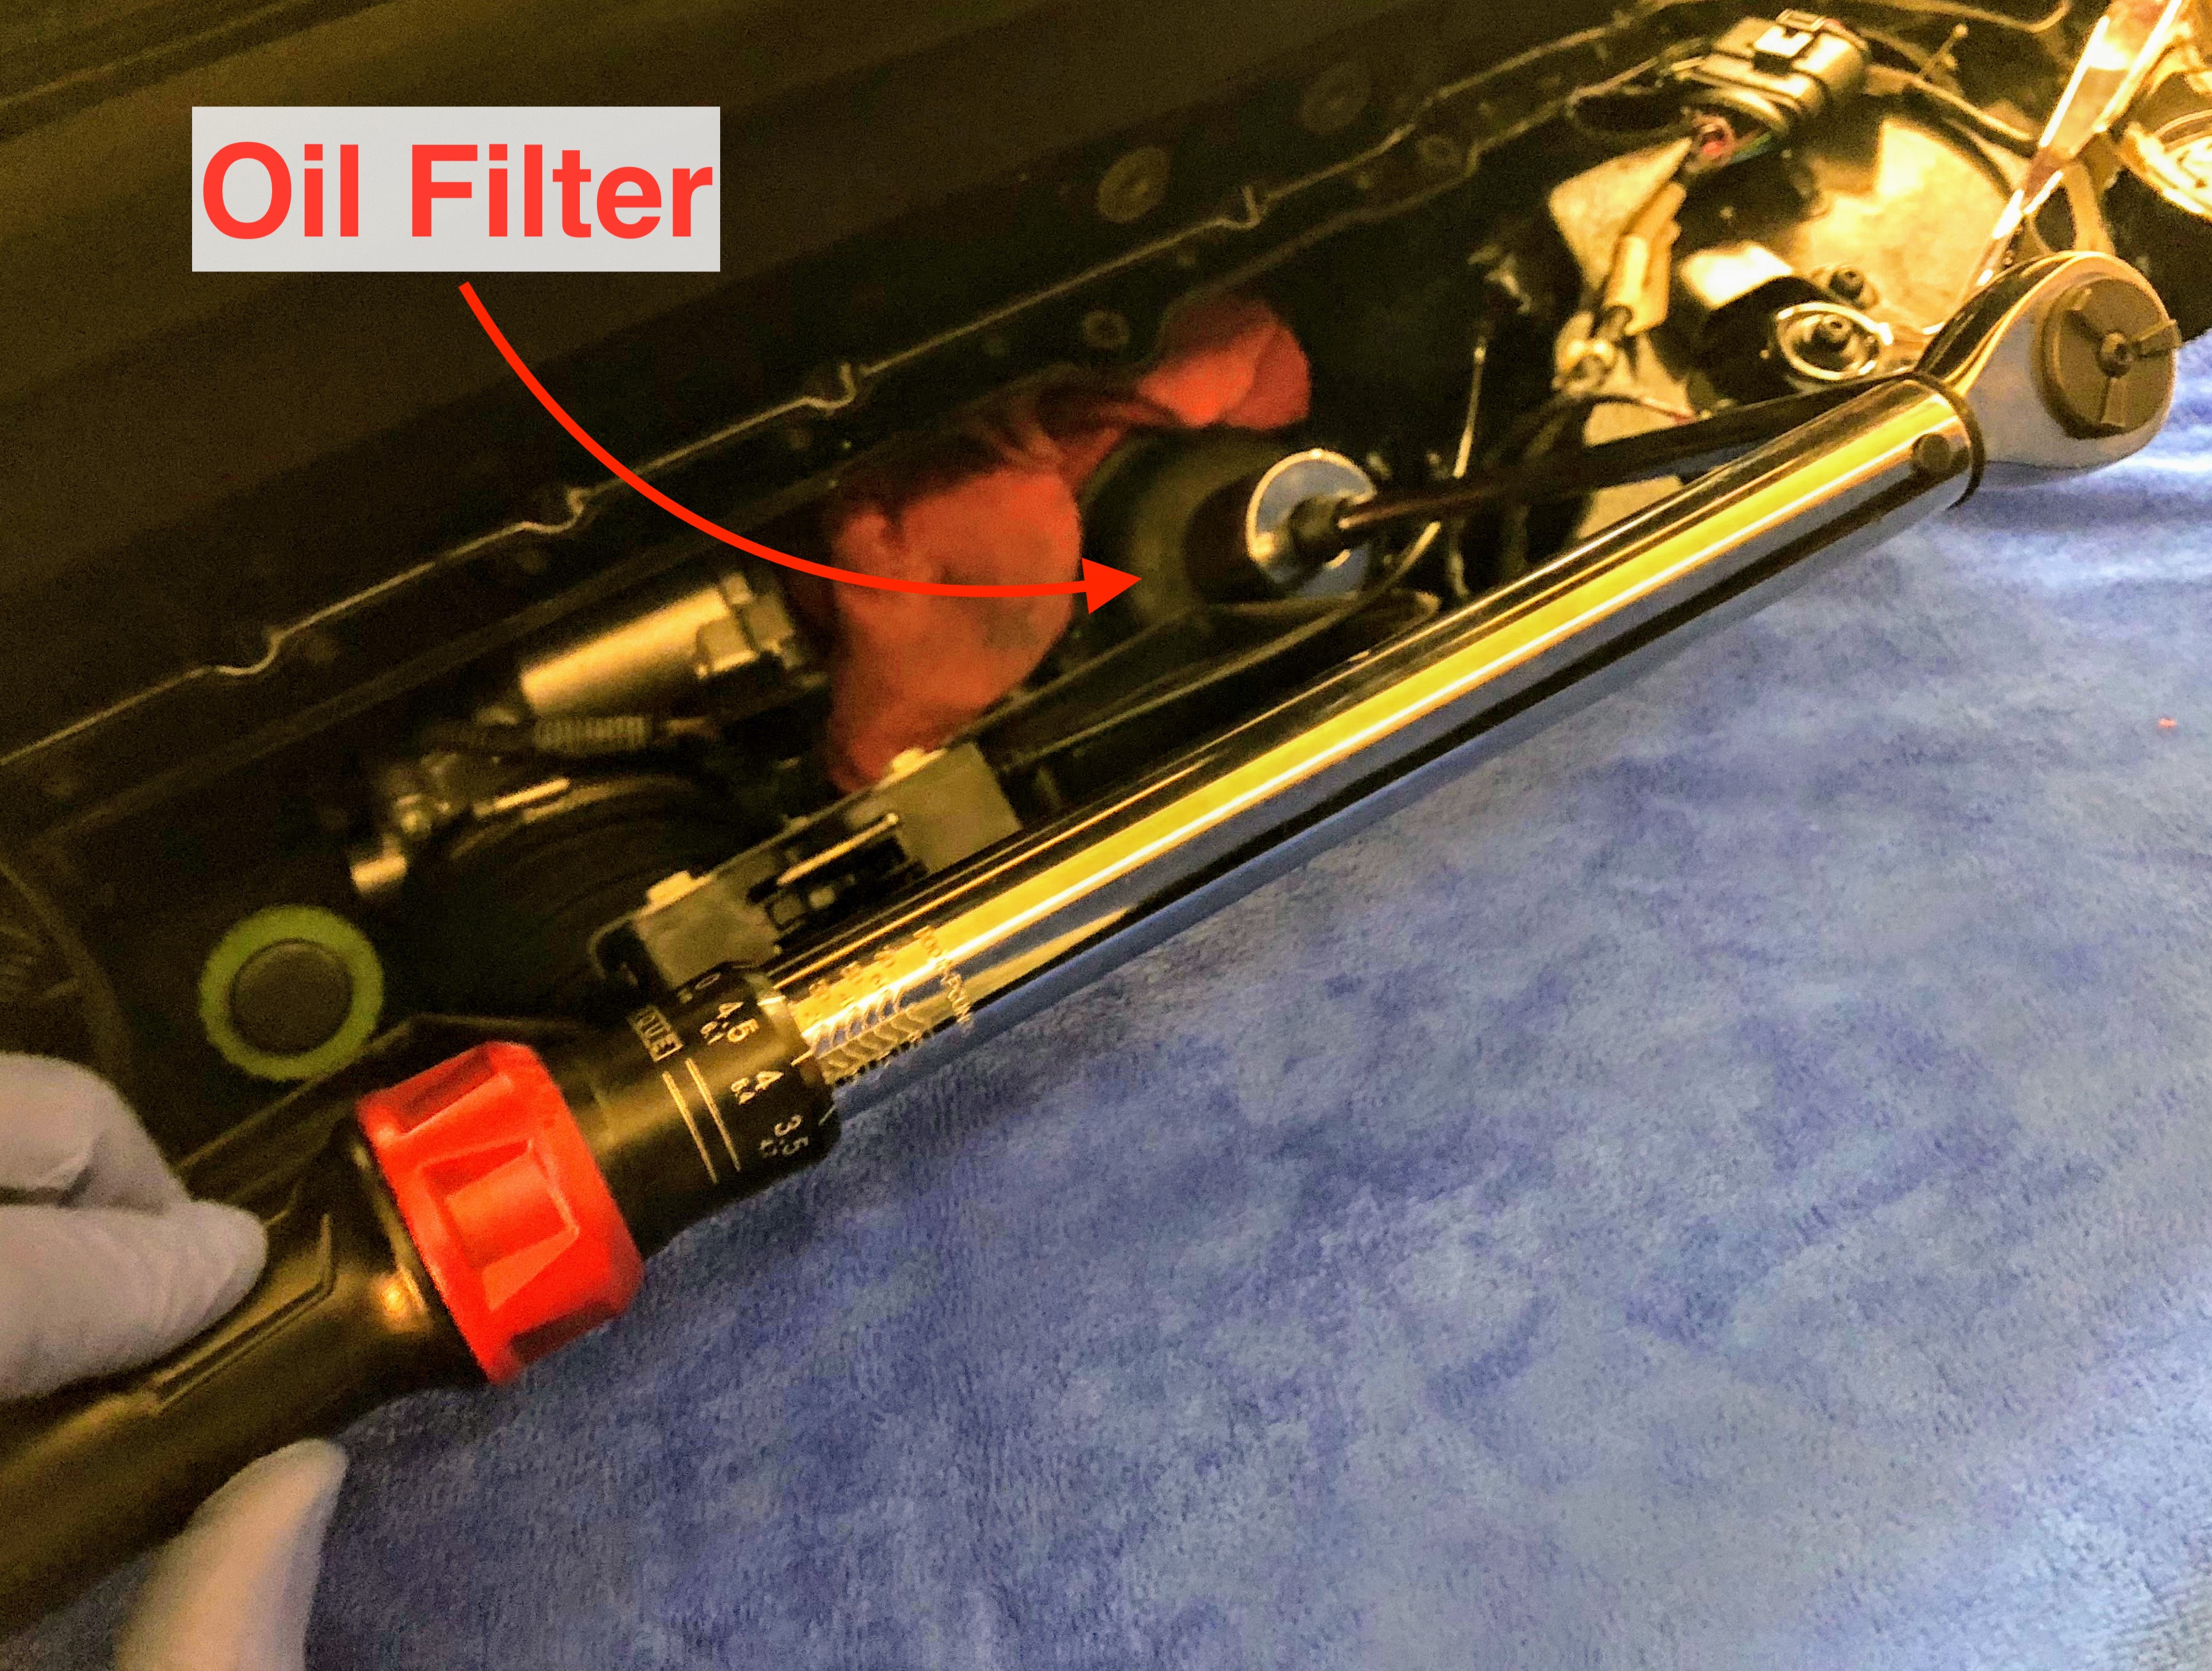
16. The oil filter cover cap was re-installed by hand tightening in the clockwise direction. The oil filter cover cap was then tightened to a torque of 19 lbs ∙ ft, using the 3/8" drive torque wrench and 36 mm socket. NOTE: generally, a extension should not be used with a torque wrench, but there is not much choice in this situation. With one hand on the handle of the 3/8" drive torque wrench, keep the other hand at the top part of the 3/8" drive torque wrench to insure it remains "square" with the oil filter cover cap. Porsche 911 (991.1) oil filter cover cap installation
17. At this point we wiped around the oil filter cover cap to remove any misplaced oil. This will be crucial when inspecting the oil filter cover cap that it is not leaking. We replaced the air guide intake by performing Step 9., in reverse order. We chose not to reattach the fan for now, in order to help us to be able to check for any leaks around the oil filter cover cap. NOTE: an error message will appear when/if the car is started. This message will go away when the fan is re-installed and reconnected.
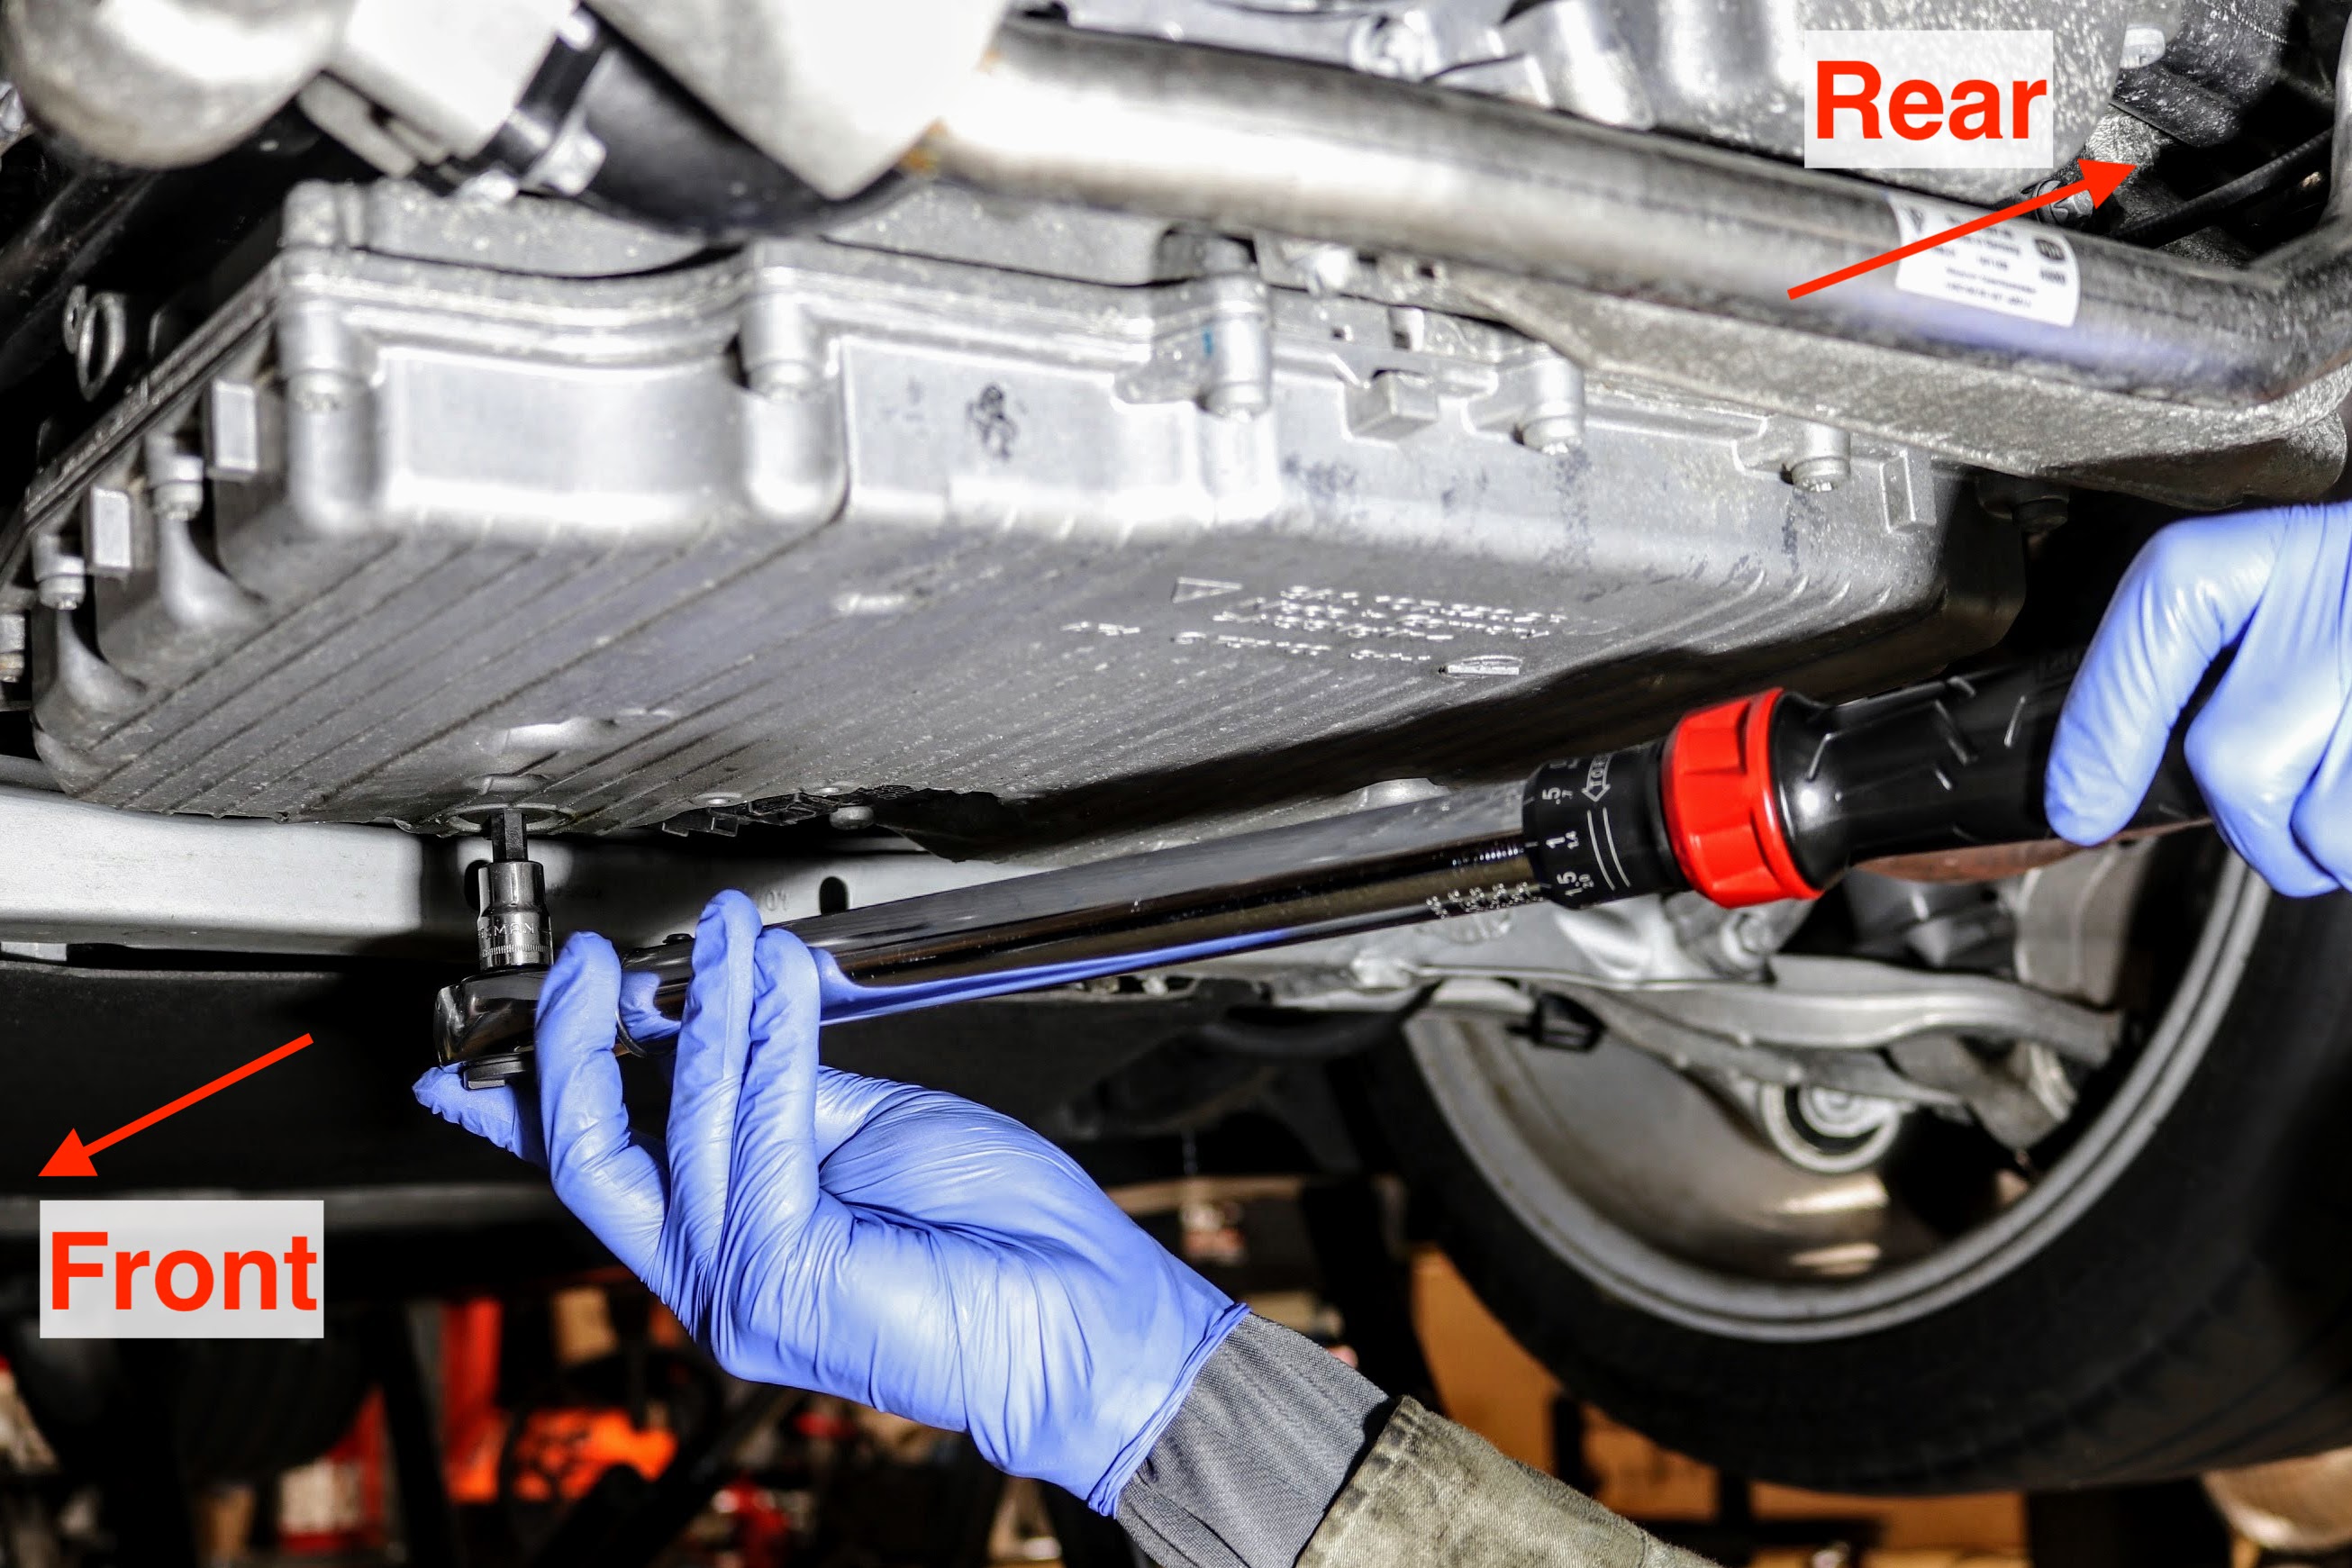
18. Moving under the car, only a small trickle of oil was draining. We replaced the crush washer on the drain plug and hand tightened. Using the 3/8" drive torque wrench and 8 mm hex key socket, the drain plug was tightened to 37 lbs ∙ ft. Clean any oil residue around the drain plug - this makes it easier to check for any leaks. Porsche 911 (991.1) oil drain plug torqued
19. With most dry sump vehicles, one must be conscious of the amount of oil being added. You can NOT measure the oil level until the oil has reached operating temperature (around 180 F). Because of this, we always measure the amount of old oil drained. For us, we drained about 7.3 L.
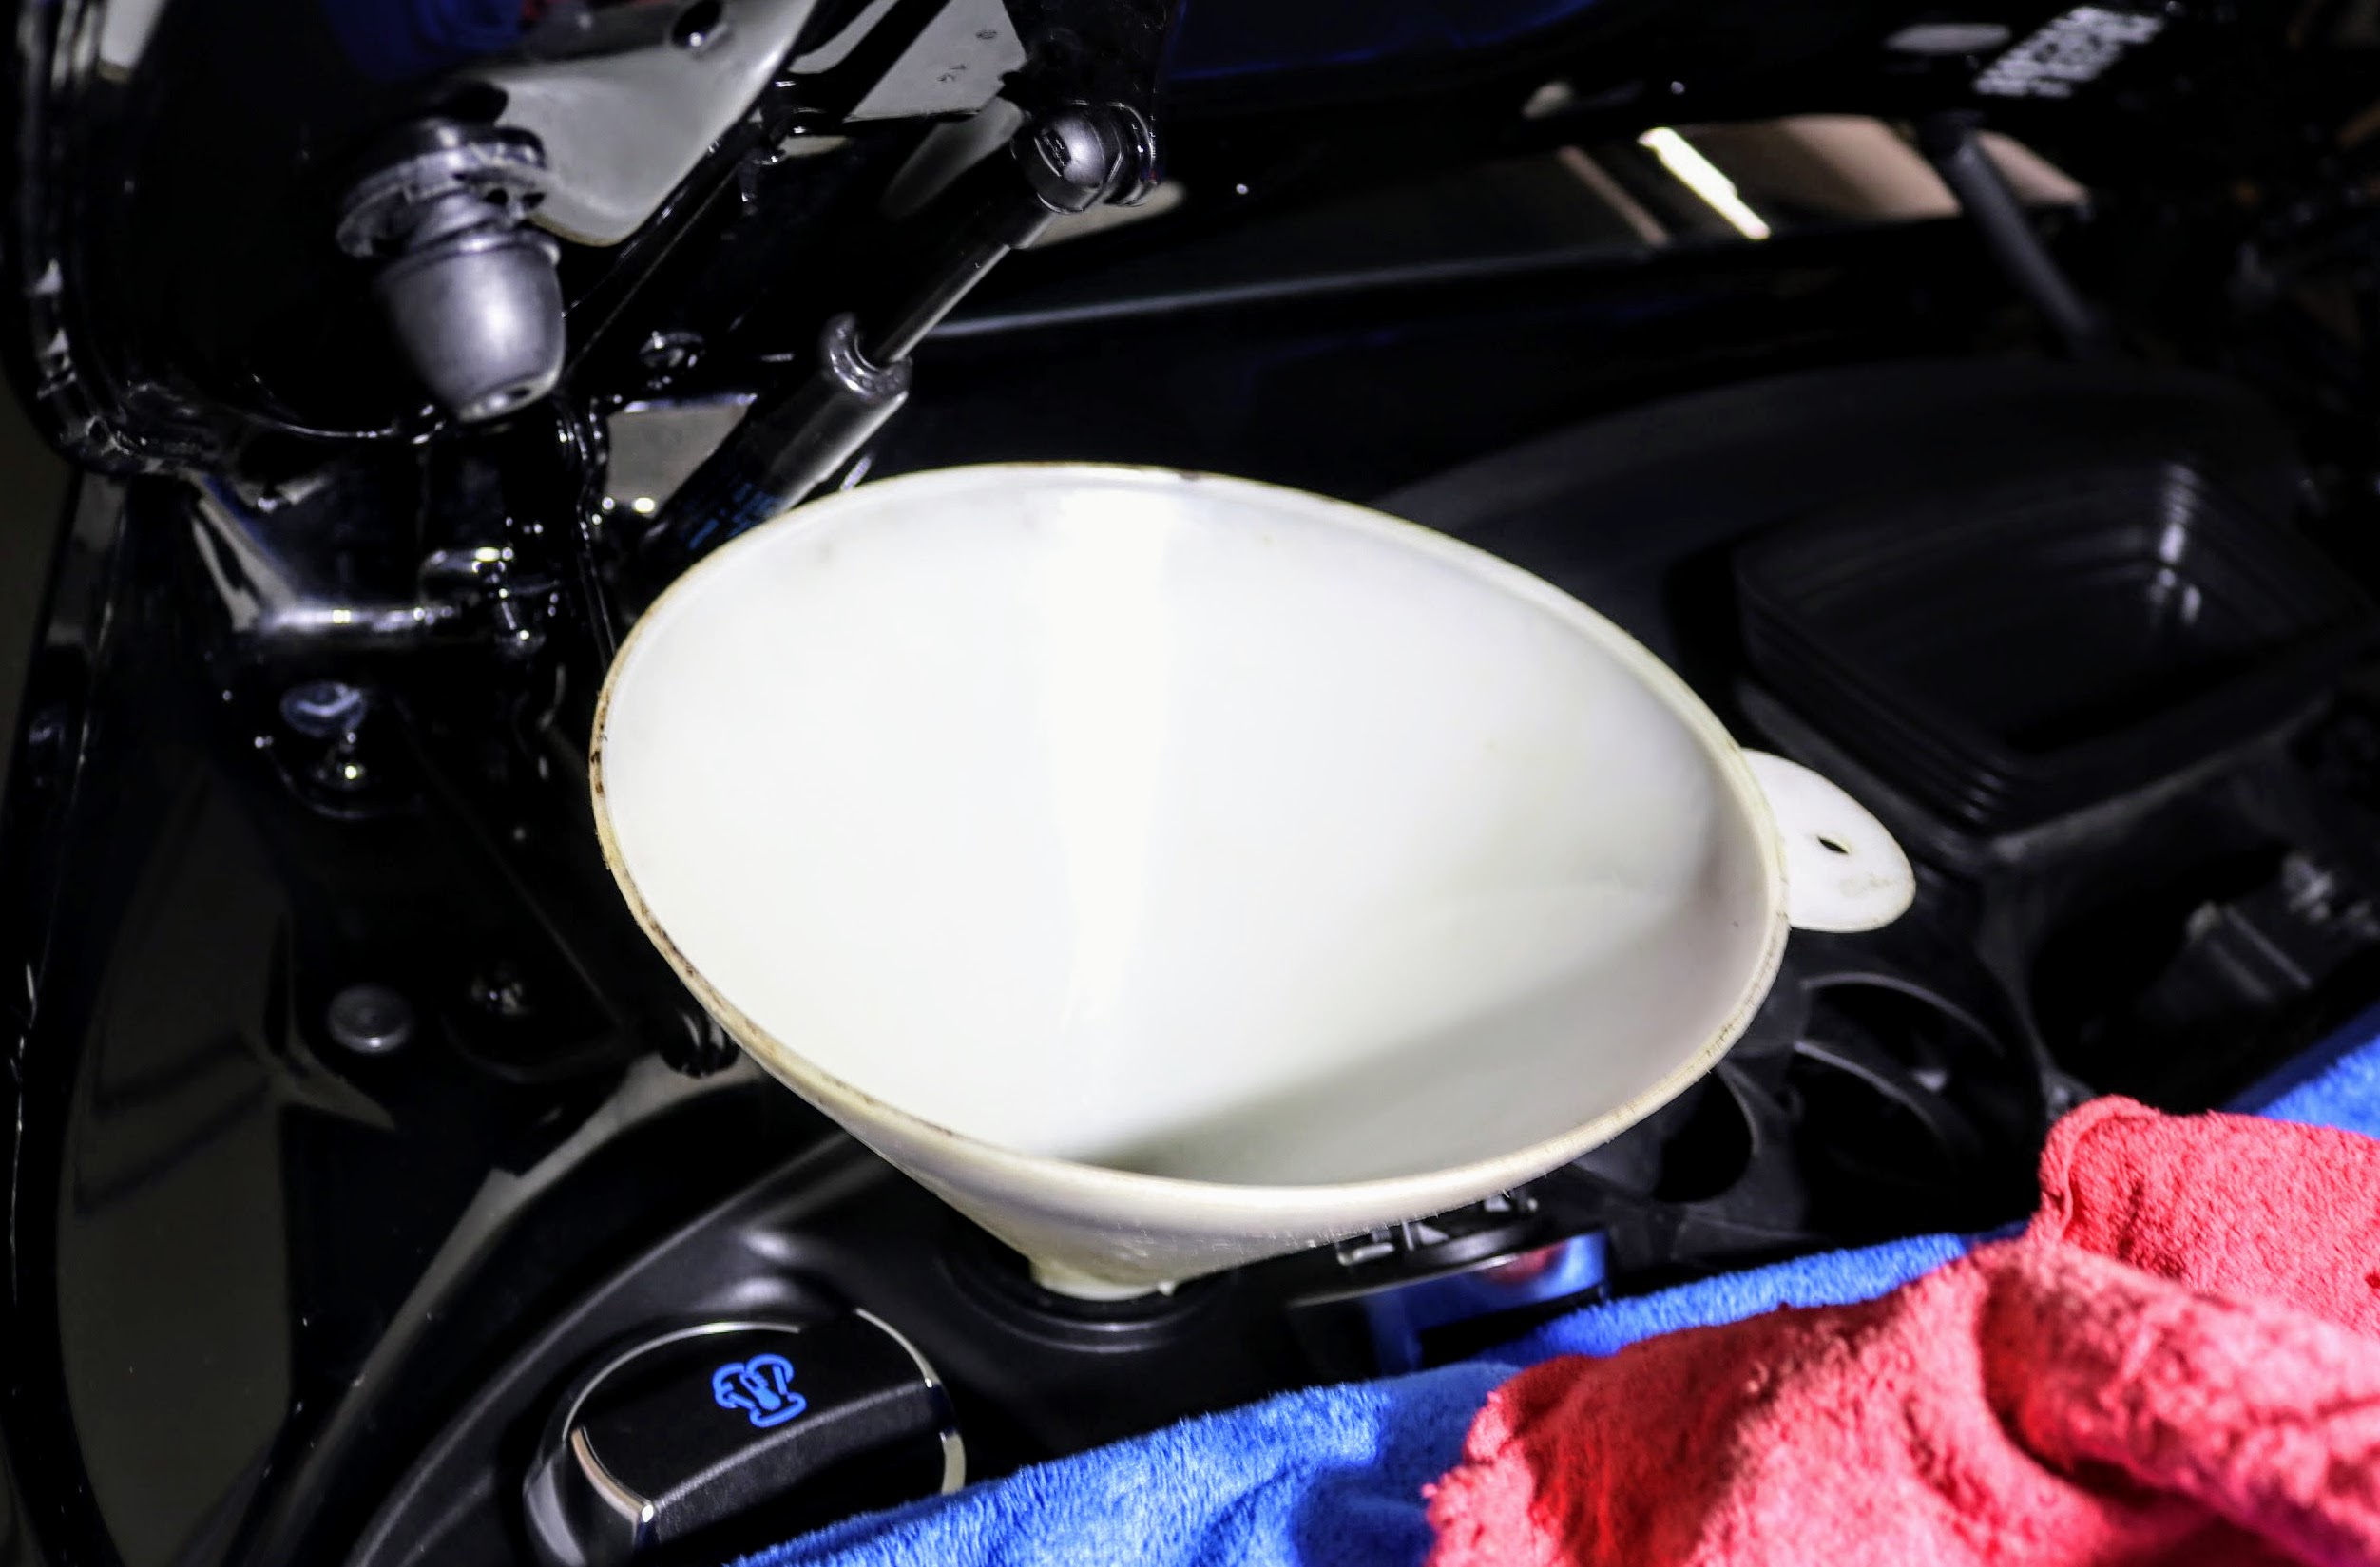
20. Using the funnel, the oil was slowly added. Since we drained about 7.3 L of oil, we added roughly 7.4 L of new Mobil-1 0w-40. When finished, we re-installed the oil filler cap. Porsche 911 (991.1) oil filling
21. In a well ventilated area, we started the car and allowed the engine oil to heat to operating temperature (around 180 F). It does take a while on these Porsches to warm up, so we did apply some throttle (a couple thousand RPM increase over idle) to warm up the engine.
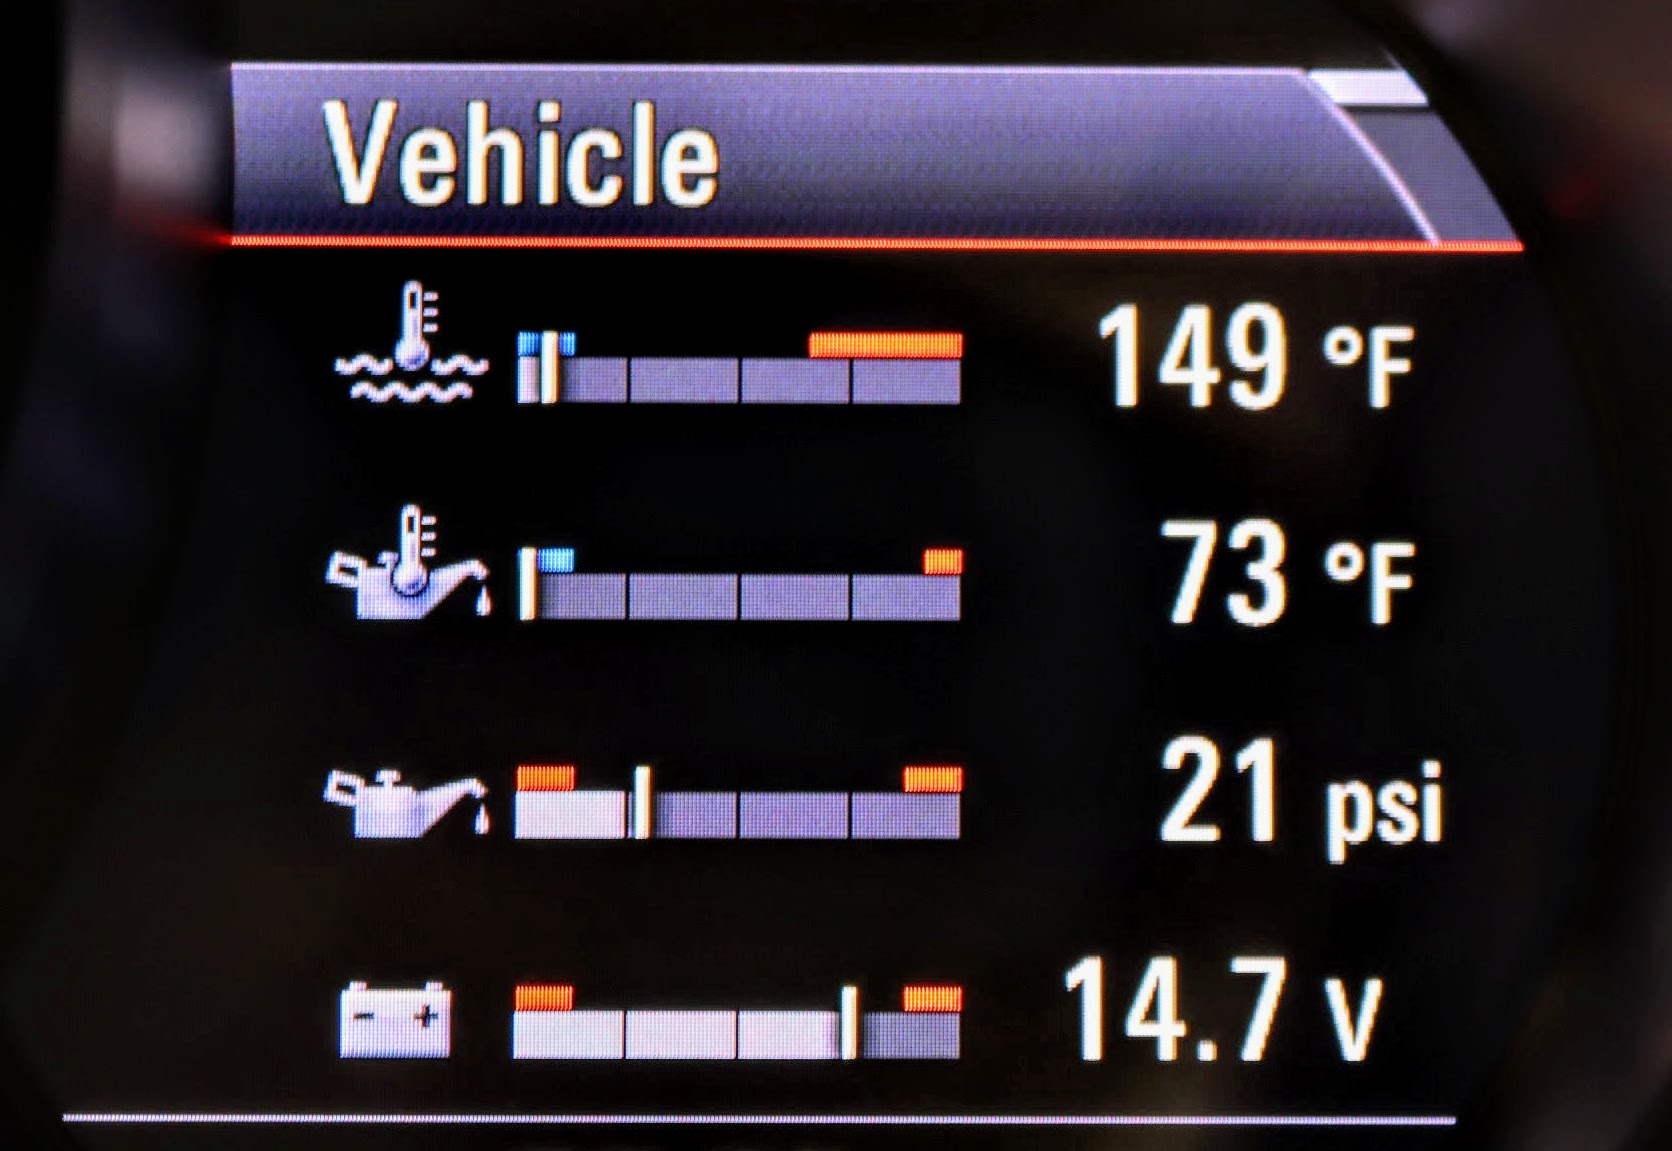
22. While warming the engine oil, we kept checking to see if we could get an oil measurement reading. To see the oil measurement reading, look at the driver's right hand screen and use the toggle to find the "Vehicle" menu. Porsche 911 (991.1) vehicle information displayed
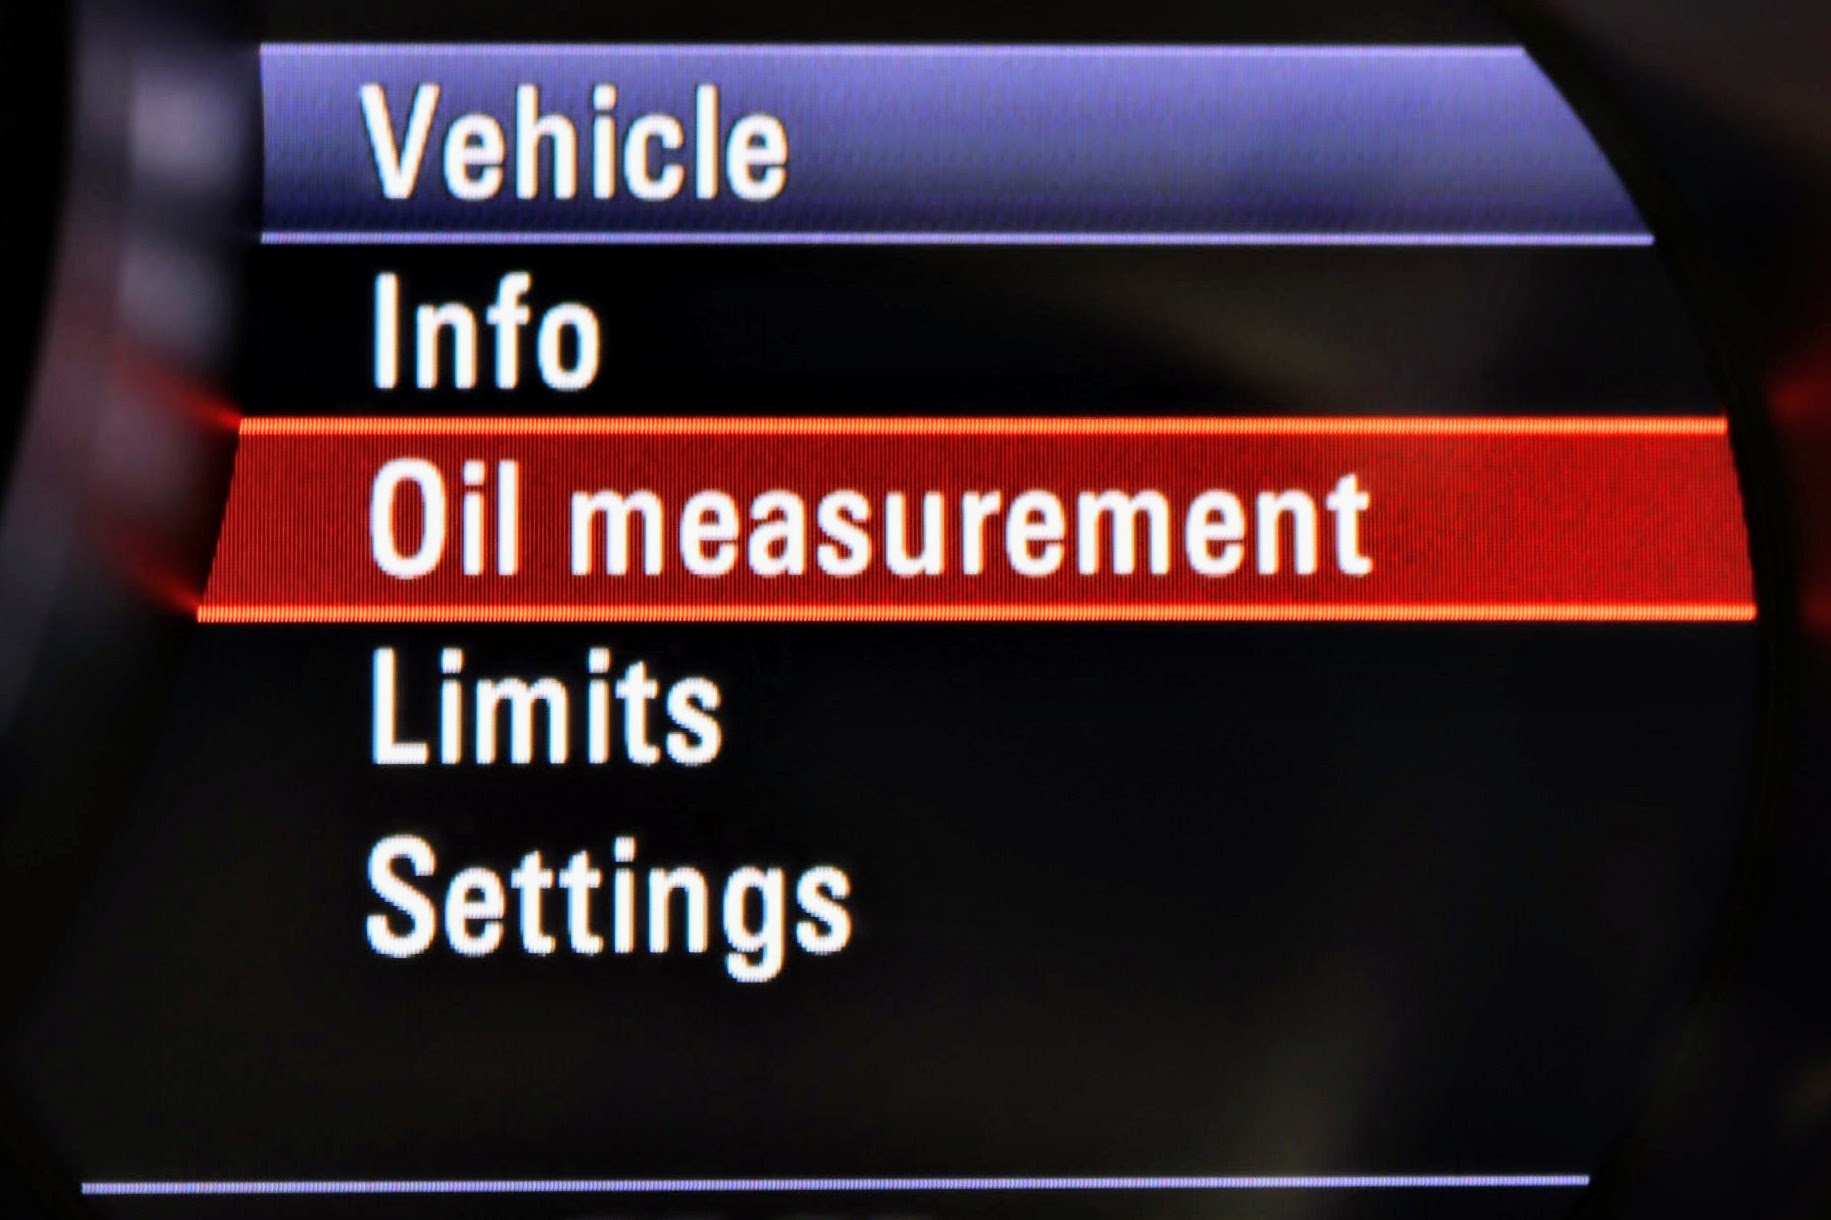
23. Pushing the driver's right side toggle forward brings up a vehicle information menu. We moved the toggle downward to highlight "Oil measurement". Porsche 911 (991.1) vehicle information menu
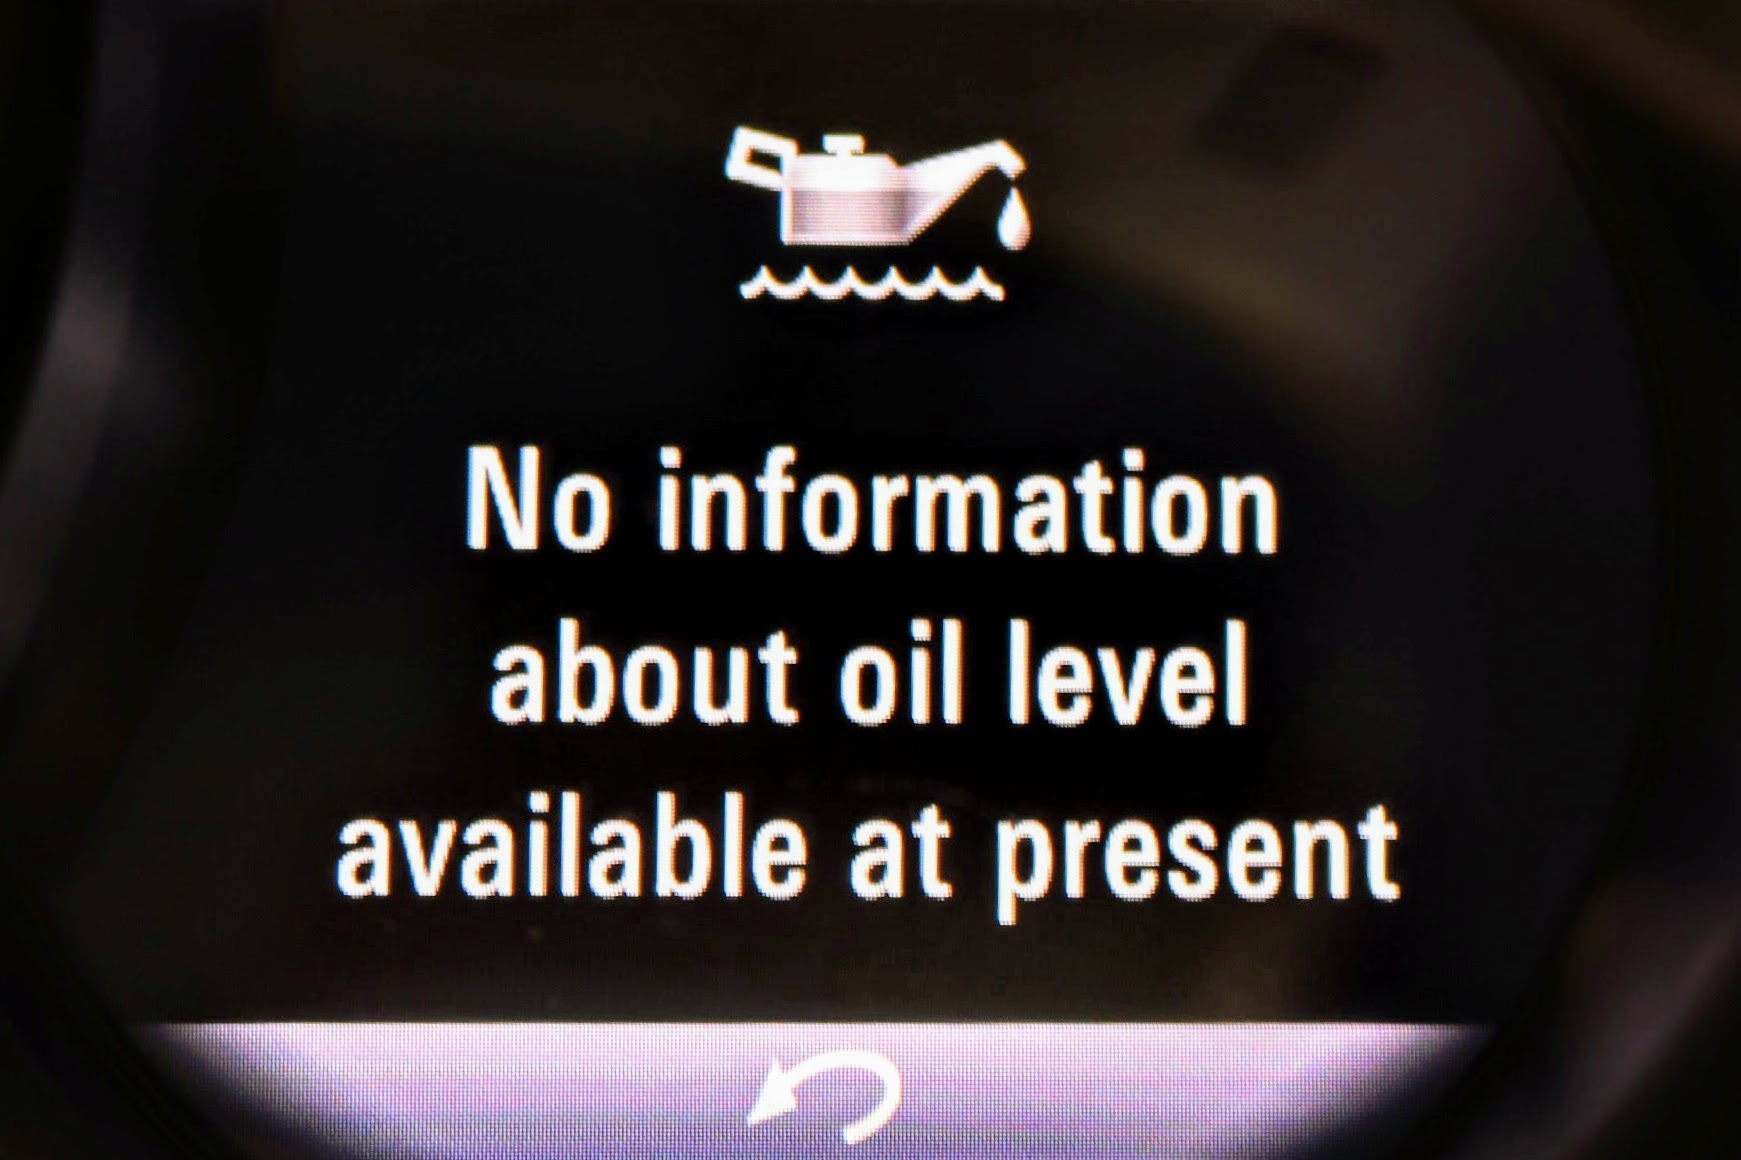
24. Pushing forward on the same toggle, the car will attempt to get an oil reading. When the oil temperature is not warm enough, a screen saying "No information about oil level" is displayed - as illustrated to the right. At this point, we also checked around the oil filter cap cover and drain plug for any leaks. Porsche 911 (991.1) No information about oil level available at present display
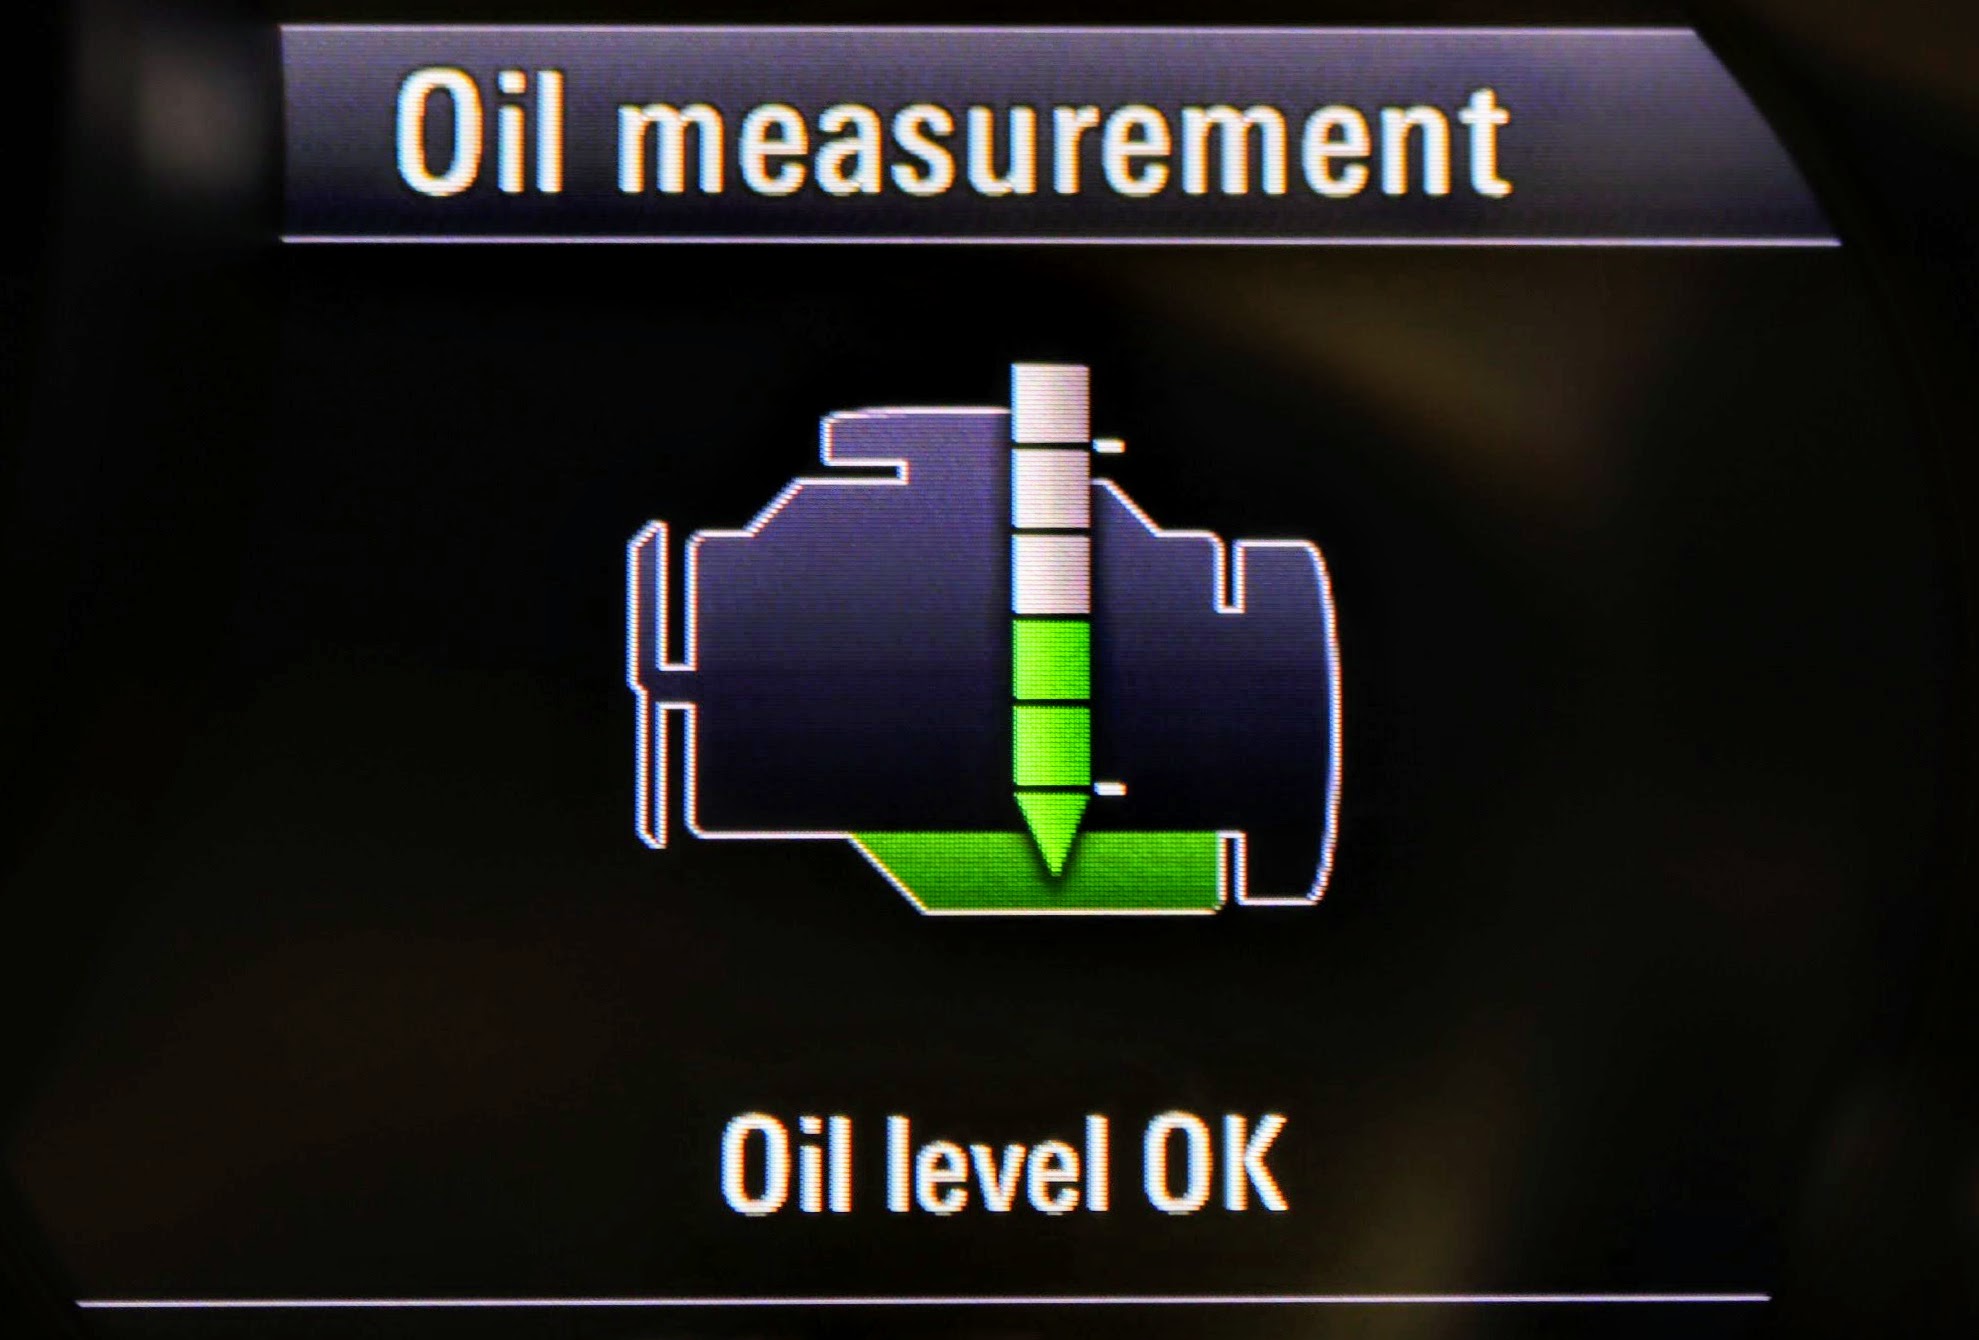
25. Once the oil reached operating temperature, toggling to the "Oil measurement" menu will display an oil measurement, as illustrated to the right. Porsche 911 (991.1) oil measurement display
26. If necessary, add oil accordingly, such that the oil measurement is at the desired amount. We aimed for it to read exactly in the middle. NOTE: do not add too much oil - removing oil is a lot harder than adding it!
27. With the car turned off; the right side fan, engine compartment cover and other pieces were re-installed following Step 5. through Step 8., although in reverse order. Porsche 911 (991.1) engine compartment
28. For the next couple of drives we checked the "Oil measurement" reading along with a quick look for any drips/leaks around the oil filter cap cover and drain plug.