Overview

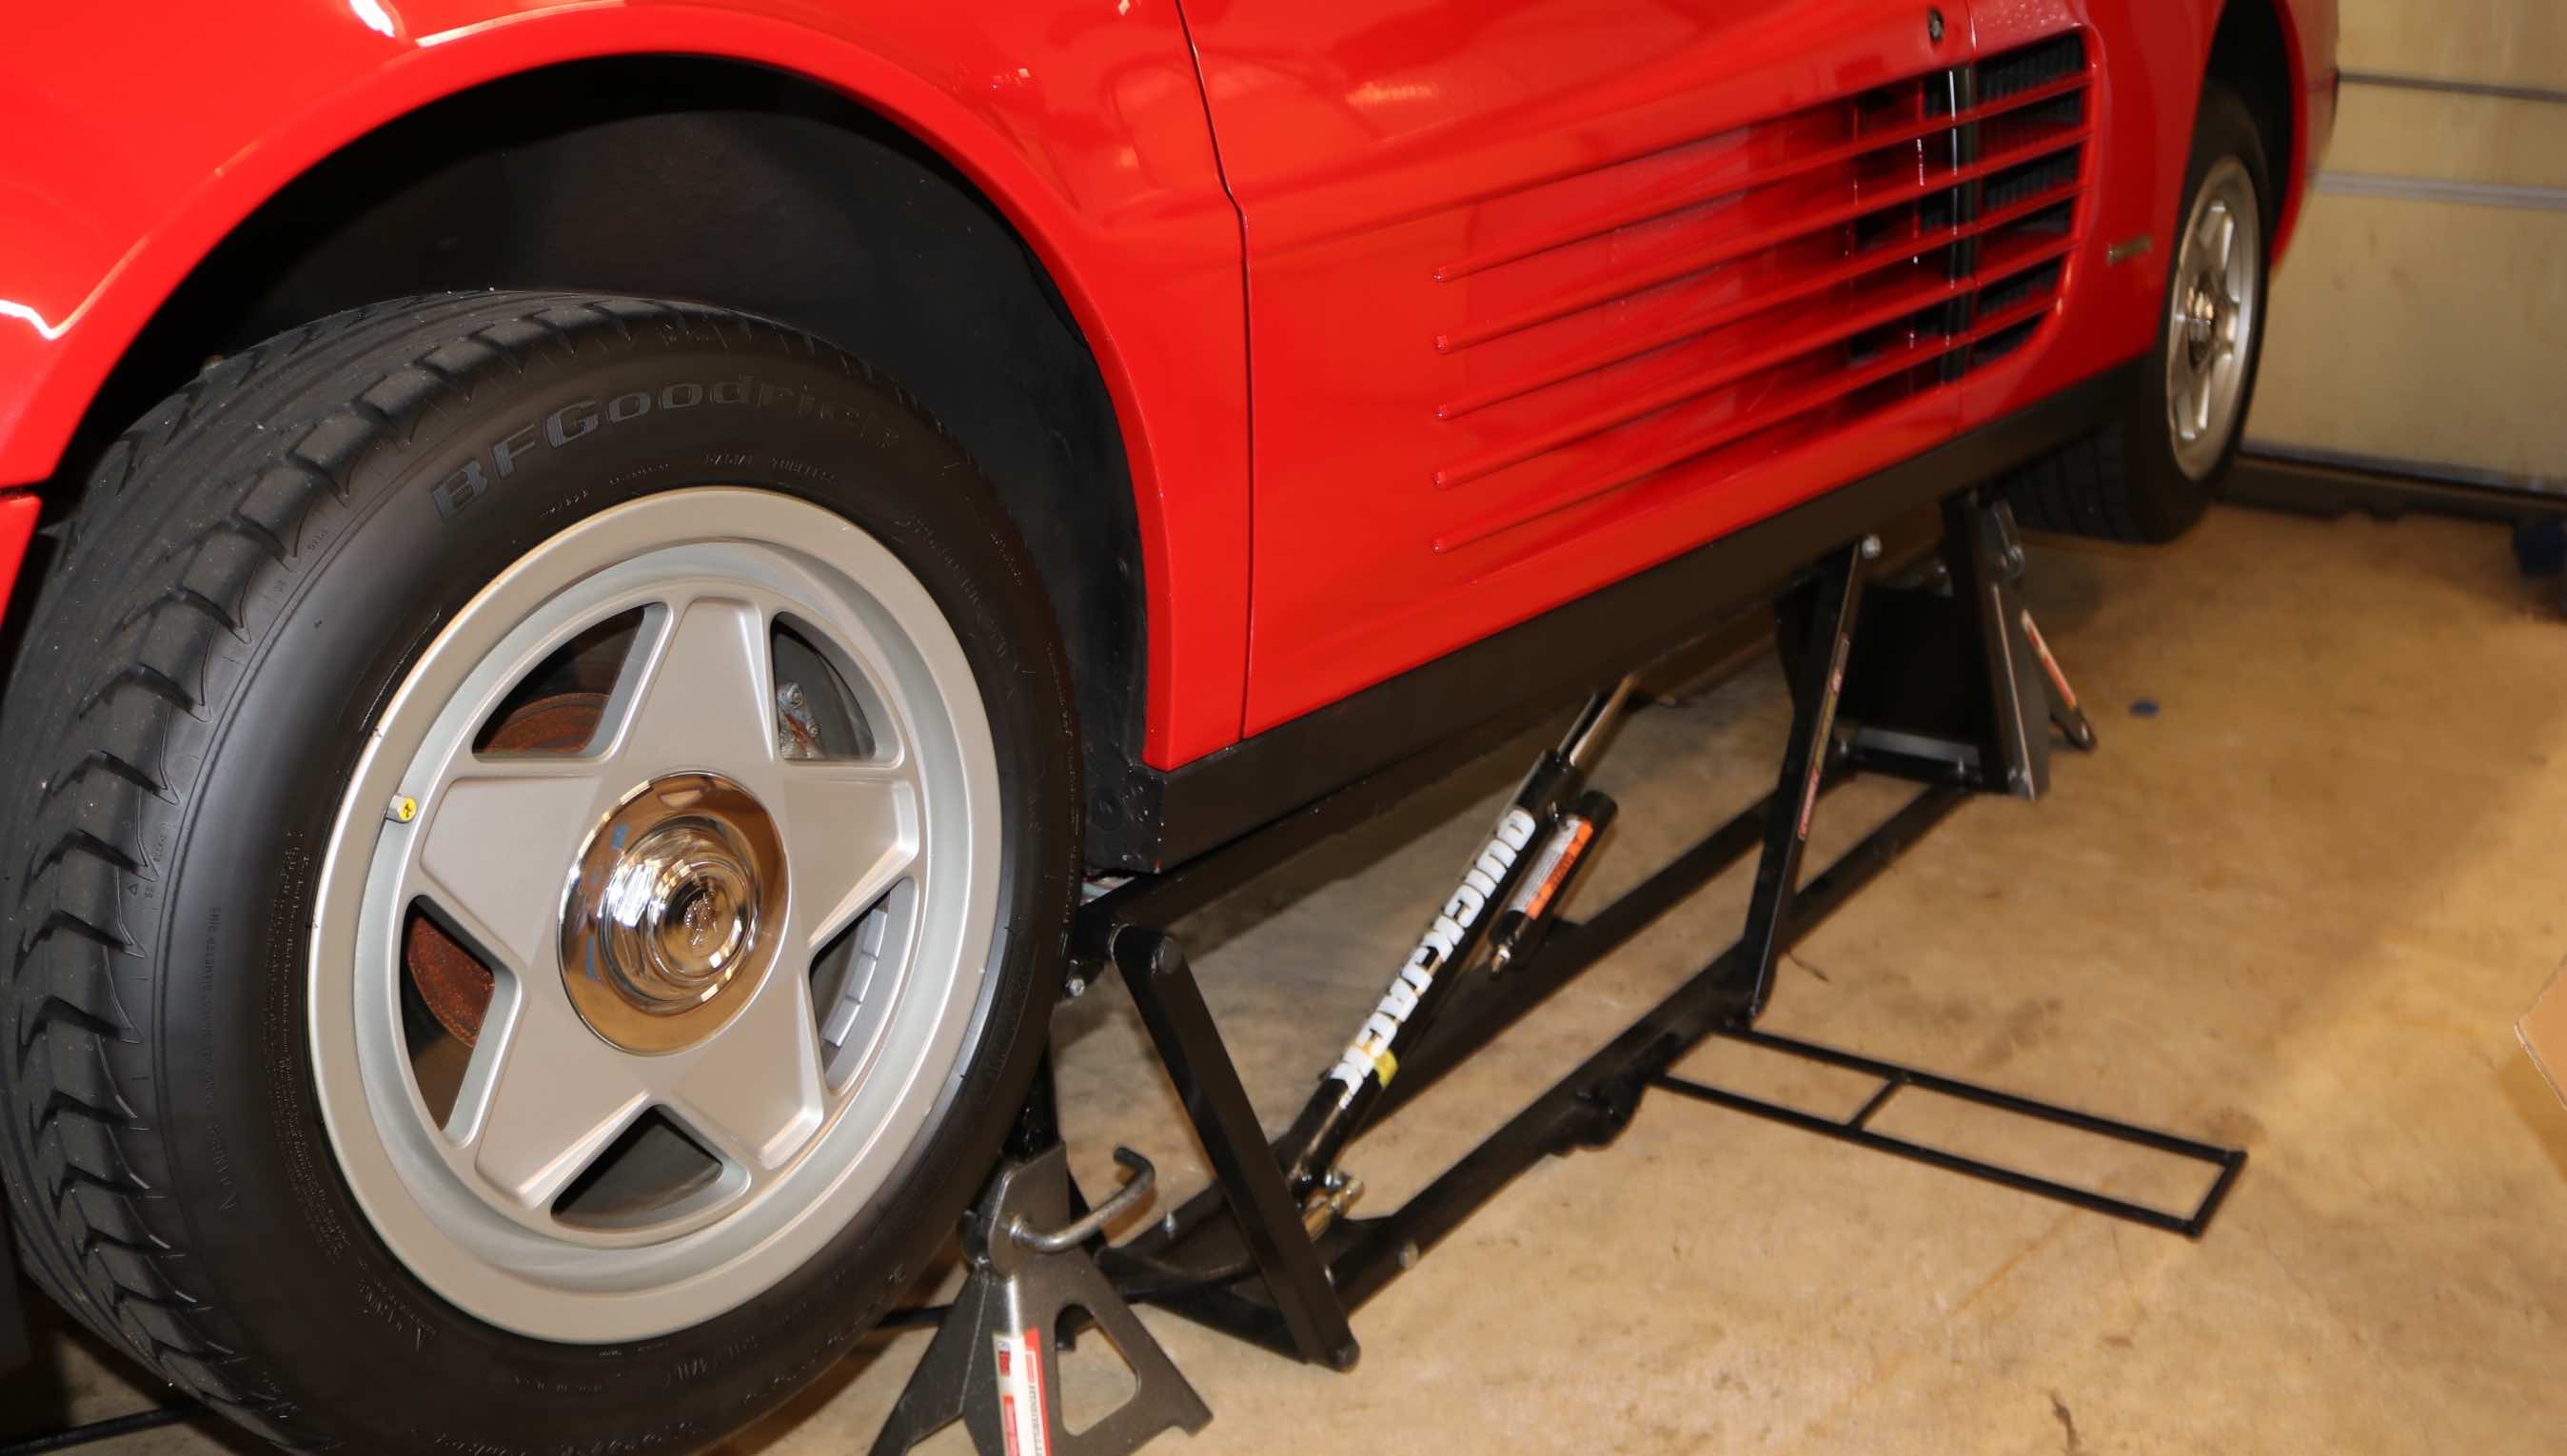
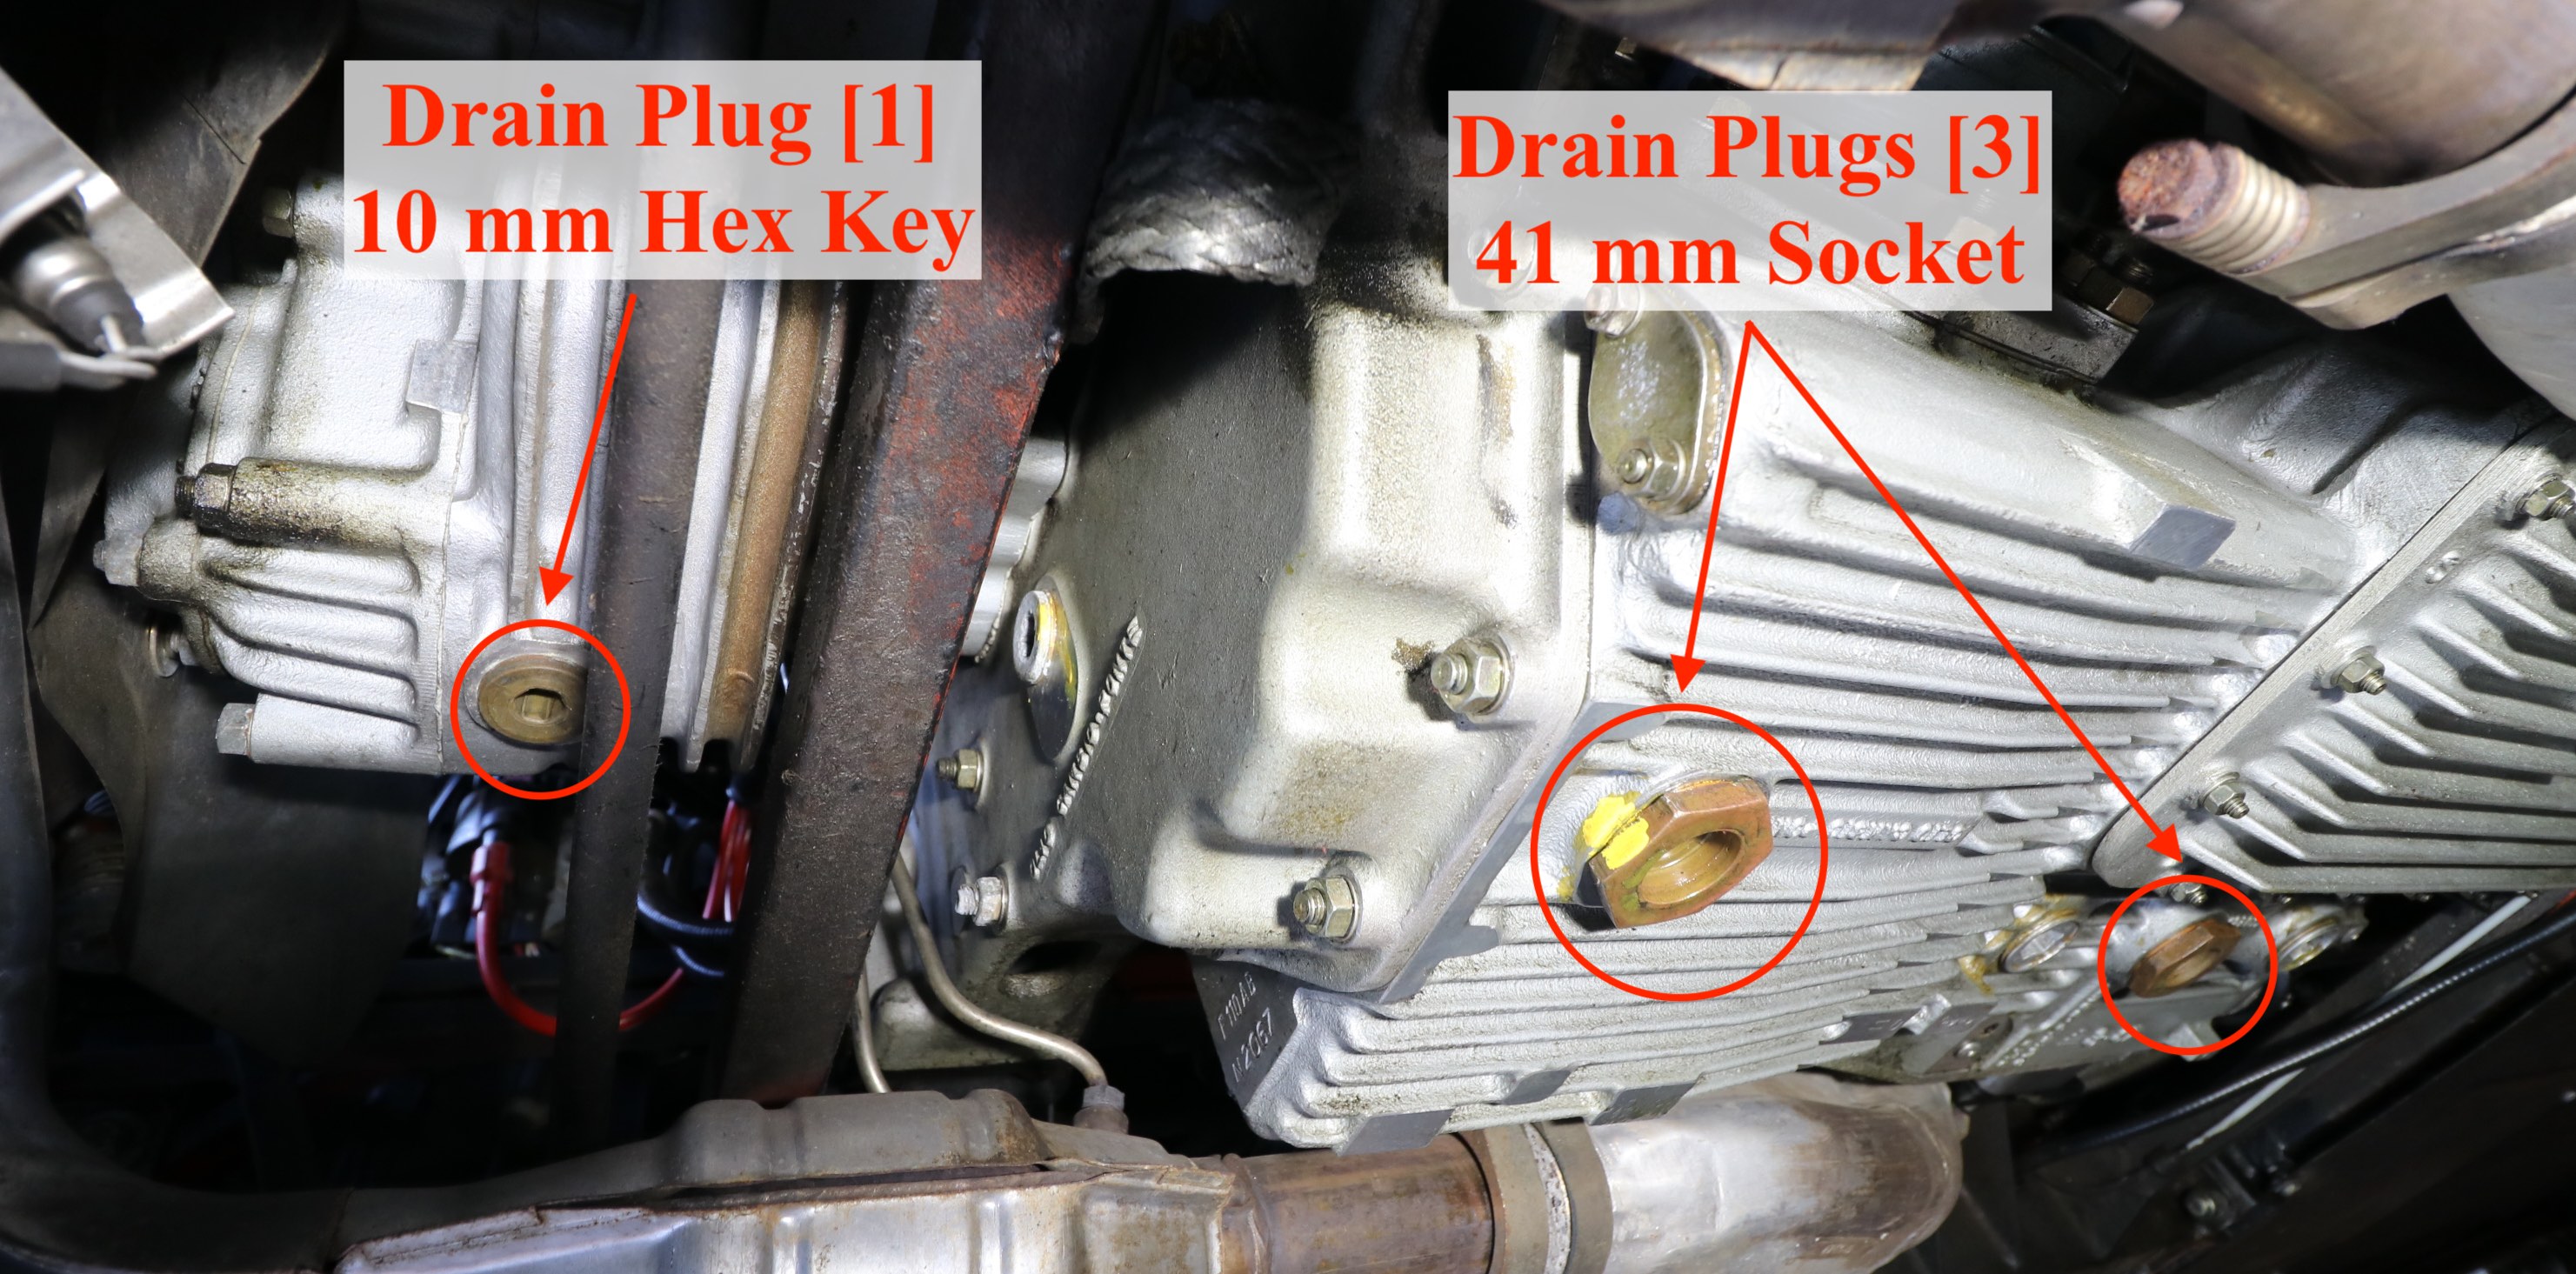
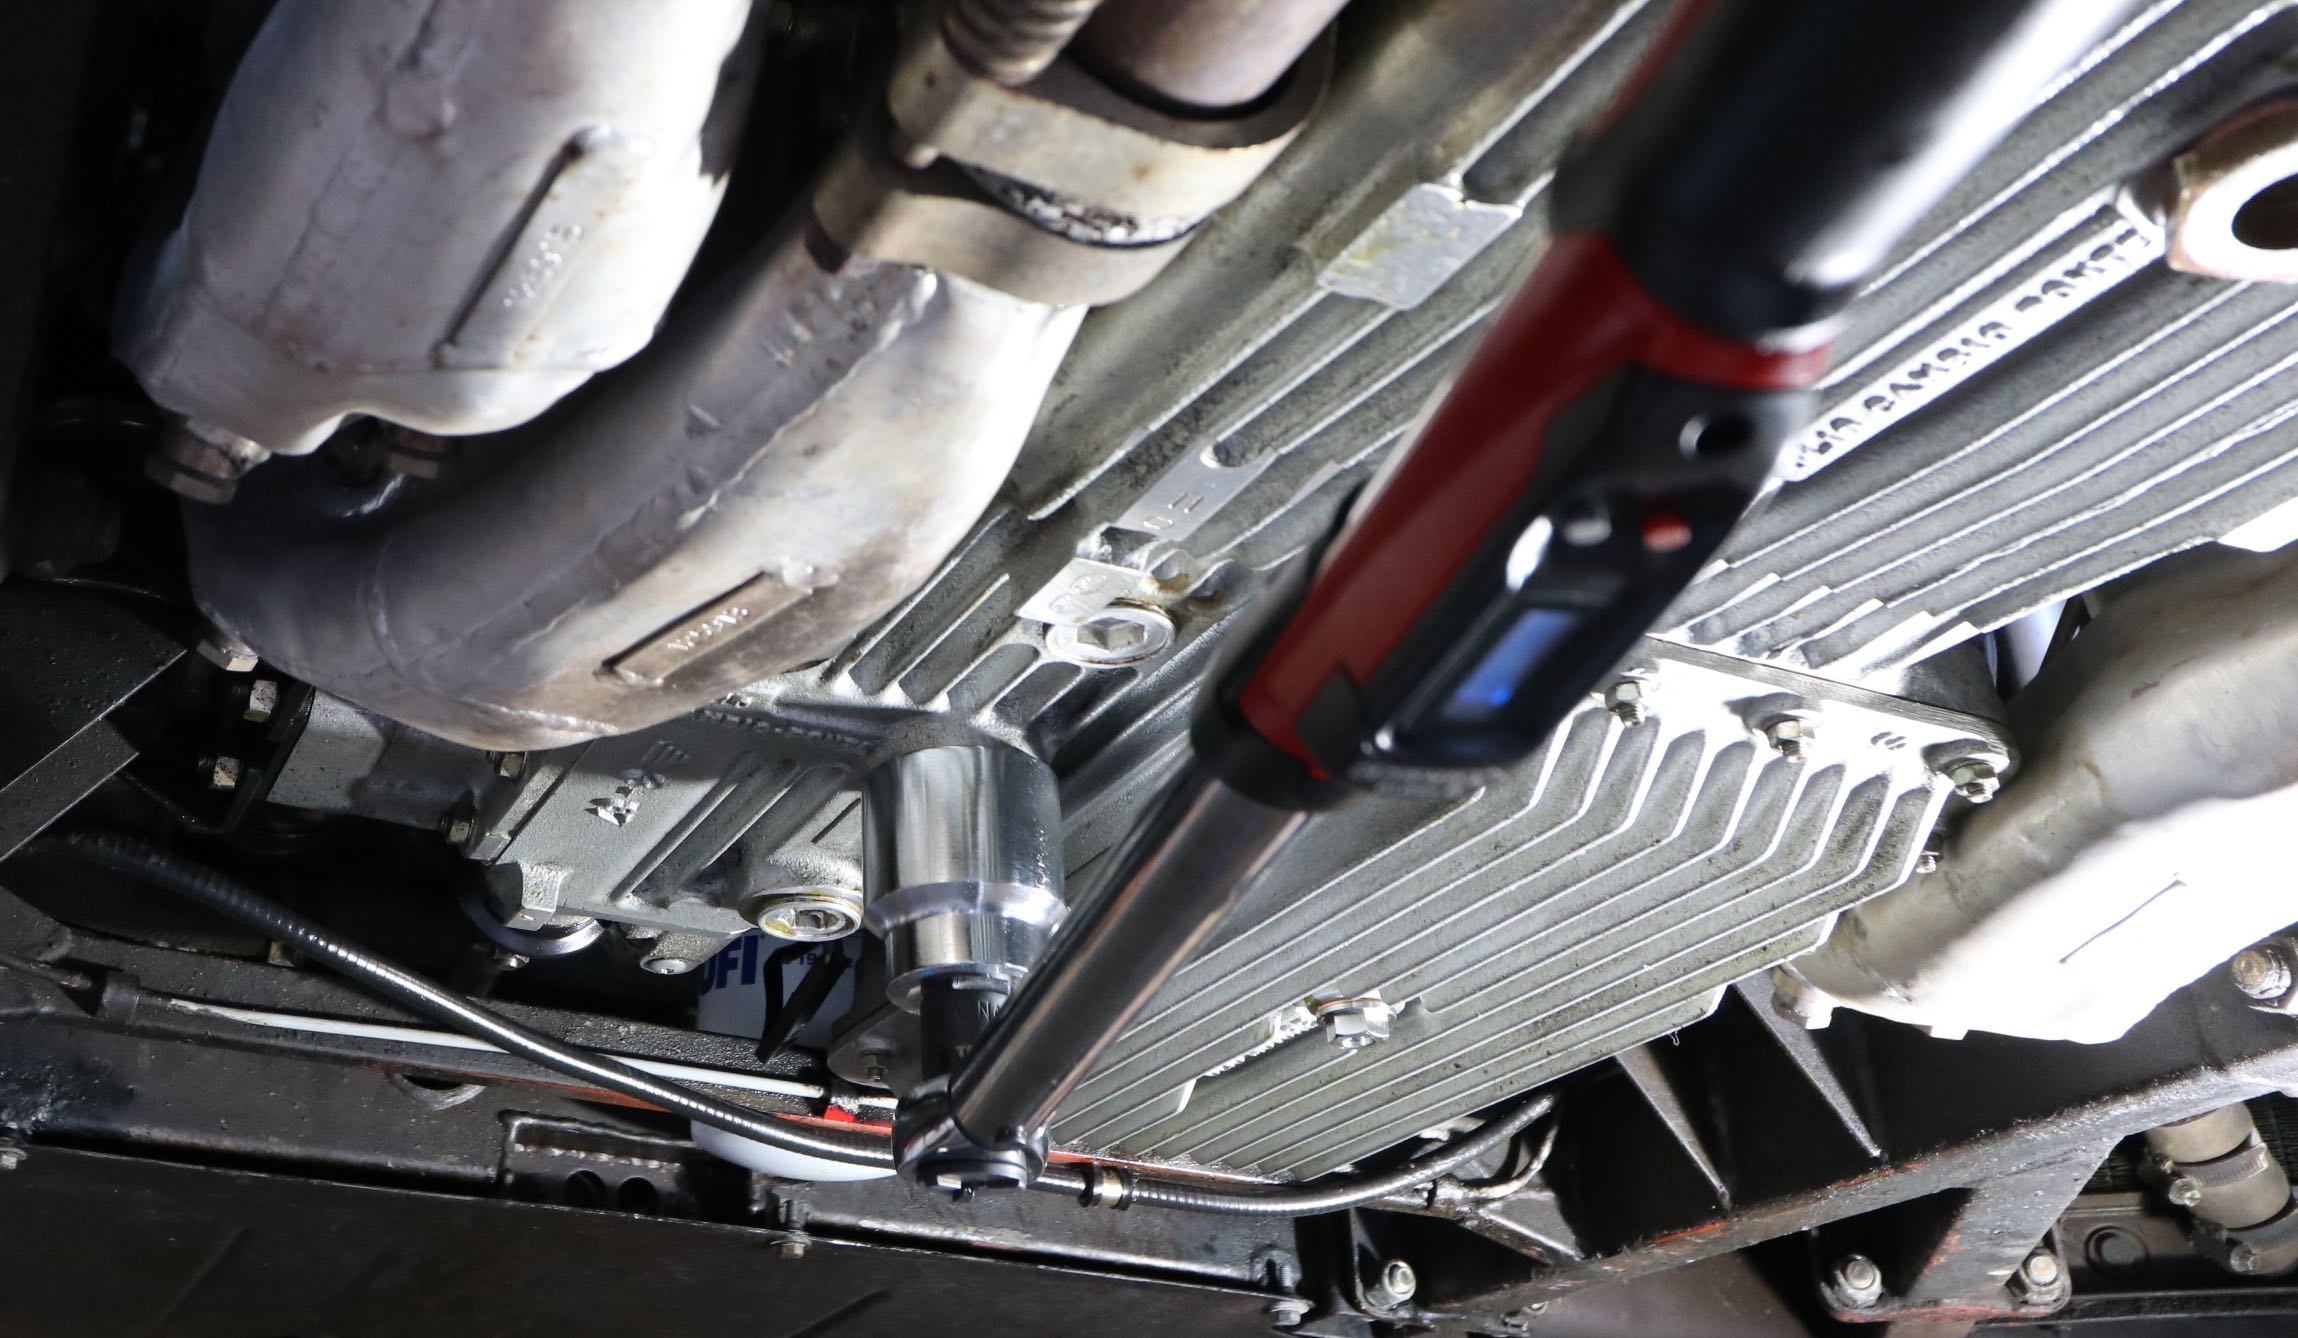
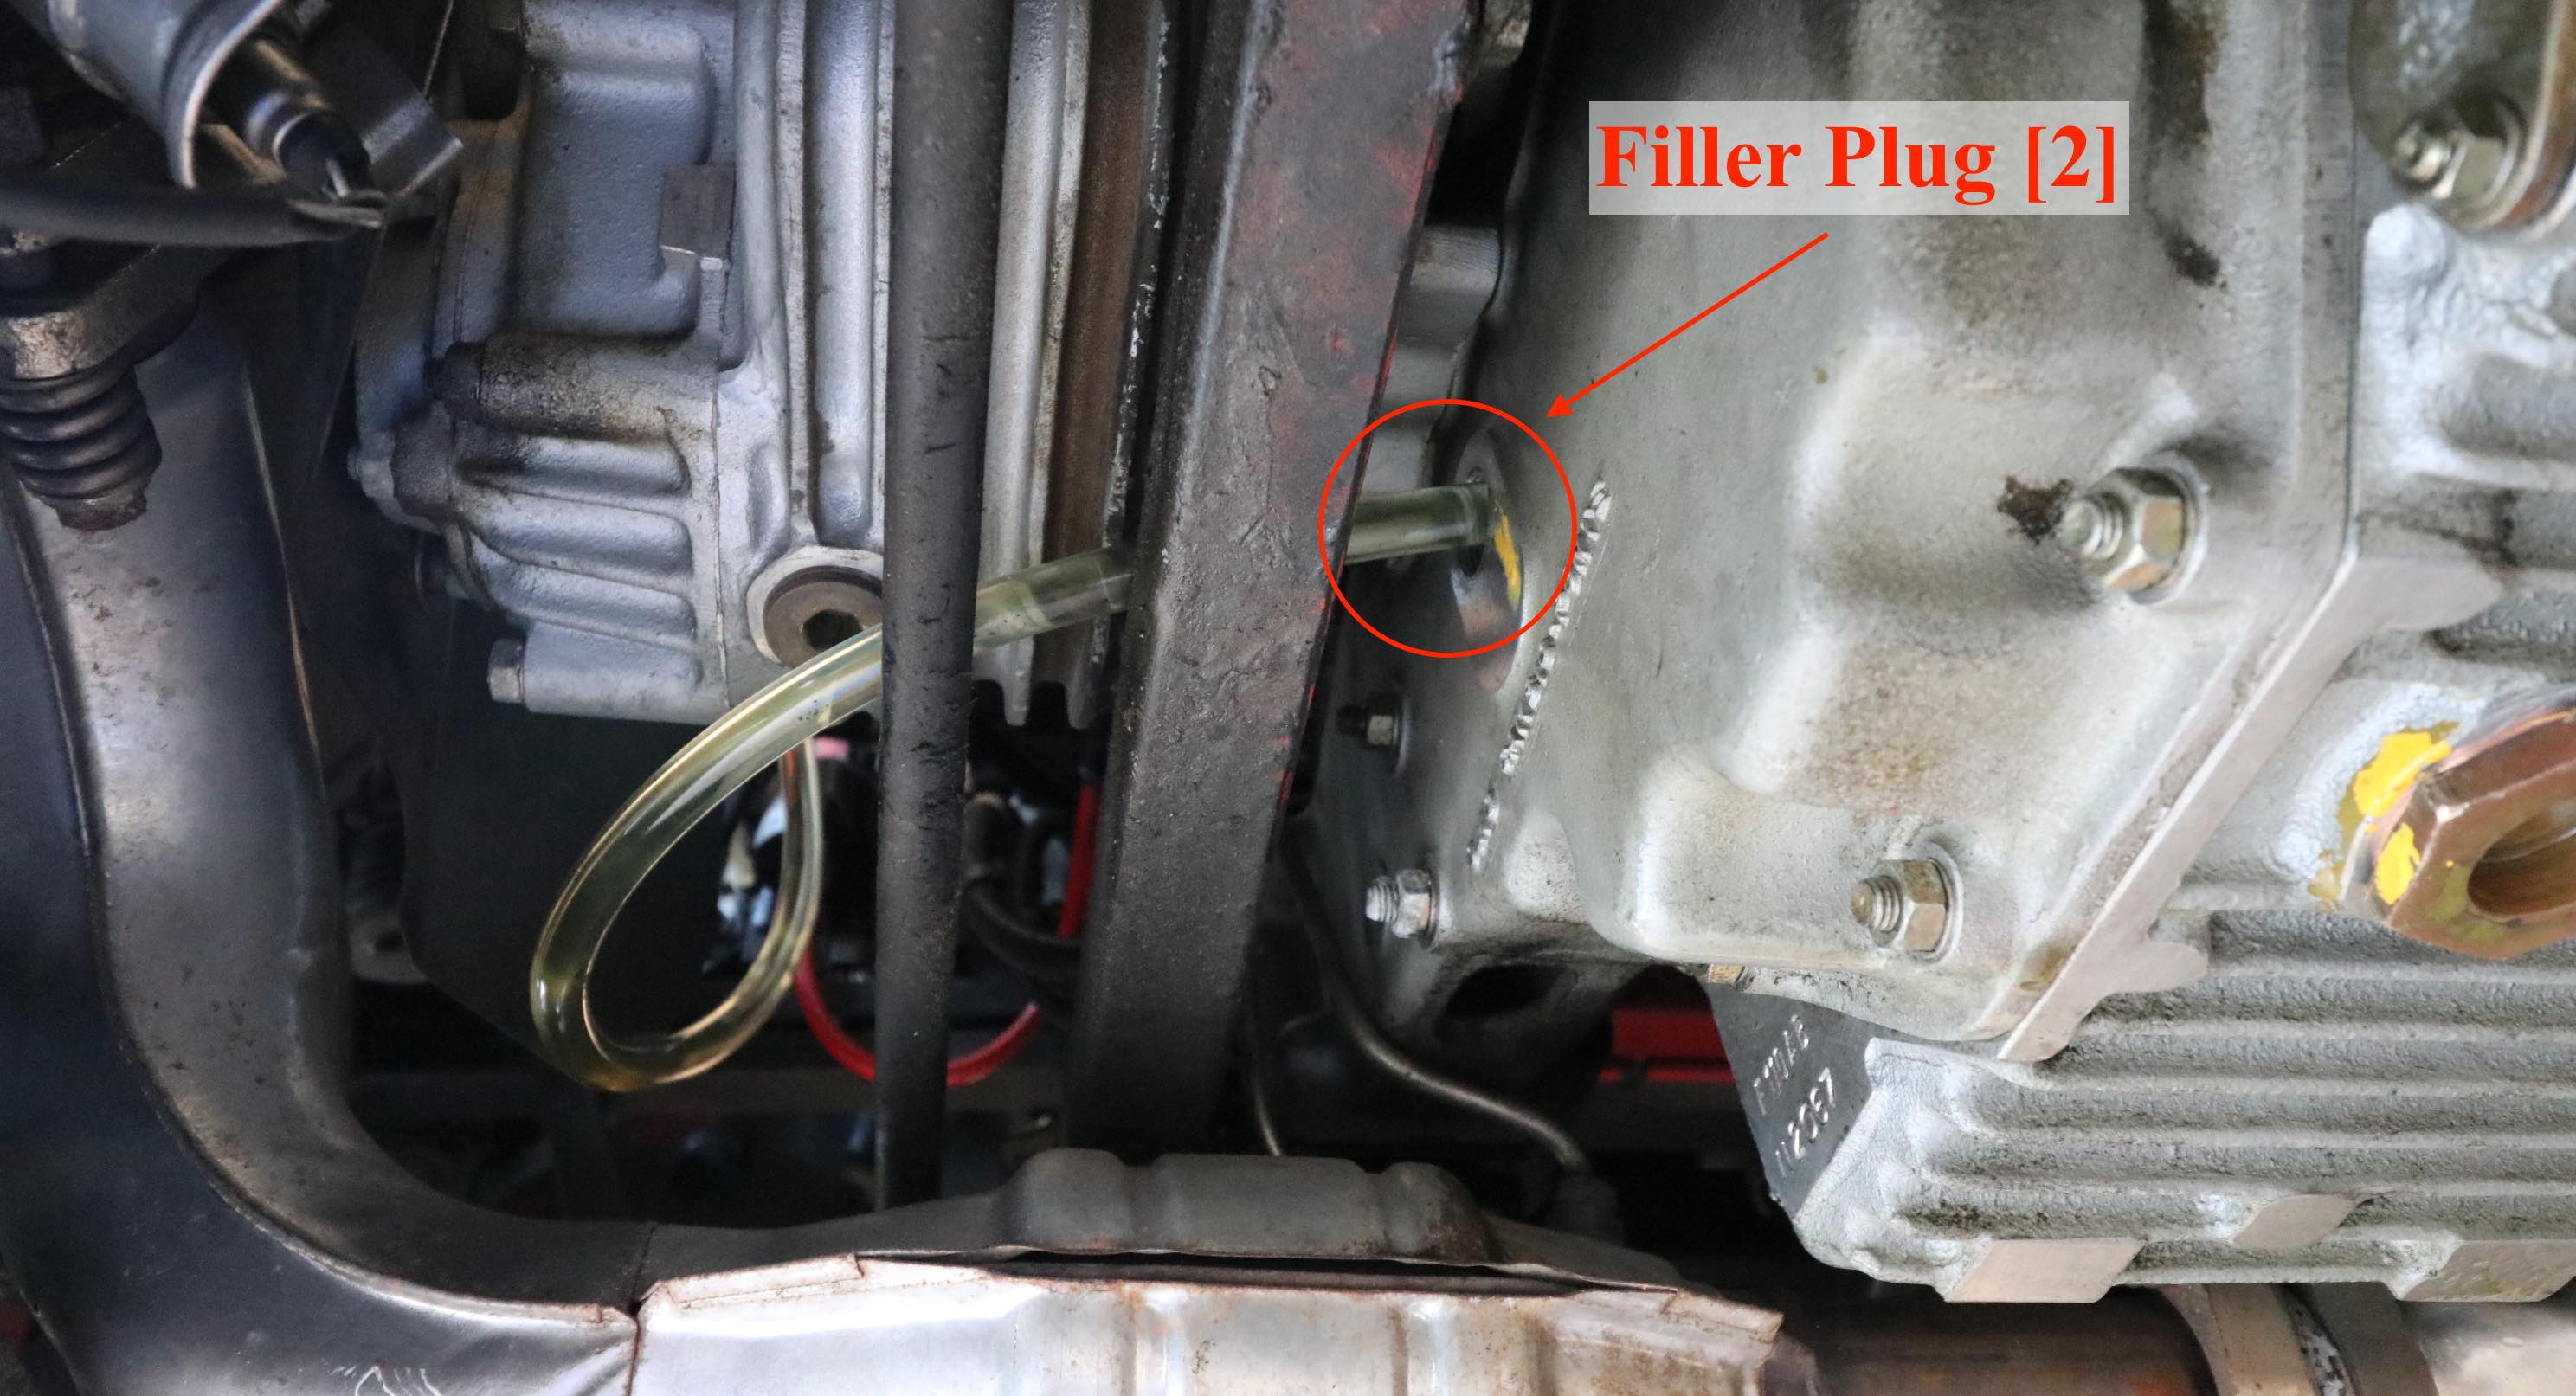
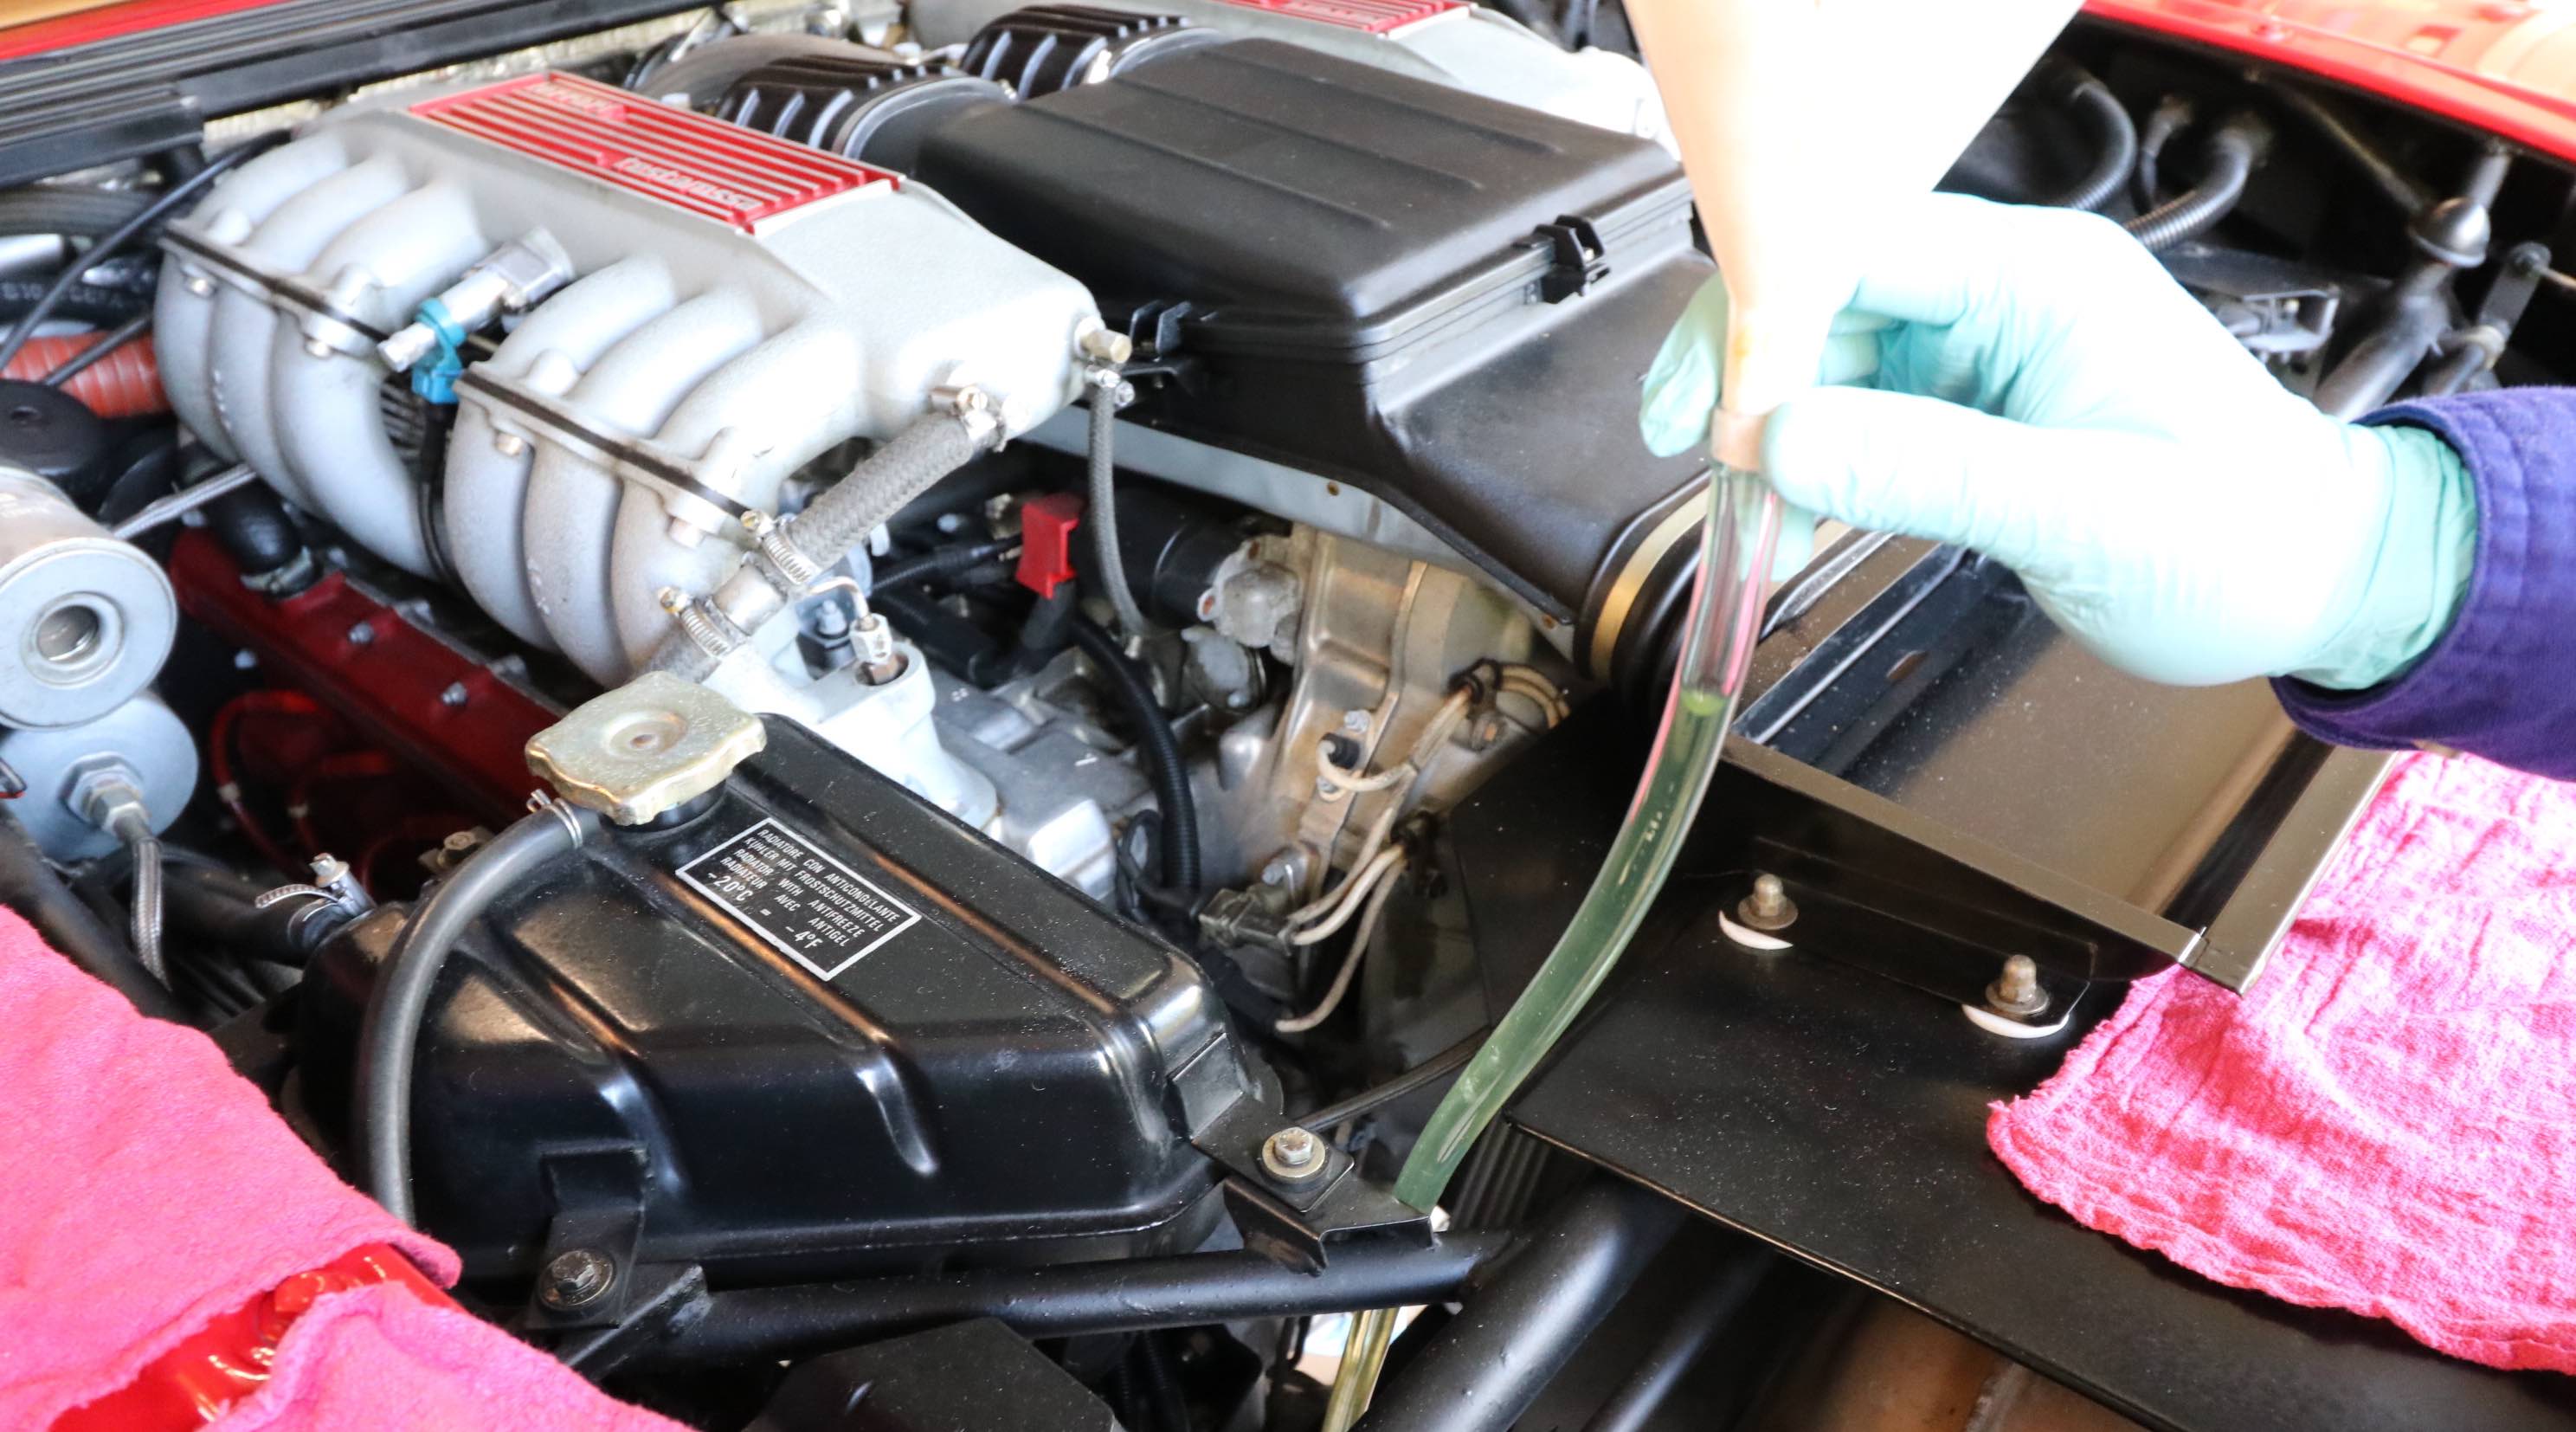
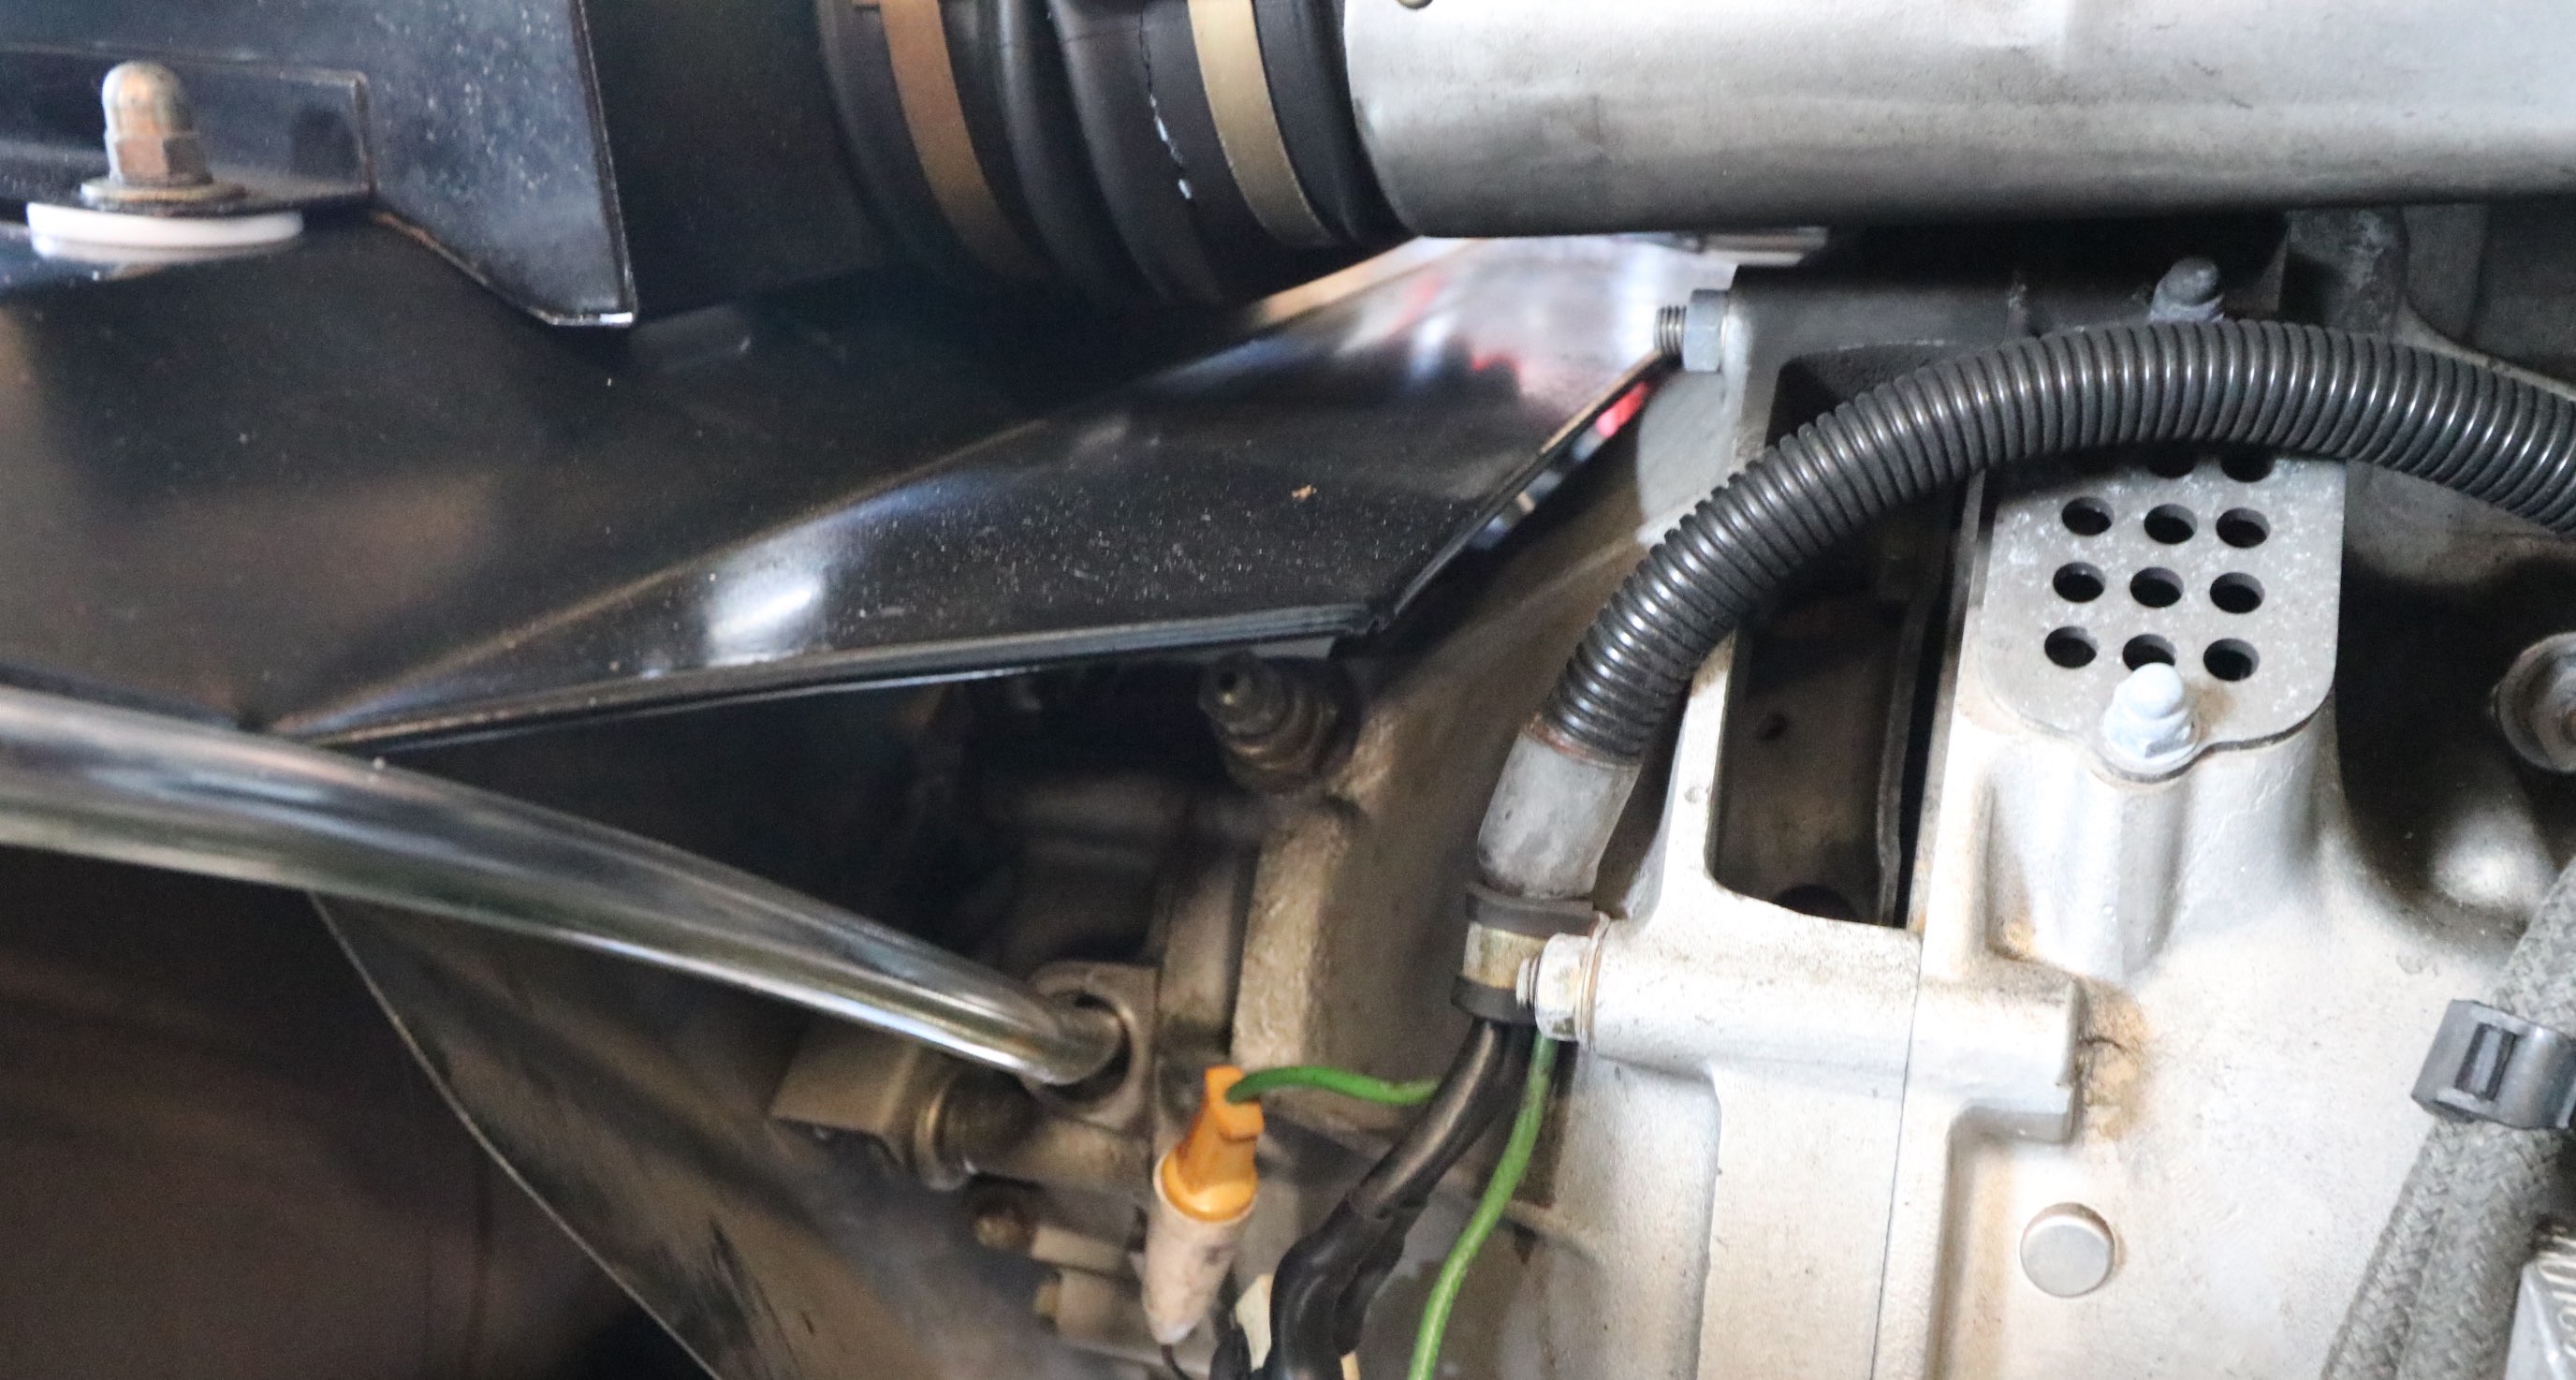
This guide goes through the steps we used to perform a gearbox oil change on a 1987 Ferrari Testarossa. It is definitely helpful to have the car lifted enough such that you can get under the middle of the car to reach the drain plugs on the bottom of the pan. Before draining any oil, we opened the two filler plugs - just in case they were seized or if some other issue occurred we wouldn't be stuck with an immobile car. If you have never changed differential oil before, beware that it does contain sulfur which smells quite bad. Having roughly 9L of oil definitely smells bad - it is normal. Before starting, it should be noted that you will need to either have a special 12 mm hex key or modify a 12 mm hex key to be able to fit in the tight space to undue the filler plug. The details of how we modified the 12 mm hex key is shown in step one.


Parts Used

Part Quantity Part No. Links to ones we used
Drain Plug Crush Washers 2 Ferrai #10265160 Ricambi
Small Drain Plug Crush Washer1 1 Ferrari #10261860 (old #10263460) Ricambi
Limited Slip Additive2 1-4 oz Amazon
Oil3 ~9.5L Mobil-1 75w-90 OR Royal Purple-1 75w-90

1 This is a copper crush washer. We use these automotive self-centered bonded seal/gasket washers that work like copper crush washers, but do not require to be tightened as much.

2 We added some limited slip additive to insure there is no undue stress or extra friction put on the differential given the known issues on the Testarossa. Our experience is that this has worked well, with smooth shifting and excellent corner feel (no skipping, jitters, etc.). The differential on the Testarossa is a highly debated topic with many opinions...

3 We use and have good results with Mobil-1 75w-90.
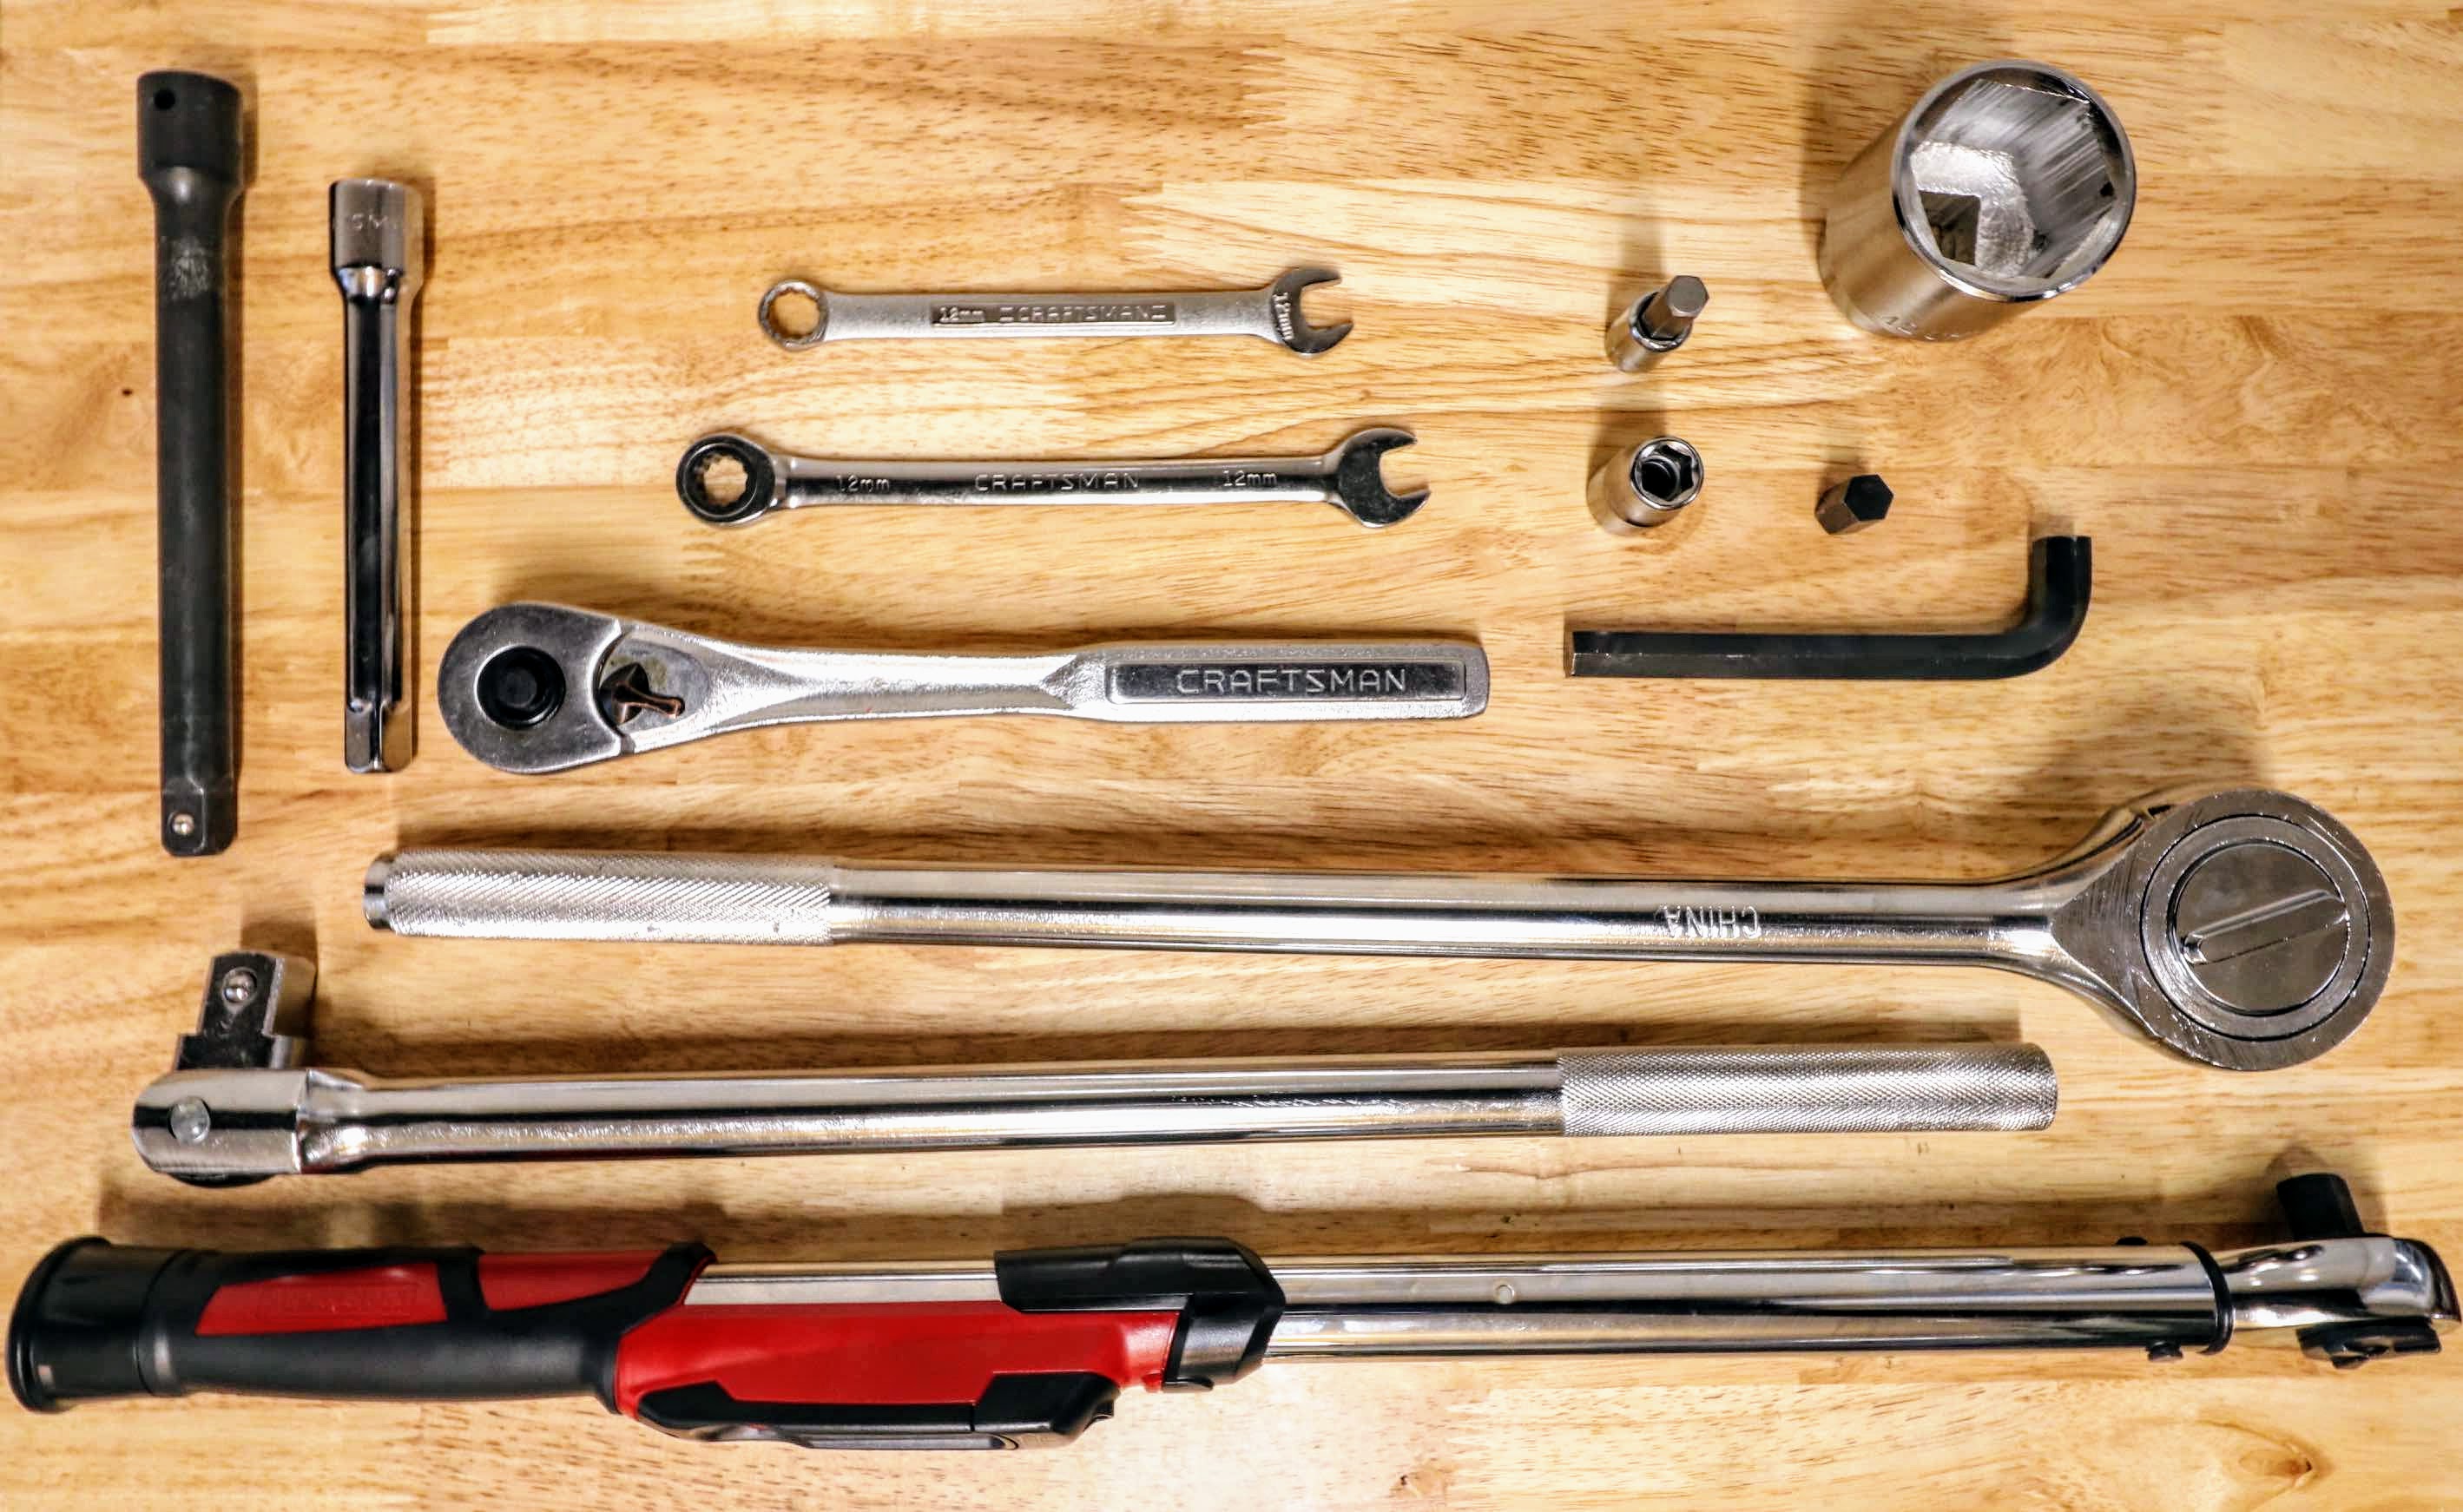


Tools Used

Tool Link
Quick Jack BL-5000XL portable lift Amazon
Jack Stands Amazon
Large Oil Pan Amazon
Funnel Amazon
Funnel Hose Amazon
12 mm Hex Key (Modified) 5 Sears
10 mm Hex Key Socket, 3/8" Drive Amazon
41 mm 6-Point Socket, 3/4" Drive Amazon
12 mm 6-Point Socket, 1/2" Drive4 Amazon
1/2" Drive Extension Amazon
1/2" Drive Ratchet Amazon
1/2" Drive Torque Wrench Amazon
1/2" Female to 3/4" Male Drive Adapter Amazon
3/4" Drive Breaker Bar Amazon
3/4" Drive Ratchet Amazon


4 We purchased the 299 piece socket set from Craftsman a while ago. We became tired of purchasing smaller sets and always missing the socket sizes in between - they get you in an endless loop of buying small sets!

5 This hex key was cut/modified, as described in step one below.


Procedure Used


1. To remove the filler plug on the oil sump, a 12 mm hex key had to be modified to be small enough to remove the plug without hitting the subframe. This is well documented on FerrariChat.com. 18 mm was cut off the short end of the hex key, as illustrated in the image to the right. To do this, we used a Dremel tool with a cutting wheel and then ground/sanded any imperfections to make the surfaces flat. Modified 12 mm hex key for Testarossa gearbox oil change
2. Next, we warmed the car to operating temperature. We like to take the car for a short (~15 min) drive to get the oil circulating and evenly heated.
3. With the engine warm, we lifted the car off the ground - enough for us to get under the middle of the car. We used a QuickJack along with a few jack stands to be on the safe side while under the car.
4. Before removing any oil, we opened/removed the filler plug near the top right side of the clutch bell housing with a 12 mm hex key. A extension was needed to be able to reach the plug without hitting the engine.
5. Next we found the second filler plug on the oil sump, located at the lower centre rear part of the transmission. Then we opened/removed the filler plug with the modified 12 mm hex key from step one. This modified 12 mm hex key made it possible to clear the subframe. To get enough torque to loosen the filler plug, we attached a 12 mm socket and extension to the end of the hex key.
6. With a large oil pan immediately under the plugs to catch the fluid, we removed both drain plugs [3] using a 41 mm socket. We opted to empty the large oil pan between opening each plug to prevent the fluid from overflowing. We drained roughly 9L of fluid.
7. After most of the oil had drained, we removed the drain plug [1] located on the bottom of the clutch bell housing with a 10 mm hex key socket. Again, we had a large oil pan pan ready to catch the fluid.
8. With all of the oil drained, we then installed each of the drain plugs with new crush washers to form a tight seal. After hand tightening drain plugs, we used a 1/2" drive torque wrench to tighten each of the plugs accordingly. We were mindful not to over tighten the drain plugs to prevent stripping the threads. Since the owner's and workshop manual do not specify the amount to torque each plug, we made sure not to tighten the two 41 mm drain plugs [3] more than 45 lbs ∙ ft.
9. To be able to add the transmission oil, we attached a ~1m long hose to the end of a funnel, while putting the other end of the hose into the filler [2] on the oil sump (the plug removed in Step 5.).
10. New transmission oil was added until the oil was level with the bottom part of the filler [2] (or oil was just coming out of the hole). For us, this ended up being roughly 9L of oil. It was extremely helpful to put the bottles of new transmission oil in a warm place beforehand to help the oil flow faster when filling.
11. Filler [2] was closed and tightened using the modified 12 mm hex key created in Step 1.
12. The workshop manual states to add an additional 100g of oil through the filler plug located on the clutch bell cover [4]. For the oil we used, this was roughly 400mL of oil. Again, we used the funnel with the attached hose to make it easier to access the filler.
13. After all of the oil was added, we tightened the filler plug with a 12 mm hex key.
14. Finally, while still on the lift, we ran the car to get it up to operating temperature while periodically checking all of the filler and drain plugs for any leaks. We also tested that all of the gears shifted smoothly before moving. We continue to pay attention to how the gears shift, the handling feel of the rear end in corners and any of the plugs for leaks.

References


  1. Ferrari S.p.A. Spare Parts Catalogue - Testarossa. Ferrari S.p.A., 1990.
  2. Ferrari S.p.A. Owner's Manual - Testarossa U.S. Version 1987 Models. Ferrari S.p.A., 1987.
  3. Ferrari S.p.A. Owner's Manual - Testarossa U.S. Version 1985/85 Models. Ferrari S.p.A., 1985.
  4. Ferrari S.p.A. Workshop Manual - Testarossa. Ferrari S.p.A., 1984.